Warning
You are reading the documentation for an older Pickit release (1.10). Documentation for the latest release (3.3) can be found here.
How to use Pickit Teach
This article describes how to get started with the Pickit Teach engine. Pickit Teach is a detection engine in Pickit which can search for objects based on a previously shown example object. It is primarily used to find irregularly shaped objects that don’t fit in one of the basic shape categories, like cylinders, spheres, squares, rectangles, circles, and ellipses.
Teach a model based on your product
Teaching a model of an object is the most important step when setting up the Pickit Teach engine to detect your object. The model is the only thing that is used by Pickit Teach to search for your objects in a scene, so a better quality model results in better detections. A high-quality model has the following characteristics:
It contains as many details of the object as possible,
It contains only points that belong to the object itself and
It exactly matches the side of the object that you want to detect.
Continue reading to learn how to build a high-quality model.
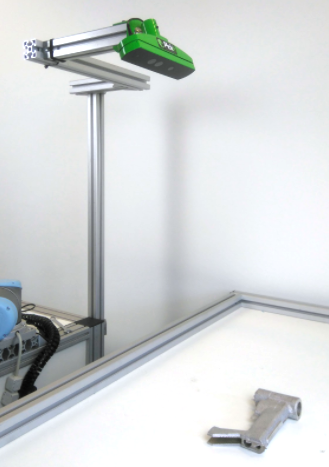
Placing the object under the camera
Place your object under the camera and try to put it as close as possible to the camera to capture the most details while making sure that the object is lying fully in the field of view of the camera. It’s useful to keep the 2D view open so you see what the camera sees.
Isolating the object
Before creating a model of the object, we need to isolate the part from its surroundings to make sure that only points belonging to the object are captured in the model. This is done by using the Region of Interest.
Go to the Region of Interest tab and modify the region of interest box boundaries until only points that belong to your objects are inside the ROI box. When you’re done adapting the boundaries, you’re ready to go to the next step.
Adding a model
In this step, the actual model will be taught and saved. Go to the Detection tab and select the Pickit Teach engine. Open the ‘Define your model(s)’ section. Here you will see a widget that allows adding models.
To add a new model, click the Add a model. Before clicking this button, make sure that the previous steps are completed so that a correct side of the object is oriented to the camera. When a new model is successfully defined, the viewer will open the Model tab automatically and a Model row will be added to the models’ widget.
The Model tab shows a 3D visual representation of your model, a model bounding box as a green dashed line and the Pick frame. Note the number in round brackets in the Model view tab name, this is the model ID.
Previous steps can be repeated to Teach different models to Pickit Teach. In one product file up to 8 different models can be taught. This means that Pickit Teach is capable of looking for 8 different shapes in one detection. See Using the model ID in a robot program on how you can use the model id in a robot program.
Detecting object(s)
Now that you’ve added your models, it’s time to detect objects.
Place your objects inside the region of interest box and press the Detect button. On a successful detection, you will see in the 2D view that a frame appears on the detected objects and yellow lines indicate the bounding box. (For the yellow lines enable the “Show model box” in the Viewer options.)
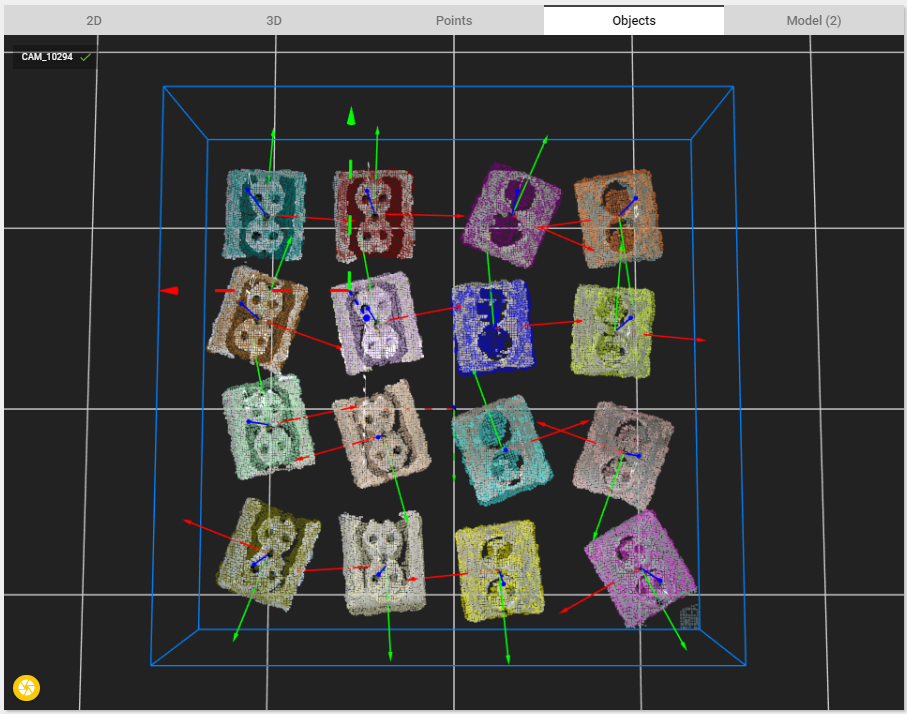
In the Objects view, the point cloud models are visualized as a colored cloud on top of the detected objects. When a detection failed because for example a threshold parameter was exceeded, the model cloud will be colored in red.
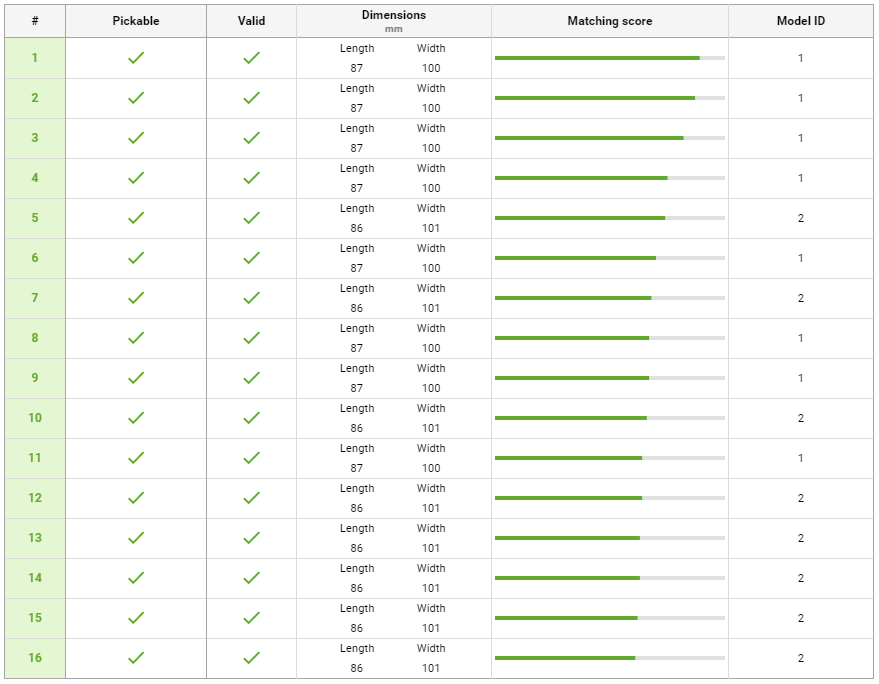
In the Objects table, you can see the detected object dimensions, matching score and the Model ID that was found. Take a look at this article to learn how to interpret the Detection grid.
If you want to optimize your detections, the article Explaining the Teach detection parameters goes more in depth on the different parameters of Pickit Teach. We advice you to experiment with different settings and multiple objects in different settings(tilted, on top of each other,..)
Note
There is a hard limit on the Teach matching time of 5 seconds. Before applying any optimization, this limit could be reached.