Warning
You are reading the documentation for an older Pickit release (2.0). Documentation for the latest release (3.3) can be found here.
Build a showcase demo with a M-HD-Camera and 2 finger gripper
This article will guide you in setting up a simple showcase demo with Pick-it and a UR that you can show at trade fairs. For this demo a Pick-it M-HD camera is used to detect cylindrical red parts in a bin. The parts are picked from the bin with a UR5 robot and a 2 finger gripper. A video of the end result can be seen below.
Requirements
The list below shows the different hardware that has been used to set up this demo.
Pick-it system with M-HD camera
UR5 robot
Stand to mount the robot and the camera on
On robot gripper RG2
Bin 400 x 300 x 120 mm
Cylindrical red parts(contact Pick-it if you want to show this demo at a fair with these parts)
Similar hardware can be used to set up a similar demo.
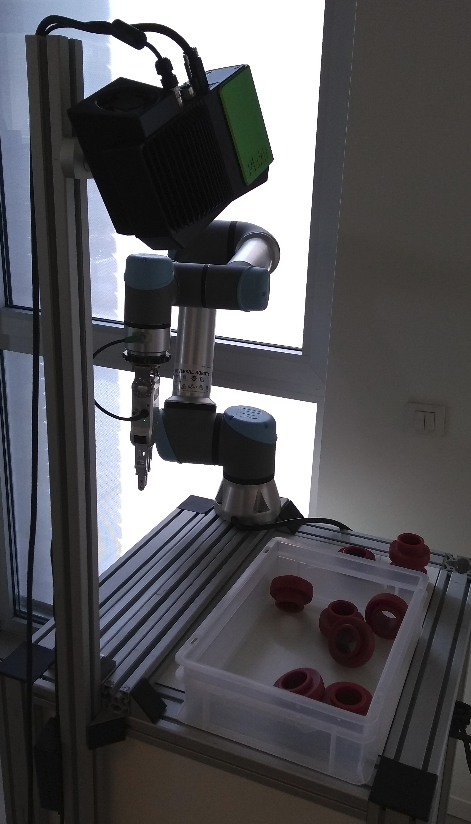
Mounting instructions
The robot and camera are mounted on a stand. The camera is mounted at a height of 700mm above the work surface.
The 2 finger gripper is mounted on the flange of the robot.
The bin is placed at a distance of 500mm(center of robot base to center of bin)and is placed 40mm lower than the robot base.
Setting up the Pickit files
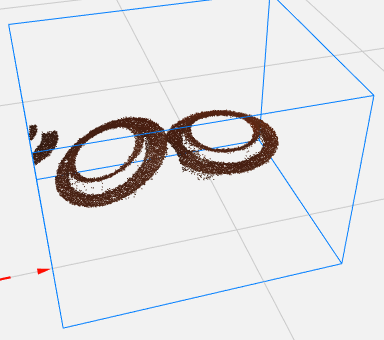
Here you can download a snapshot of the demo. In the snapshot you can see that the parts are detected by using the Teach detection engine with a 2 different models. A model from the top side and a model from the bottom side.
Setup file
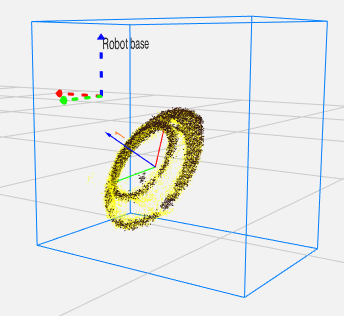
For this demo the ROI box is set to similar dimensions as the real bin, the set ROI is slightly smaller and slightly higher. This will be important because the dimensions of the ROI box will be used for collision prevention. Last, the ROI box is attached to the Robot base frame. No other settings are used for this demo.
Need help to set these settings? See this article for more information: Region of Interest.
Product file
The product file that has been used can be copied from the snapshot mentioned above. Download the snapshot, upload it to your Pick-it system, open the snapshot on your Pick-it system and press Save these settings.
The models that are being used is the shape from the top and from the bottom. The difference lies within the height of both models. The pick frame of each model is put in the center. The matching score and tolerance is set to 85% and 1.8mm. No downsampling is applied and the detection speed is set to Fast.
Need help to set these settings? See this article for more information: Teach.
In the Picking tab no alignments are enforced. For this demo collision prevention is applied. It is checked that the calculated pick frames are not steeper than 30 degrees. Also possible collision with bin and other objects are checked. For this check it is important that a good model of the tool is defined. See below for the used model for the two finger gripper in the video.
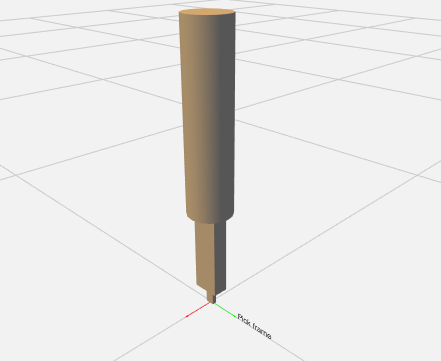
Warning
Possible collision with the support of the camera is not checked.
Need help to set these settings? See this article for more information: Picking.
Setting up the robot program
Here you can download the UR robot program. The idea of the program is to pick one part. Depending on which side is picked(top/bottom) it is shown in a different way. After showing the part is dropped back into the bin. The drop off position alternates between two predefined waypoints.
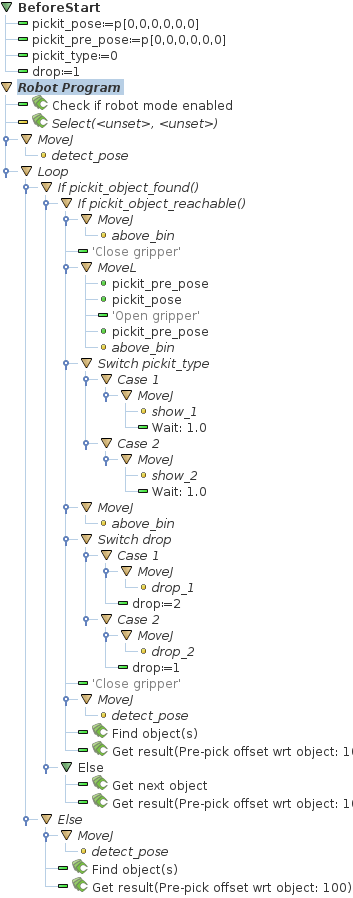
Following still needs to be defined in this robot program:
Pick-it select command, the correct setup and product file need to be filled in.
The detect_pose is a waypoint defined outside the field of view of the camera, this is also the starting position of the
Above_bin is a fixed waypoint on the center top of the bin. This intermediate waypoint is used to get in to and to get out of the bin.
Before the robot will move in the bin the gripper is closed. Once the robot is in the pick pose the gripper is opened again to grab the parts.
Depending on which side is picked it is decided how the part is shown. For this 2 different waypoints need to be defined. One position is upside down to show a clear difference on how the part has been picked.
After the showing of the part it is dropped back into the bin. Here the program alternates between 2 different drop off poses. One drop off position is defined on each side of the bin. After reaching the drop off position the gripper is closed to drop the part.
Interaction with the running demo
This demo is robust and will keep on working continuously. After a while it could be that the robot is unable to pick parts from the bin. This is due to the random positions the parts can have. For this reason it is advised to have some interaction with the demo.
Interaction with the scene is possible when the robot just picked a part and is showing it off. After a detection is triggered(flashing light) the scene can’t be changed anymore.
Parts can be placed under angles quite easily if you let them lean on each other. This will result in nice robot movements to pick these parts.
If parts are positioned on their side Pick-it can still find them. But they are not send back to the robot because the calculated pick frame is to steep. If all parts would be dropped like this the robot will not be able to pick any part. That is why it is advised to have some interaction with the demo while it is running.