Warning
You are reading the documentation for an older Pickit release (1.10). Documentation for the latest release (4.0) can be found here.
Build a showcase demo with Flex
This article will guide you in setting up a simple robot picking demo with Pickit Flex. The Flex vision engine is the vision engine for finding objects with simple geometrical shapes in random orientations. In this demo we are picking simple steel cylinders. Click here to see the video of this demo.
Requirements
The hardware requirements to set up this demo are:
A Pickit vision system
A robot and gripper, UR5 + double-lined magnetic gripper
An additional computer or laptop
Steel cylinders of 105 x 42 mm (diameters greater than 30 mm are advised)
A sturdy bin, dimensions 400 x 600 x 150 mm
First we create the hardware setup. This includes mounting the camera and connecting all components.
It is assumed that the Pickit system is mounted around 700 mm above the table and is running correctly. If you are not sure, please follow step 1-4 from our Quick start guide.
Your first detection(configuring the Pickit files)
Now that every component is connected to the Pickit system, we are able to configure Pickit. Open a chrome web browser on your external PC and enter the following IP address to access the Pickit system.
http://192.168.66.1
In the Pickit user interface, go to the configuration tab and create new setup files and a product file:
Setup: flex_demo.
Product: flex_demo.
Configuring the Pickit comes down to three simple steps:
Create a scene where you want to pick the parts
Define the shape of objects that need to be picked
Define a picking strategy
The information of the shape and picking strategy is stored in the product file and the information of the scene is stored in the setup file.
Create the scene
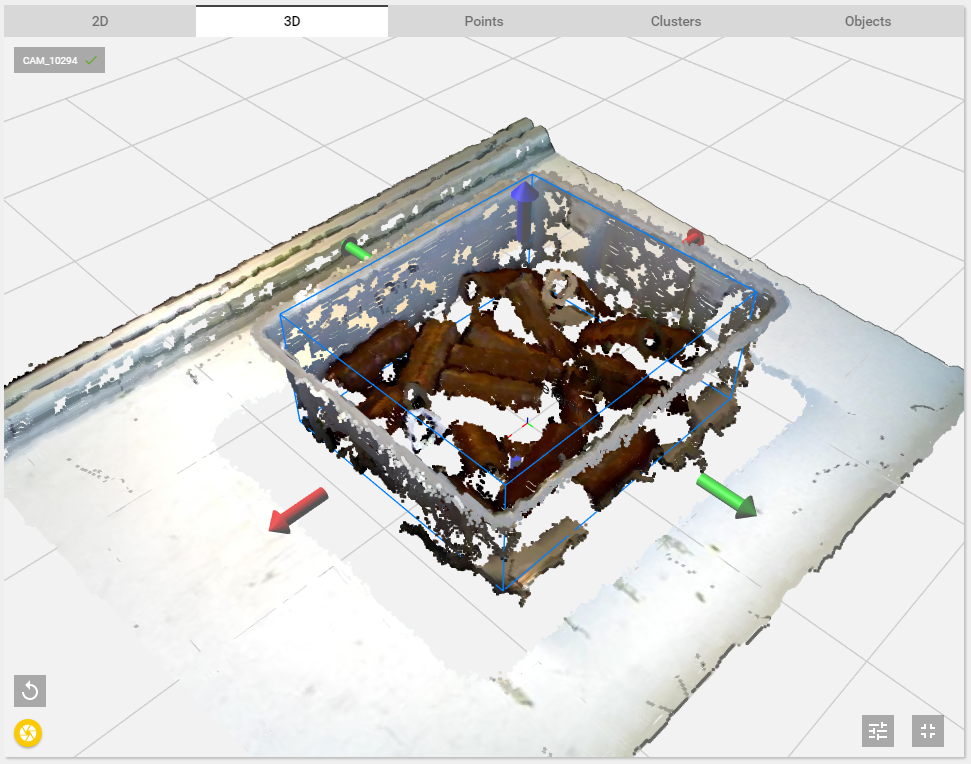
The first step defines where Pickit has to look for objects. This is done by defining the region of interest (ROI). See the article Region of Interest on how to define a ROI.
Below you can see a pictures of a good defined ROI for this application. All useless information is filtered out(the bin and the table) only information of the parts in the bin are kept. Also make sure that the ROI is slightly higher than the real bin.
Don’t forget to save the settings in the corresponding Setup files.
Define the detection parameters
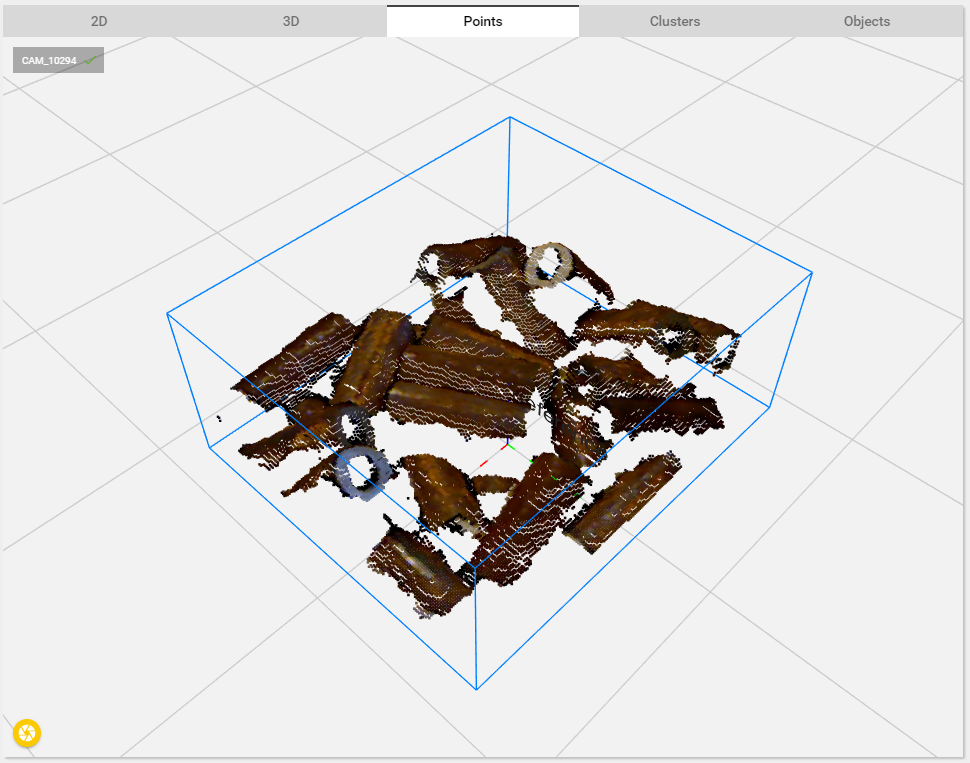
The second step consists in setting up the Pickit Flex detection engine. In this application Pickit will look for cylindrical shapes in the scene.
See below for images of the results of the clustering and the fitting step. Below the images all used detection parameters are given. See following article on how to use Pickit Flex.
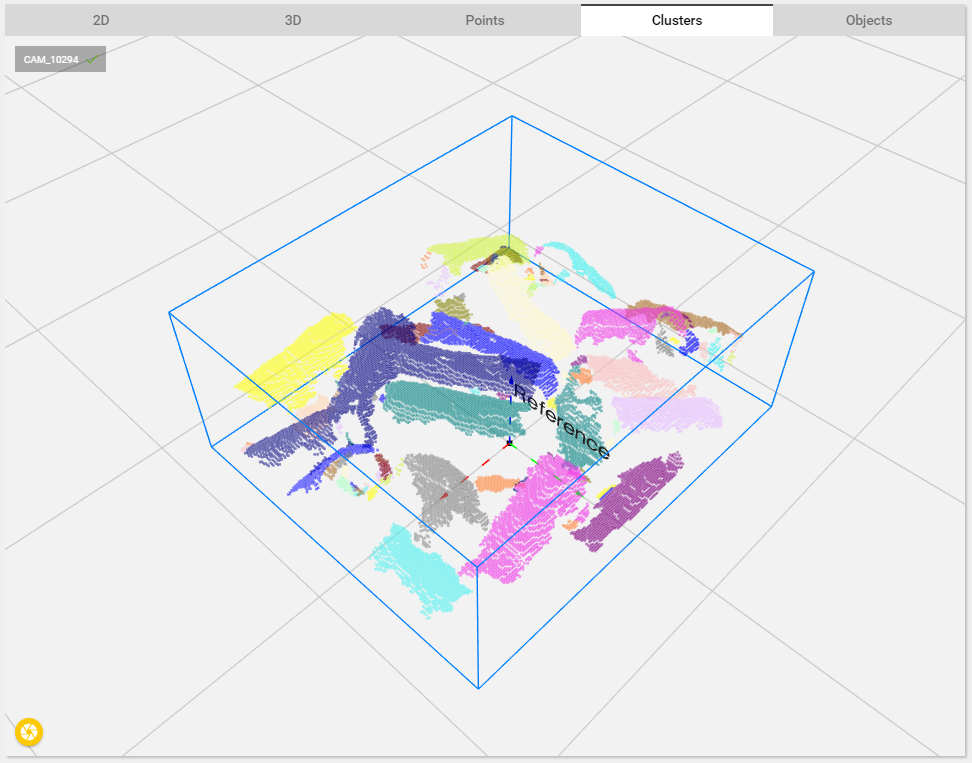

In this demo following parameters are used:
Clustering: Touching - Preset A
No rejecting clusters
Object model: Cylinder
Surface: external only
3D tolerance: 5mm
Filtering: 400 < Points < 500000
Filtering: 100mm < Length < 110mm
Filtering: 38mm < Diameter < 46mm
3D scene score: 90%
Fusion: None
Downsampling: 1
Don’t forget to save the settings. This will update the Product file.
Define the picking strategy
Finally the picking strategy is defined. For this application bin collision is checked. This means that Pickit checks if the gripper can pick the parts without hitting the bin. Also the pick frames are orientated on the top surface of the cylinders. More information about the picking strategies can be found in the Picking article.
For this demo following parameters are used:
Pick strategy: Surface top
Enforce alignment: No alignment
Check collision with: Bin
Ordering Strategy: Highest product center
Don’t forget to save the settings. This will update the Product file.
Calibration
Next step is the robot-camera calibration. This process teaches Pickit where the robot base is located w.r.t. to the camera. This information is used to transform the object pick-frames into robot coordinates. A detailed description in robot-camera calibration can be found in the article How to execute robot camera calibration. Do not forget to save after the calibration is finished.
Your first pick(Program the robot)
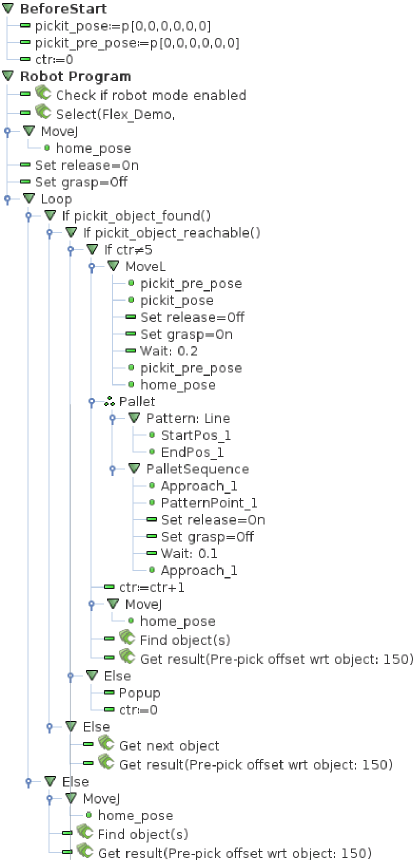
Now Pickit is configured, the only thing left to do is programming the robot. The robot used in the demo video is a UR5, but a similar program can be created on any other robot.
The idea of the program is to pick 5 parts and drop these off side by side. After 5 cylinders are picked the program stops and a pop-up appears. After the parts are taken away the program starts all over again.
The UR robot program: Download link here.
Happy picking!
Following all these previous steps leads to the next Pickit Flex demo application, happy picking!
If you need any help with one of the steps above, please contact support@pickit3d.com.