Warning
You are reading the documentation for an older Pickit release (2.2). Documentation for the latest release (4.1) can be found here.
Pick and place template
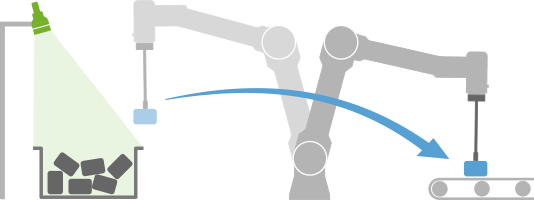
The Pickit pick and place template is a program node for executing vision-guided pick and place tasks with minimal programming effort. It provides an easy and intuitive interface for specifying relevant application knowledge, and abstracts away the complexity required to robustly execute the task.
This article presents the pick and place template in detail. Refer to the companion articles for an example pick and place program and the interface documentation (exposed variables and additional commands).
Note
The Pickit Pick and place template is only available for URCap 2.0 or later and Pickit 2.2 or later. Installation instructions can be found here.
The Pickit Pick and place template supercedes the low-level interface from URCap version 1 as the preferred way to set up a pick and place application, although both ways of working are supported.
Inserting the template
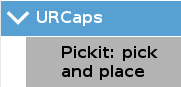
The pick and place template can be inserted in a robot program by selecting Program in the header bar, then URCaps → Pickit: pick and place on the left panel.
On insertion, you need to answer two basic questions about your application on the right panel and click Done for the template to initialize.
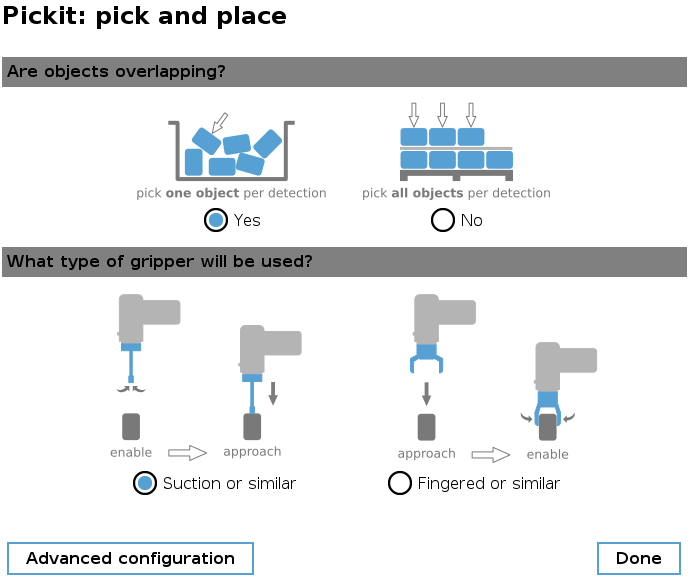
Power users can fine-tune pick and place behavior to a much finer degree than what the basic questions allow by entering the Advanced configuration. For instance, pick and place will by default continue until no more pickable objects are found, but it’s also possible to stop after a user-specified number of successful picks.
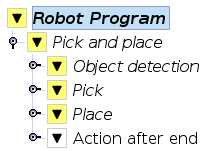
The pick and place template consists of a top-level node, three main sequences responsible for object detection, pick and place actions, and optional actions that can be selectively enabled according to the needs of the application.
Note
Lines marked in yellow by Polyscope indicate that they (or their nested commands) have uninitialized input parameters that must be set before running the program.
The template explained
The following statechart depicts the execution logic for the default pick and place configuration and a fixed camera mount. Optional actions are shown in dashed lines, and the places where Pickit is busy performing object detection are shown in green. Note that in the lower-right, object detection runs in parallel to the place sequence, which saves cycle time. If this parallel execution is not desired, it can be disabled in the advanced configuration.
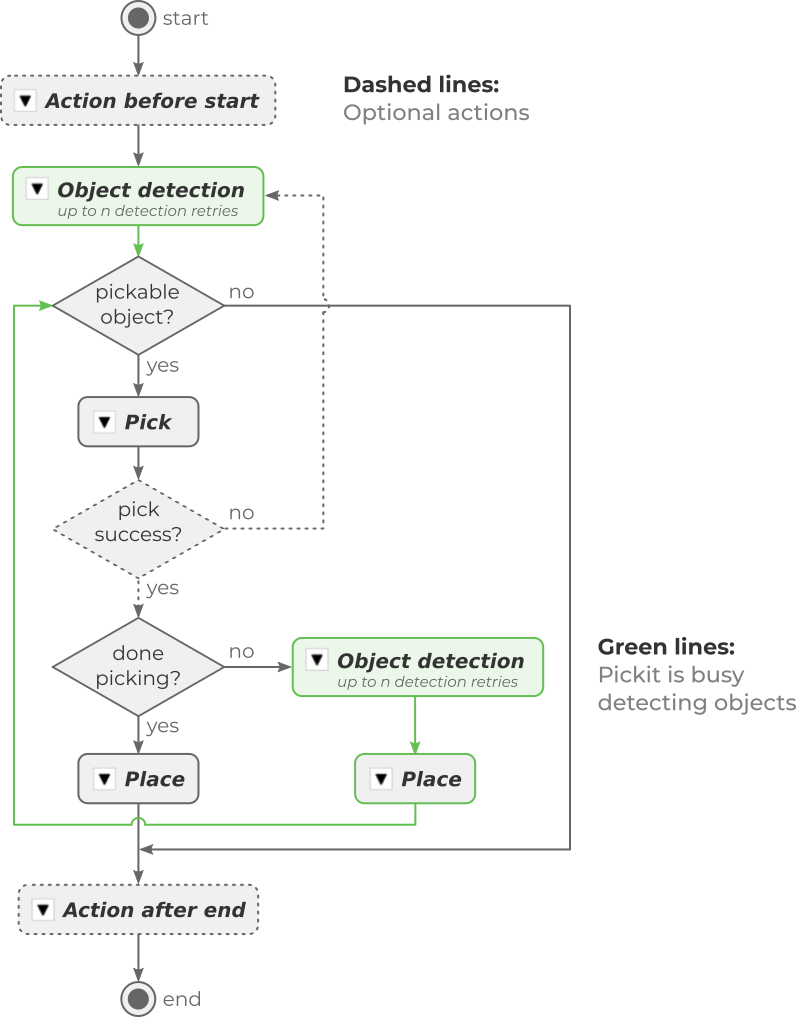
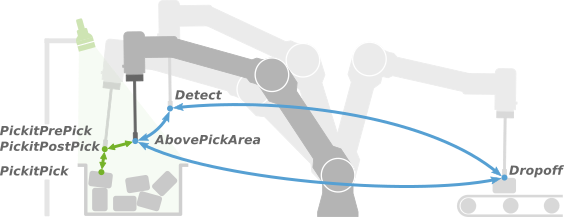
The motions involved in pick and place involve a number of waypoints, some of which are computed by Pickit (prefixed with Pickit and shown in green below), and three (in blue) which are user-defined:
DetectWhere to perform object detection from. Refer to this article for guidelines on how to make a good choice.DropoffWhere to place objects.AbovePickAreaA point roughly above the pick area from which the above two can be reached without collision. In simple scenarios, it can be the same asDetect.
Pick and place
The top-level node is meant for monitoring Pickit by showing a live camera stream overlaid with the ROI and detected objects (the same as the web interface 2D view). It also allows to access and modify the general pick and place Configuration (basic and advanced) which was set when inserting the template.
Inputs and configuration that are specific to the object detection, pick or place actions are specified in the corresponding action.
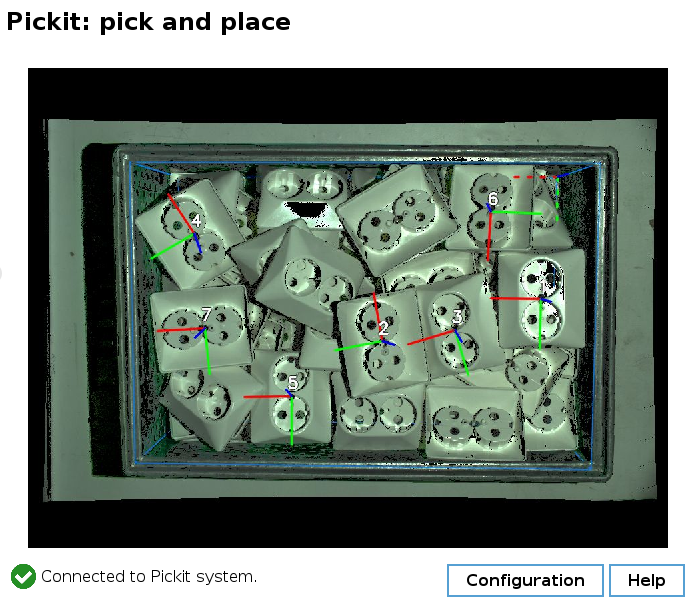
Note that below the camera stream the connectivity to the Pickit system is displayed. The following are two examples of the Pickit system being connected and not:

Object detection
This sequence triggers a Pickit object detection.
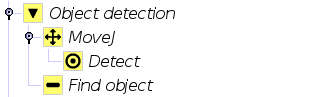
Required inputs
Detectuser-defined waypoint.Tip
Some applications using a robot-mounted camera benefit from having extra logic that modifies the
Detectpoint as the program executes. Examples:De-palletizing, where the camera viewpoint lowers after emptying each layer.
Multiple viewpoints to cover bins wider than the camera field of view.
Find objectnode: Set the Pickit configuration (setup and product) that should be used for object detection.

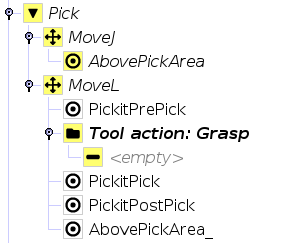
Pick
This sequence performs the actual picking motion, which consists of a linear approach to the pick point, a grasping action, and a linear retreat away from it.
Tip
If your robot tool have the means to check pick success, consider incorporating this optional check to save cycle time.
Required inputs
AbovePickAreauser-defined waypoint.Tool action: Graspfolder: Populate with user-defined grasp logic.Note
Its location in the Pick sequence depends on the gripper type set in the pick and place configuration. It can be located before (suction or similar) or after (fingered or similar)
PickitPick.
Optional inputs
Picknode: Select a strategy for computingPickitPrePickandPickitPostPick, used in the approach and retreat motions, respectively.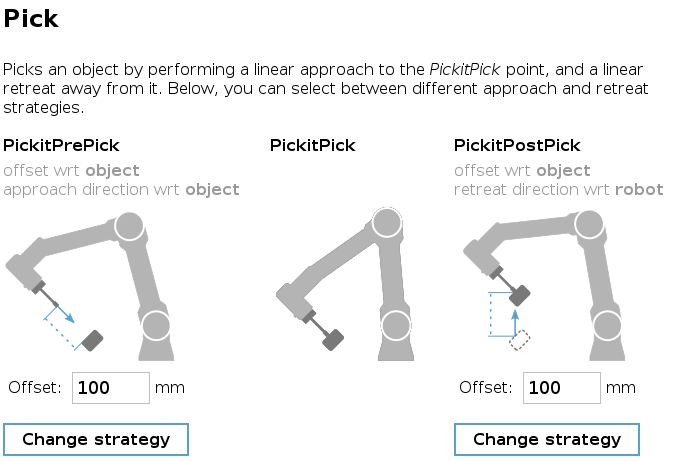
Place
This sequence places the picked object at the specified dropoff location.

Required inputs
Dropoffuser-defined waypoint.Tip
The robot sometimes needs to know about the way the object was picked, in order to place it appropriately. Refer to the smart placing examples to learn how to do this with minimal programming effort.
It can also be the case that the drop-off point is not constant, as when parts need to be stacked or palletized. In such a case,
Dropoffcan be replaced with an instance of Universal Robot’s Palletizing template, for instance.Tool action: Release: Populate with user-defined release logic.
Optional actions
The advanced configuration lists a number of optional actions whose execution can be enabled or disabled during pick and place. Their default contents are a suggestion, and can be modified.
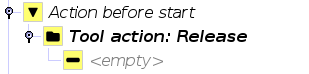
Action before start
This sequence is executed once before starting pick and place. The default implementation performs a Release tool action, to prepare the gripper for picking.
This sequence is disbled by default.
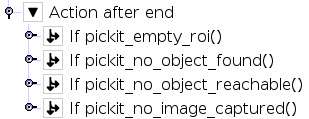
Action after end
This sequence is executed once after pick and place has finished. The default implementation identifies the termination reason and raises a popup if there are no more pickable objects. Pickit can discriminate the following situations:
Empty ROI: The Region of Interest (ROI) has nothing inside.
No objects found: The ROI is not empty, but the requested object was not found.
No reachable objects: The requested object was found, but is unreachable by the robot.
No image captured: Pickit failed to capture a camera image, possibly due to the camera being disconnected.
This sequence is enabled by default as it provides useful information when setting up or debugging the application.
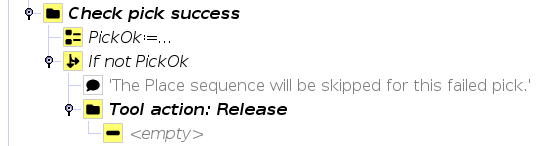
Pick success check
If your robot tool has the means to check pick success from sensor input (like vacuum or force), the Place sequence can be skipped on pick failure, and save cycle time. The robot will instead proceed to pick a new object.
This action is disabled by default, as it requires additional user input. When enabled, it adds the following extra logic at the end of the Pick sequence.