Warning
You are reading the documentation for an older Pickit release (2.3). Documentation for the latest release (3.4) can be found here.
Yaskawa installation and setup
This setup manual helps you setup Pickit with a Yaskawa robot. The setup of Pickit with a Yaskawa robot consists of the following steps:
Check controller and software compatibility
Pickit is compatible with controllers DX200, YRC1000 and YRC1000 micro. Also Pickit can be used with the HC10 human-collaborative robot.
Note
Pickit is not yet compatible with the Smart Pendant.
Note
In this article you will be asked to switch between the NORMAL MODE, that you get when you start the robot normally, and the MAINTENACE MODE which you can access by turning on the controller while pressing the MAIN MENU key.
Note
Several steps of the following procedure require the security level to be in MANAGEMENT MODE. The password for Motoman robots is usually “99999999” (hold the 9 key until the password field is completely filled out and then press ENTER). The security menu can be found under MAIN MENU > SYSTEM INFO > SECURITY in normal mode, and directly under the MAIN MENU in maintenance mode.
The parameters listed below must be verified on the controller to allow the correct operation of the application. Ask your local Yaskawa affiliate to check this.
LAN INTERFACE SETTING set to MANUAL SETTING
This setting is accessed in the MAINTENANCE MODE. The security mode should be MANAGEMENT MODE. SYSTEM > SETUP > OPTION FUNCTION > LAN INTERFACE SETTING > HOST SETTING |
The MACRO INST. set ON
This is the default setting on the YRC1000 and YRC1000micro. However, it could be verified when SELECT MACRO JOB can be seen in the JOB menu. The security mode should be MANAGEMENT MODE. 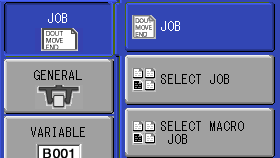
|
MotoPlus function set to USED
This setting is accessed in the MAINTENANCE MODE. The security mode should be MANAGEMENT MODE. SYSTEM > SETUP > OPTION FUNCTION > MotoPlus FUNC. |
Warning
On old DX200 controllers, the MotoPlus function can only be configured by Yaskawa service engineer.
Setup the network connection
Hardware connection
The connection between the Yaskawa controller and Pickit is done over Ethernet. You connect your robot controller to the ROBOT port on the Pickit processor as shown in the diagram below:
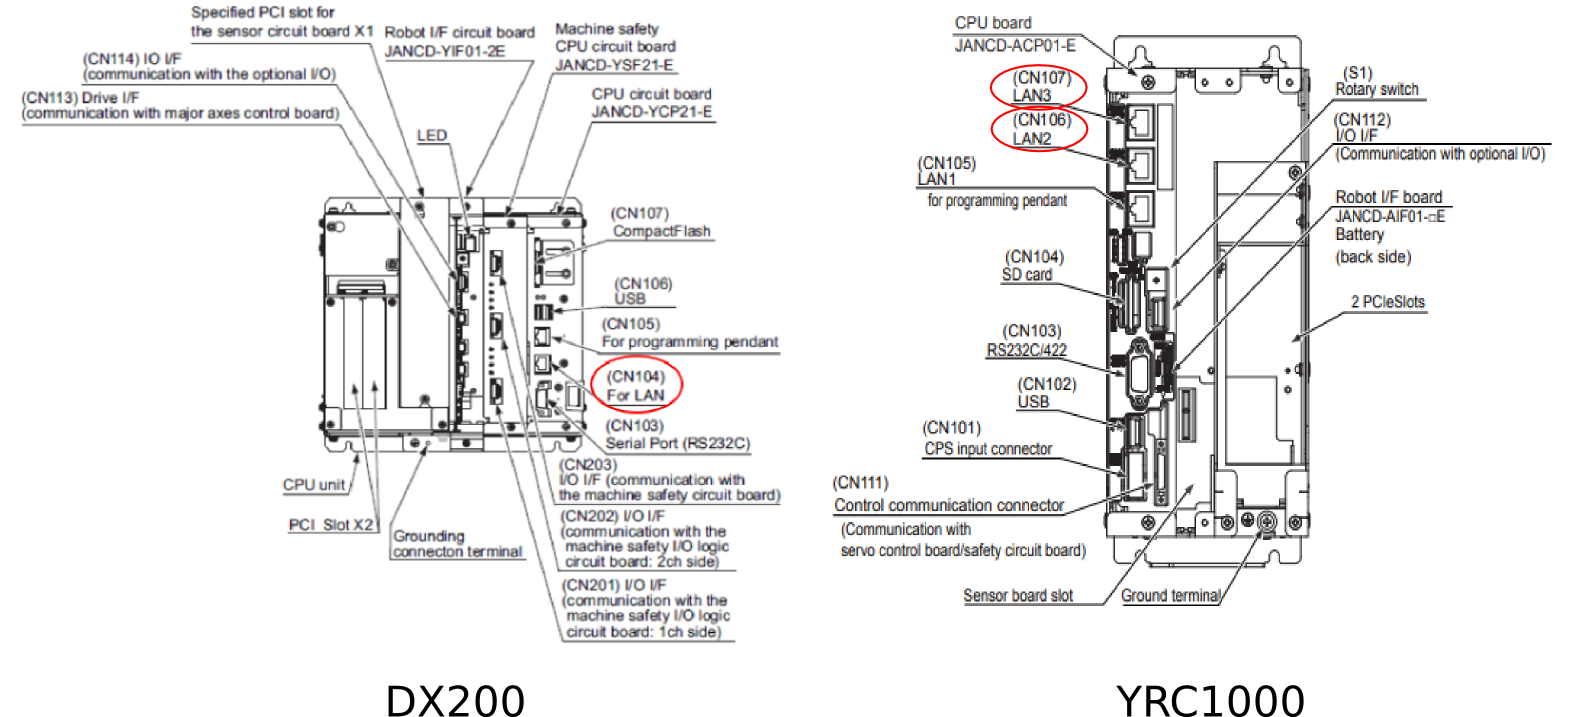
For DX200 controllers you need to connect the Pickit processor to the CN104 port.
For YRC1000 (Micro) controllers you need to connect the Pickit processor to the CN106 or CN107 port.
IP configuration
Warning
Before making these changes, the robot controller should be in MAINTENANCE MODE, and the security mode should be MANAGEMENT MODE.
Setting the IP address of the robot controller should be done in MAINTENANCE MODE. Go to SYSTEM → SETUP → OPTION FUNCTION → LAN INTERFACE SETTING (or NETWORK for the DX200) and set the following values:
IP ADDRESS SETTING: MANUAL SETTING
IP ADDRESS: 169.254.5.182
SUBNET MASK: 255.255.0.0
DEFAULT GATEWAY: 0.0.0.0
Press ENTER and CONFIRM to modify the values.
Pickit and the robot should be in the same IP range. This can be configured in The Pickit port labeled ROBOT menu.
The robot IP address can always be checked in NORMAL MODE. This information can be consulted under: SYSTEM INFO > NETWORK SERVICES after switching the security level to MANAGEMENT MODE.
Load the program files
Before starting, Download the Pickit Yaskawa files here. The Pickit folder should be copied to a USB pen drive. Then copy the correct “.out” extension file to the root directory of the USB drive:
Pickit_YRC100.out for YRC1000 and YRC1000 Micro controllers.
Pickit_DX200.out for DX200 controllers.
The robot controller should be in MAINTENANCE MODE and the security mode set to MANAGEMENT MODE before making these changes.
Insert the USB pen drive in the robot pendant or to the controller USB port.
Under MotoPlus APL → DEVICE select the USB target port used.
If the file Pickit_YRC1000.out ( Pickit_DX200.out ) is not placed in the main root of the USB drive, select its containing folder folder in: MotoPlus APL. → FOLDER.
Load the MotoPlus application under MotoPlus APL. → LOAD (USER APPLICATION).
Press Select, Enter and confirm. Now reboot the controller in NORMAL MODE with the USB device still attached. After rebooting, set security to MANAGEMENT MODE.
First check if the MotoPlus application is running by looking for robot output #1024 under IN/OUT → GENERAL PURPOSE OUTPUT, this output should be blinking. If the MotoPlus application is running you can continue with uploading the Pickit files.
Warning
In the next step, uploading the system data file MACRO INST DEF DATA, MACRO.DAT will remove all existing macro files on your controller, before pushing in the Pickit macros. If this is unwanted, do not upload the file. In that case, you should upload all other files as described below, and then manually define the macros.
Under MAIN MENU → EX. MEMORY → DEVICE select the USB target port used.
Under MAIN MENU → EX. MEMORY → FOLDER select the folder program.
Under MAIN MENU → EX. MEMORY → LOAD select the file IONAME.DAT.
Under MAIN MENU → EX. MEMORY → LOAD select the file VARNAME.DAT.
Under MAIN MENU → EX. MEMORY → LOAD select the .JBI files (Selected files appears with a star).
Note
The order of loading these files must be respected: I/0 data (IONAME.DAT), then System data (VARNAME.DAT and MACRO.DAT), and finally the JOB files (.JBI files). The correct loading of these files can be verified in the NORMAL MODE under JOB > SELECT MACRO JOB.
Load the Pickit example jobs
For this section the controller should be in the NORMAL MODE and the security level set to MANAGEMENT MODE. In the Pickit folders there are two example jobs available. These can be uploaded to the controller so you can easily get started with picking.
Under MAIN MENU → EX. MEMORY → DEVICE select the USB target port where the USB drive is plugged in.
Under MAIN MENU → EX. MEMORY → FOLDER navigate to the folder program > EXAMPLE.
Under MAIN MENU → EX. MEMORY → LOAD
SELECTJOB, thenSELECTboth files (selected files appear with a star), finally pressENTERand confirm the loading.
Now, you should be able to see these loaded files under MAIN MENU → JOB → SELECT JOB
Setting the Pickit IP address on the robot controller
For this section the controller should be in the NORMAL MODE and the security level set to MANAGEMENT MODE. The IP address of Pickit needs to be specified as a String the S049 is meant to receive this address:
Under MAIN MENU → VARIABLE → STRING navigate to S049
Type in the same IP address set in The Pickit port labeled ROBOT menu.
Note
There is no communication yet between the Pickit and the robot. So don’t worry if the connection is not shown in the Pickit web interface Top bar. The robot can be pinged from the Pickit web interface to check the IP settings. Details on testing this connection can be found in: Testing the Robot to Pickit connection.
Test the robot connection
To start the communication, you can run PI_RUN on the robot. This job can be found in JOB → SELECT MACRO JOB (with MANAGEMENT MODE as security mode).
While the program is running, an indicator in the Pickit web interface Top bar should confirm that the robot is connected.
Run the example jobs
The example jobs are a great way to get familiar with Pickit, and can serve as a template to build your own applications. The following articles provide detailed descriptions of the example programs:
Yaskawa Pickit interface
See following article for a detailed explanation of the macros and registers used by Pickit: Yaskawa Pickit interface.