Warning
You are reading the documentation for an older Pickit release (2.2). Documentation for the latest release (4.0) can be found here.
How can I get a better bin picking experience?
This article covers a number of tips and tricks for improving the bin picking experience with Pickit. Some of the tips are specific to Pickit, while others relate to your hardware setup.
Use the Region of Interest box to represent the bin.

If picking from a big bin, consider using a robot-mounted camera and attach the ROI box to the Robot base frame. A big bin is one whose volume is larger than the camera field of view, e.g. very wide, or very deep.
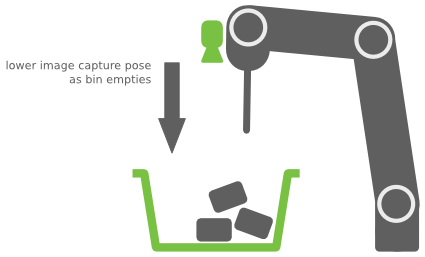
When emptying deep bins with a robot-mounted camera, move the camera capture pose down as the bin empties. Keeping the distance between camera and objects relatively short produces higher quality image captures.

In bin picking, each Pickit detection request typically yields multiple objects. Select an object ordering strategy that places higher objects first. In general prefer highest product center over highest product part. In the image below object 1 will be picked before object 2.

Enable collision prevention between tool and bin, and between tool and other objects in the bin.

Enforce alignment of pick point orientation to constrain the approach direction and orientation. When enforcing alignment constraints it’s useful to enable the bin avoidance strategy to improve reachability of objects close to the bin borders.
Consider Detecting an empty ROI box when no more detections are found.
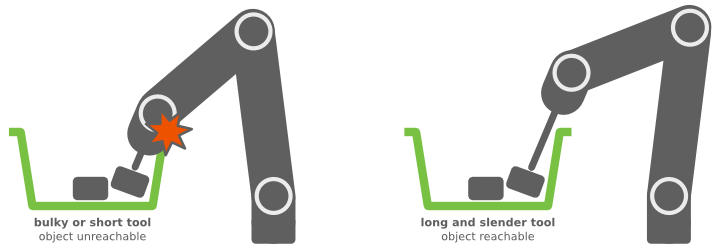
Not related to Pickit but to bin picking in general, use a slender tool that is as long as the bin depth. Leaving bulky parts of the tool and the robot outside of the bin at all times greatly improves object reachability. This is not always a feasible alternative due to application constraints, so it’s a good idea to consider in early stages of application development.

To conclude, you can take a look at some real bin picking scenarios with Pickit on the videos section of our website.