Setting up Pickit with Stäubli
The setup of Pickit with a Stäubli consists of 4 steps:
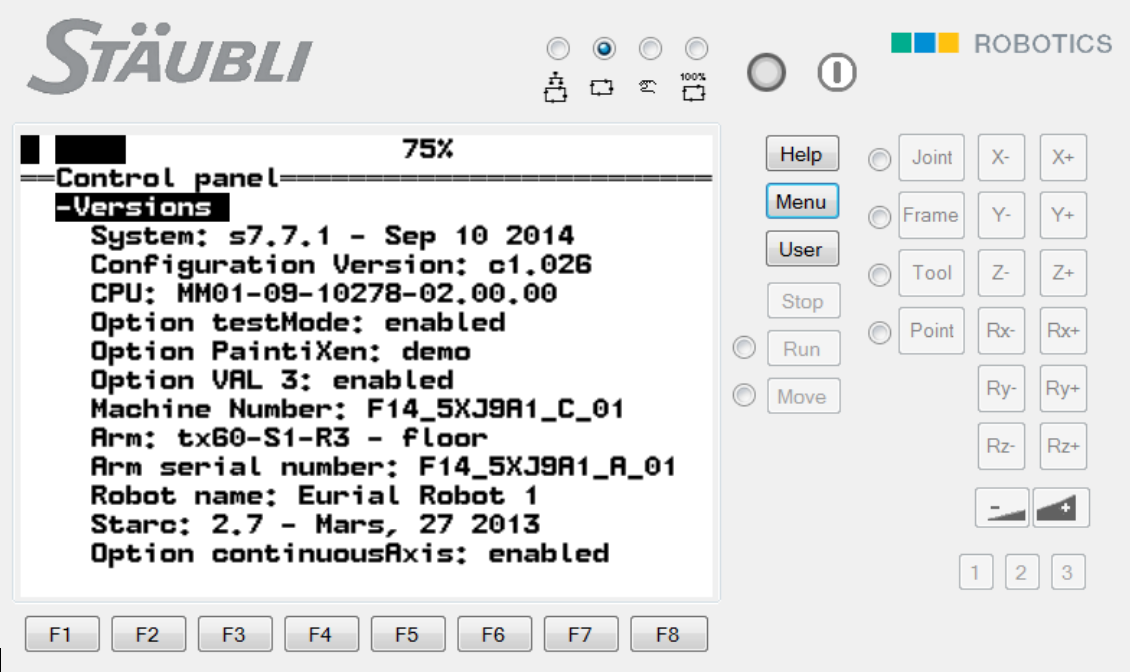
Check Stäubli software version
The software version should be at least 7.
To verify this go to MENU > CONTROL PANEL > CONTROLLER CONFIGURATION > VERSION.
Setup the network connection
Hardware connection
The Pickit processor has to be connected to the robot controller using an Ethernet cable.
This Ethernet cable should be plugged in:
The ROBOT port of the Pickit processor;
The robot controller.
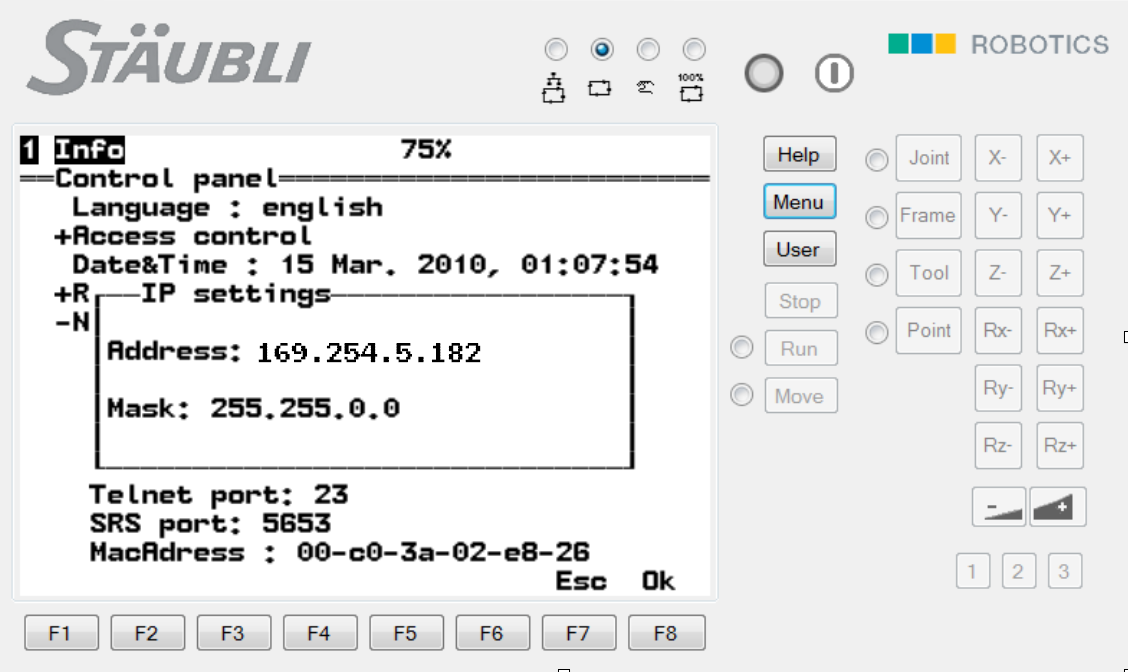
IP configuration
To allow communication between Pickit and the robot controller both must have a different IP address in the same subnet.
By default, the Ethernet port on the Pickit processor labeled ROBOT is configured to have the following static IP address: 169.254.5.180 with a subnet mask of 255.255.0.0.
If this setting is kept, the following has to be done on the robot controller:
For the CS8 controller, go to MENU > CONTROL PANEL > CONTROLLER CONFIGURATION > NETWORK > J204 or J205.
For the CS9 controller this can be found in HOME > SETTINGS > NETWORK > J204 or J205.
Set the IP address of the robot to 169.254.5.182 which is an IP address in the same subnet as the Pickit IP address.
Set the subnet mask to 255.255.0.0.
Push Enter to edit. Push F8 OK.
The IP address of the robot can of course not be the same as the IP address of the Pickit processor.
Setup socket
For the CS8 controller, go to MENU > CONTROL PANEL > IO > SOCKETS > TCP CLIENTS > NEW.
For the CS9 controller this can be found in HOME > IO > SOCKETS > TCP CLIENTS > +.
Choose Type: Client
Add name: pickit
Add the Pickit IP address
IP: 169.254.5.180
Port: 5001
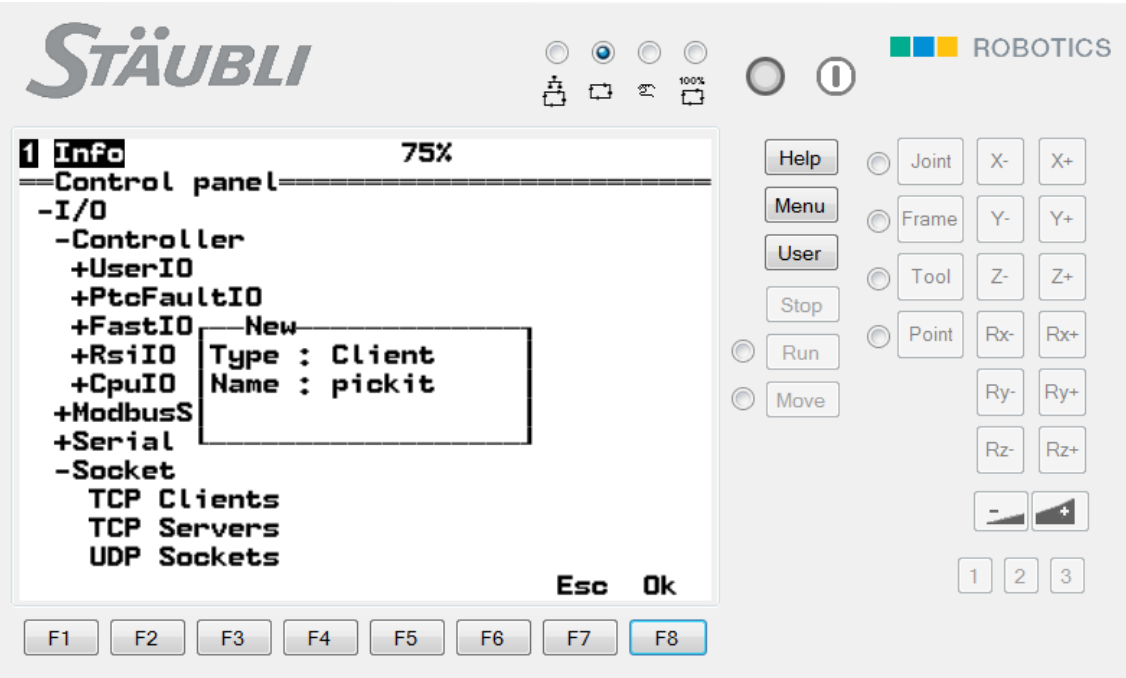
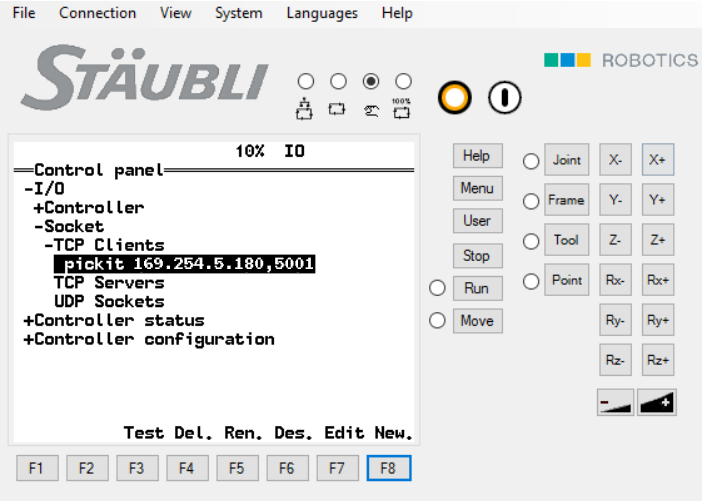
Now the new socket connection can be tested on the robot side.
Test robot connection on Pickit
On the Pickit side, details on testing the connection to the robot can be found on: Testing the Robot to Pickit connection.
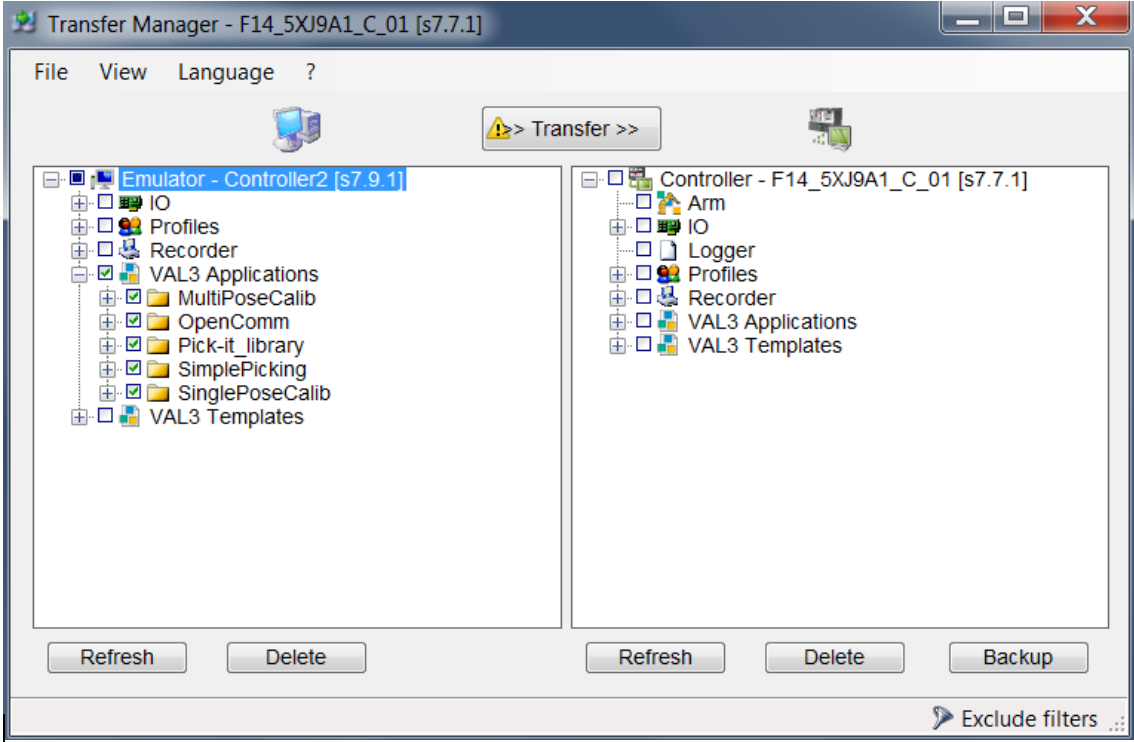
Load the program files
Loading the program files consists of 4 steps:
Download the right files
Upload the files to the robot
The Pickit Stäubli files can be uploaded to the Robot using Stäubli Robot Software (SRS). To establish connection between SRS and the robot, a harware connection (Ethernet cable) is needed between the PC and the robot controller. The correct protocol (FTPS + FTP) need to be set on the controller side. Also, a fixed address needs to be set on the pc in the range of the controller.
Start and verify communication
Starting and verifying communication consists of 2 steps:
Start communication
To start the communication, on the robot you have to select a Pickit example program. You can test this by using the OpenComm program.
Verify on the Pickit interface
To verify that the data packages are received by Pickit: Check for the V icon next to ‘Robot’ in the top bar of the Pickit interface.