Denso
Warning
This robot integration is in beta stage. As such, it supports most functionality but is not yet feature-complete.
Installation and setup
Setup the network connection
Hardware connection
The Pickit processor and the robot controller connect via Ethernet. An Ethernet cable should be connected to the Ethernet port of the Denso controller and to the Pickit processor as described here.
IP configuration
To allow communication between Pickit and the Denso controller, both must have an IP address in the same subnet.
By default, the Pickit robot connection is configured to have the following static IP address: 169.254.5.180 with a subnet mask of 255.255.0.0.
Set the IP address of the Denso controller to an address in the same subnet as the Pickit IP address (for example, 169.254.5.182) with a subnet mask of 255.255.0.0.
Setup TCP/IP communication
On the Denso teach pendant, navigate to Home → Settings (bottom right) → Communication and token → Data communication → Ethernet.
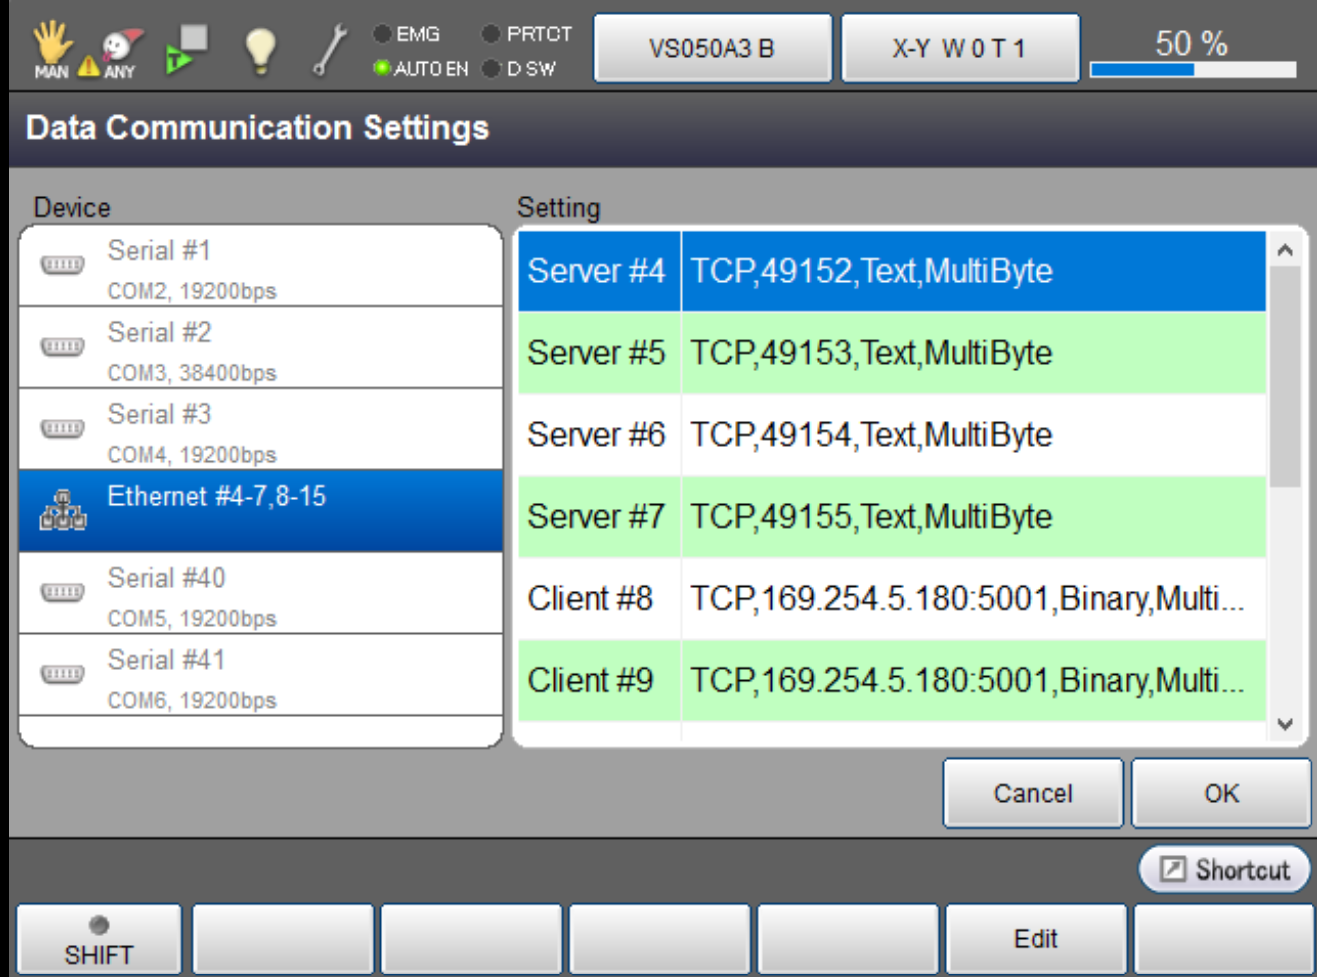
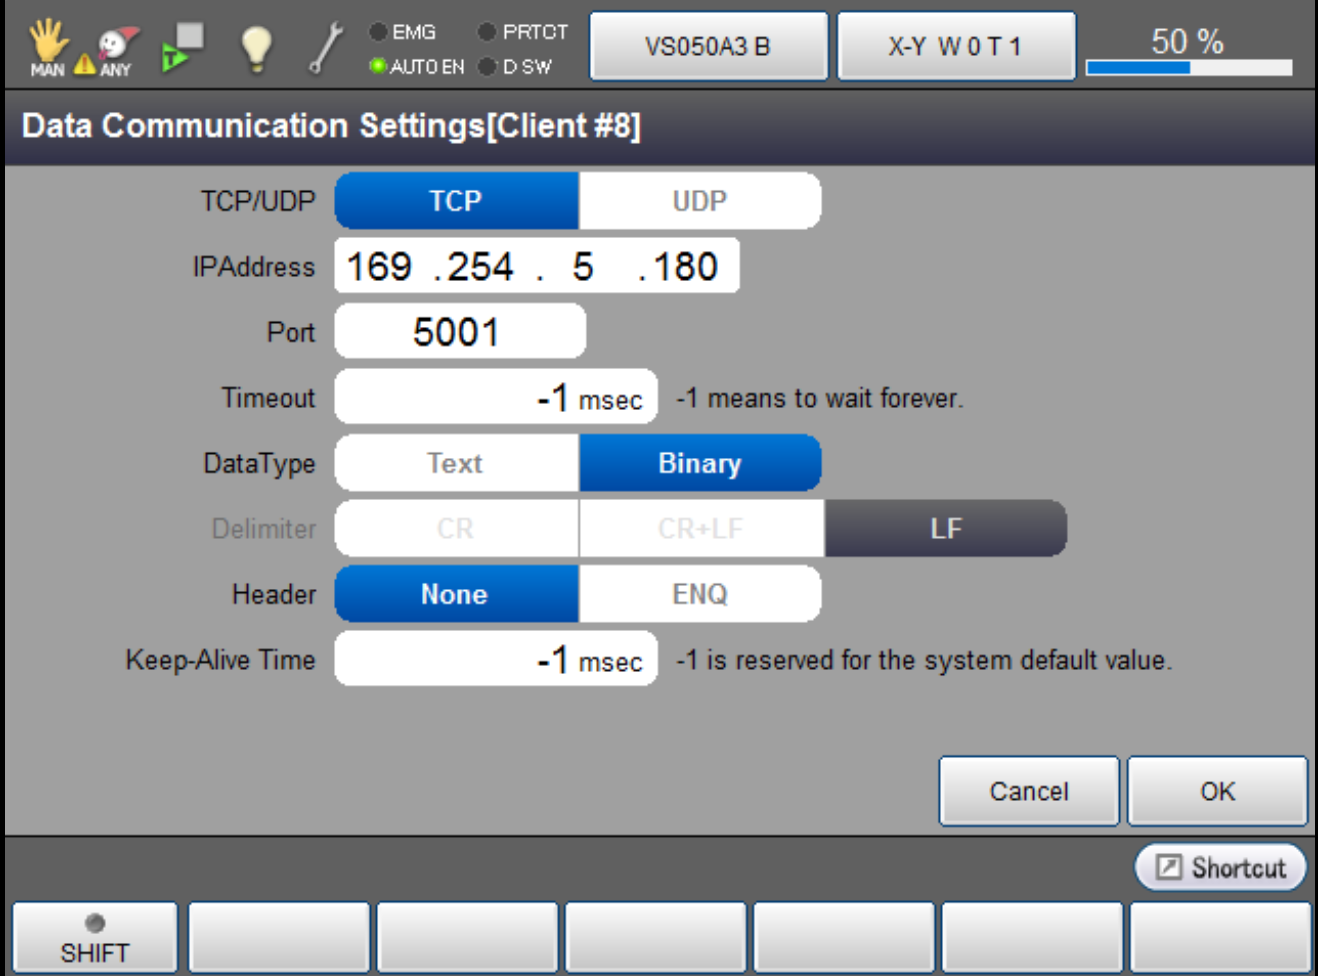
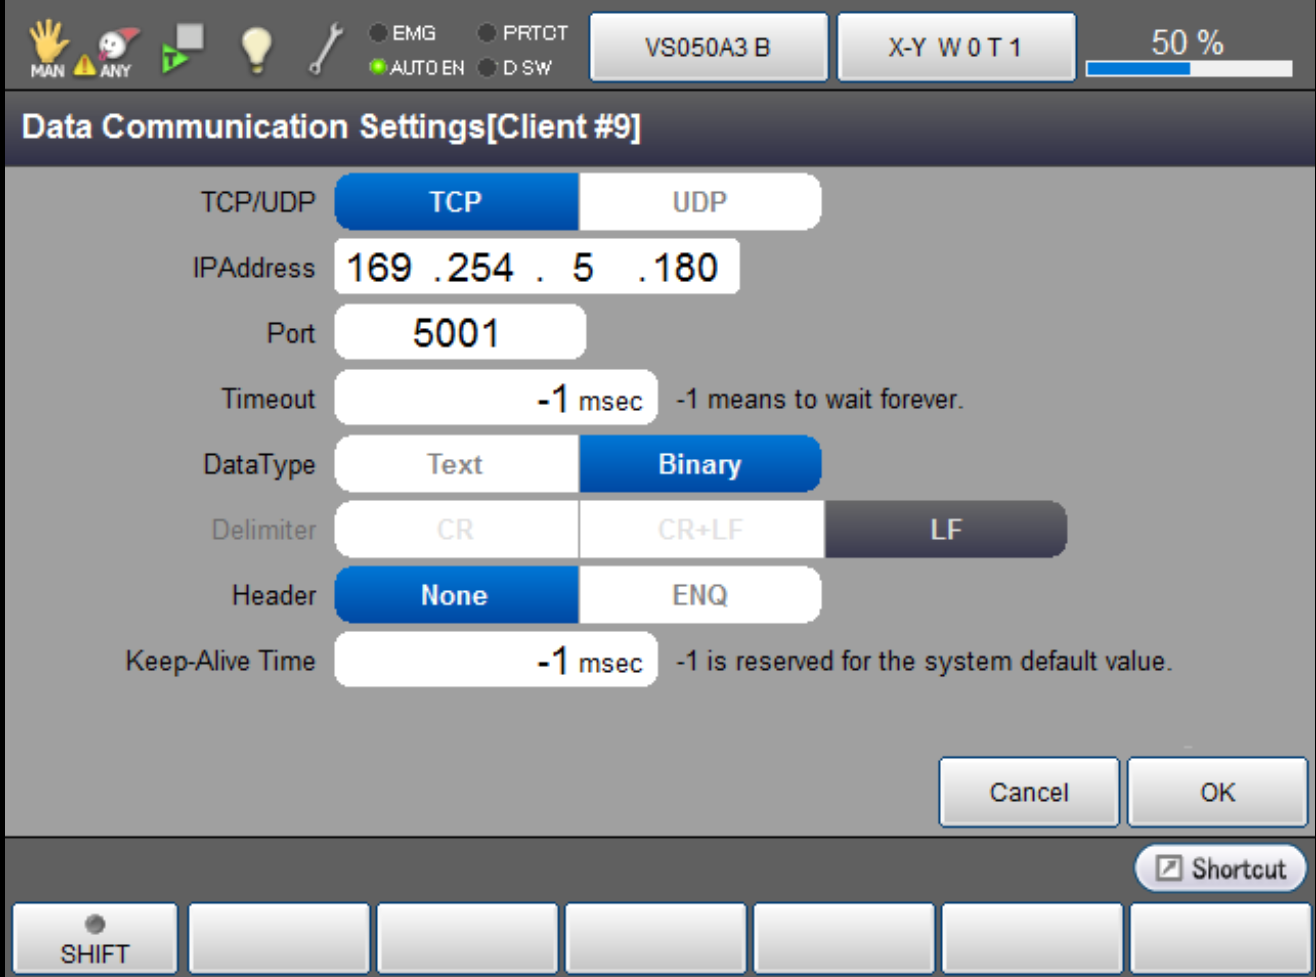
Configure two TCP clients (Client #8 and Client #9), both pointing to the Pickit robot IP and port 5001, with the following settings:
TCP/UDP: TCP
IPAddress: 169.254.5.180 (the Pickit robot IP)
Port: 5001
Timeout: -1 (wait forever)
DataType: Binary
Delimiter: LF
Header: None
Keep-Alive Time: -1
Attention
The Pickit integration requires clients 8 and 9 specifically these numbers are defined in Pickit_Const.h and the integration will not use any other client slots.
If clients 8 or 9 are already used by another application two options are available:
Reassign the conflicting application to different client numbers, freeing 8 and 9 for Pickit.
Edit the client number constants in
Pickit_Const.hto point to two unused clients, and configure those same clients on the Denso side instead of 8 and 9.
Client #8:
Client #9:
Test robot connection on Pickit
On the Pickit side, details on testing the connection to the robot can be found on: Testing the Robot to Pickit connection.
Load the program files
Download the Pickit Denso files and upload them to the robot controller.
The integration is composed of the following files:
File |
Purpose |
|---|---|
|
Internal constants. Do not include directly from programs. |
|
Pickit function library. Include this from programs. |
|
Background task that streams the robot pose to Pickit. |
|
Bin picking application example. |
|
Robot-camera calibration program. |
|
Calibration validation program. |
|
Teach step for the part location workflow. |
|
Execution step for the part location workflow. |
Start communication and run an example
Quick guide to get up and running:
Configure both clients as described above, and enable robot mode in the Pickit web interface.
Start
TSR1.pcsas a background (auto-start) task and check the ✓ icon next to Robot in the top bar of the Pickit interface.Choose one of the ready-to-use example programs to run.
Note
Before running an example program, remember to define the robot poses and the other settings listed at the top of the program file.