Warning
You are reading the documentation for an older Pickit release (1.10). Documentation for the latest release (4.0) can be found here.
Explaining the Pattern detection parameters
The process of detecting objects with the Pattern vision engine is all about step-by-step testing and fine-tuning parameters until you get a good result. The parameters for Pattern are split into six catagories.
Group points into clusters
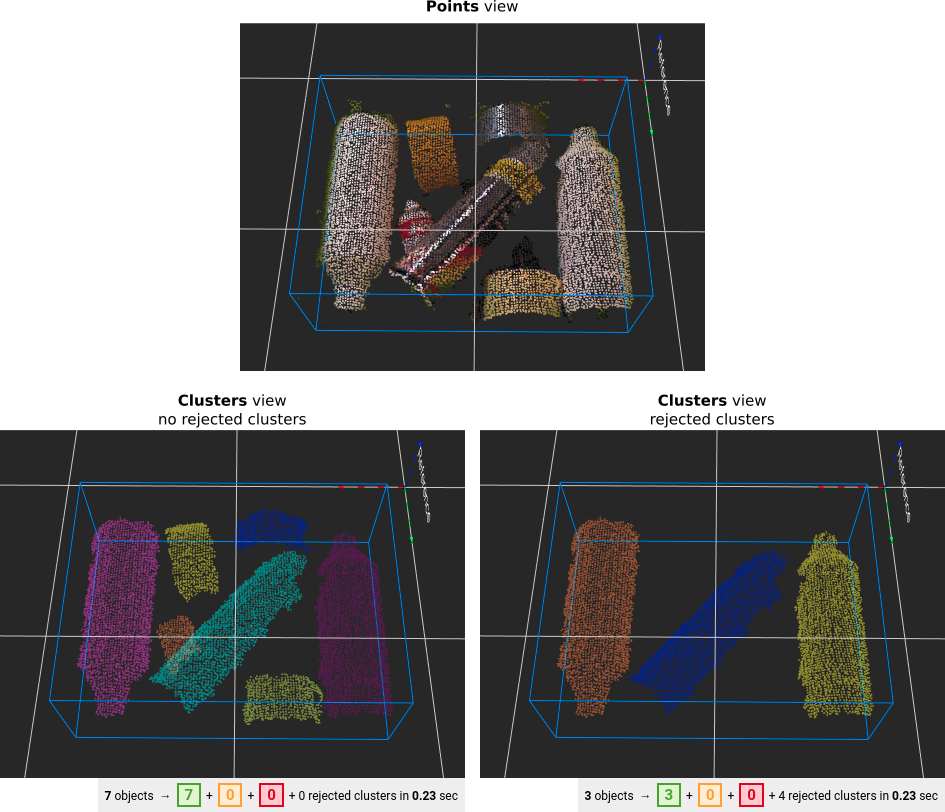
These parameters affect the clustering (grouping) of points. Clustering points is a way of grouping points belonging to individual objects. A good way to detect multiple objects is to try and group points that belong to the same object. The effect of modifying these parameters can be visualized in the Clusters view.
There are multiple clustering strategies available, and the choice initially depends on whether your parts are touching or non-touching.
For touching parts,the system looks at the change of surface. If a surface change is to abrupt it is considered as a separate cluster. An example where this clustering method is used is for touching cylinders or spheres. In the system a few preset configurations exist, and you should experiment with them to determine which works best with your parts.
For plane-based clustering, the system looks for flat surfaces. If two surfaces are touching but the orientation of the surface is different they are considered as separate clusters. A typical example where this is used is random boxes in a bin.
For non-touching parts, you specify the clustering distance threshold, which represents the minimum distance to consider clusters as separate entities. This is typically used for complex shaped parts that are already physically isolated.
Pickit also allows the possibility of not grouping points into clusters at all, and an expert mode which is intended mostly for compatibility with older versions of Pickit. The expert-mode parameters are such that higher values will typically result in less and/or bigger clusters, while lower values result in more and/or smaller clusters.
See following article, Example: the clustering methods, to see examples and use cases for each clustering method.
Reject clusters
These parameters specify filters for rejecting clusters from object detection. Clusters can be rejected by setting minimum and maximum values for their size in number of points, or their physical size (length, width and height). Clusters can also be rejected if they touch the Region of Interest (ROI) box limits (top, bottom, and/or sides).
Rejected clusters are not shown in the Clusters tab of the viewer, and their count is listed in the detection summary.

Fit objects to clusters
These parameters determine the kind of object you want to find. The effect of modifying them can be visualized in the Objects view.Below there is a list of all models and a typical applications where they are used:
Square and rectangle: cardboard packaging, plastic bags, industrial objects
Circle and ellipse: industrial rings, pipe ends, top of soda cans
For 2D object models, Pickit first finds flat regions and then looks for the selected model within them (square, rectangle, circle or ellipse). One can specify:
Whether the shape is solid or has an internal hole, like a ring.
Whether to look for the shape in the outer-most contour only or not. This is mostly relevant for ring-like shapes, which have internal and external contours.
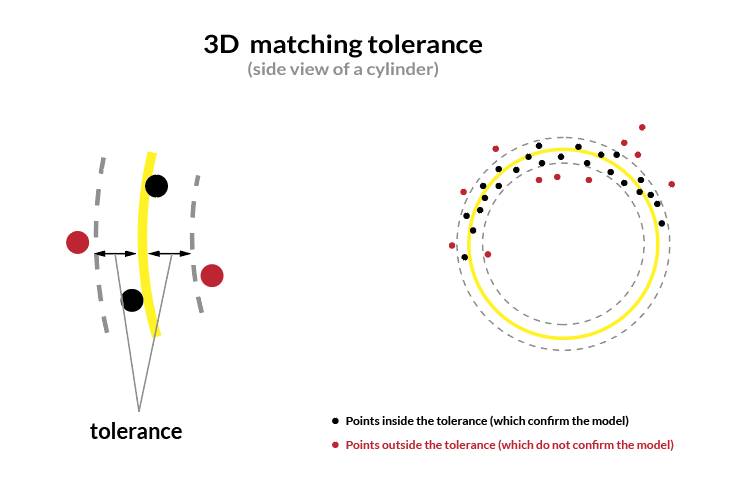
The 3D matching tolerance, used to determine the points that confirm flat regions.

The 2D matching tolerance, used to determine the points that confirm the object model.

Define dimensions and orientation of objects
These parameters determine the dimensions and the orientation of objects you want to find. The effect of modifying them can be visualized in the Objects view. For circles, you can define the diameter, for the other geometrical models you can define length and width. With the Remove contour points on ROI boundary and the Threshold, you can remove contour points that are within the threshold distance of the Region of Interest.
Filter objects
These parameters specify filters for rejecting detected objects. Rejected objects are shown in the Detection grid as invalid.
Similar to how we reject clusters, objects can be rejected by setting minimum and maximum values for their size in number of points, or their physical size (length, width, diameter). Additionally, objects can be rejected depending on the value of the different matching scores, explained below.
2D contour score
This score only applies to 2D shapes and represents the percentage of the 2D model contour that is covered with points within the 2D matching tolerance.

2D surface score
This score only applies to 2D shapes, and represents the percentage of the 2D shape surface that is covered with points taking into account the 2D and 3D matching tolerance.

Optimize detections
These parameters affect the number of points of the captured point cloud used for object detection. The effect of modifying these parameters can be visualized in the Points view.
Image fusion
Image fusion is the combination of multiple camera captures into a single image. Enabling image fusion can provide more detail in regions that show flickering in the 2D or 3D live streams. Flickering typically occurs when working with reflective materials. There are three possible fusion configurations: None, Light fusion and Heavy fusion.
Image fusion can increase total detection time by up to half a second. The recommended practice is to use None in the absence of flickering, and try first Light fusion over Heavy fusion when flickering is present.
Scene downsampling resolution
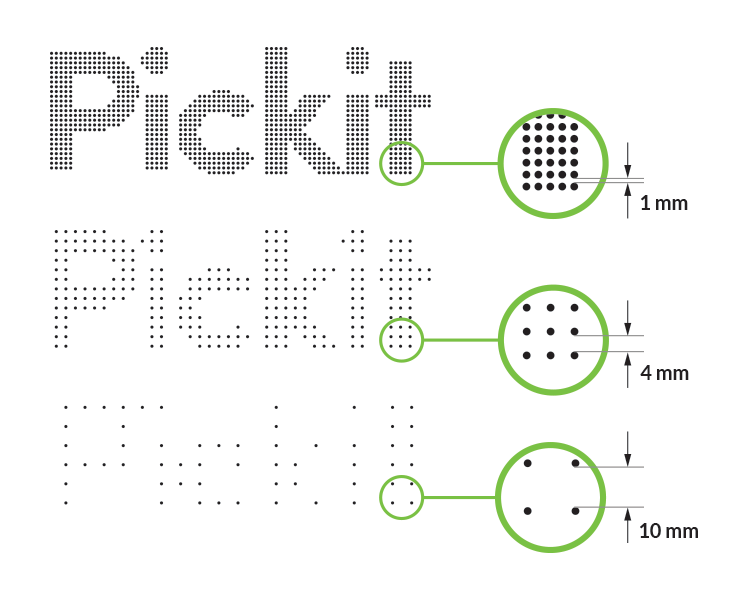
The downsampling resolution allows reducing the density of the point cloud. This parameter has a big impact on detection time, and to a lesser extent on detection accuracy. More points lead to higher detection times and higher accuracy, fewer points to lower detection times and lower accuracy.
In the illustration, you can see an example of setting the scene downsampling parameter to 1 mm, 4 mm and 10 mm.
