Warning
You are reading the documentation for an older Pickit release (2.4). Documentation for the latest release (4.1) can be found here.
Example pick and place program
Loading the program
This example program requires the Pickit TMflow components to be installed in your robot. For installation instructions of both the TMflow components and the example programs, please refer to the Component installation and setup article.
Click the hamburger icon on the top-left corner of the user interface, and select Project.

Open the project called pickit_pick_and_place.
The program explained
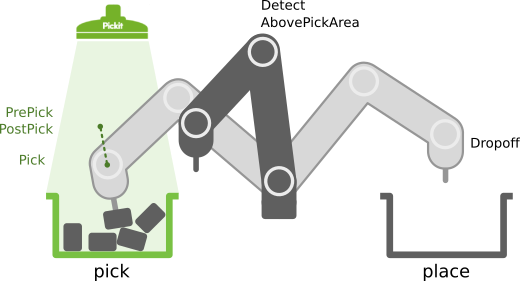
The program implements a simple pick and place task, where Pickit is used to continuously pick objects from a detection region and place them in a specified dropoff location. No assumptions are made on how objects are laid out in the detection region, so the program is a good starting point to build a wide range of applications. Objects can be stacked randomly, or in a pattern, touching or not.
Inputs
Component parameters
The following two inputs are configurable from components in the main program logic:
Points
There are six points relevant to the application, of which three are fixed and need to be taught by the user, and three are automatically computed from Pickit’s results. They are listed in the Point Manager.
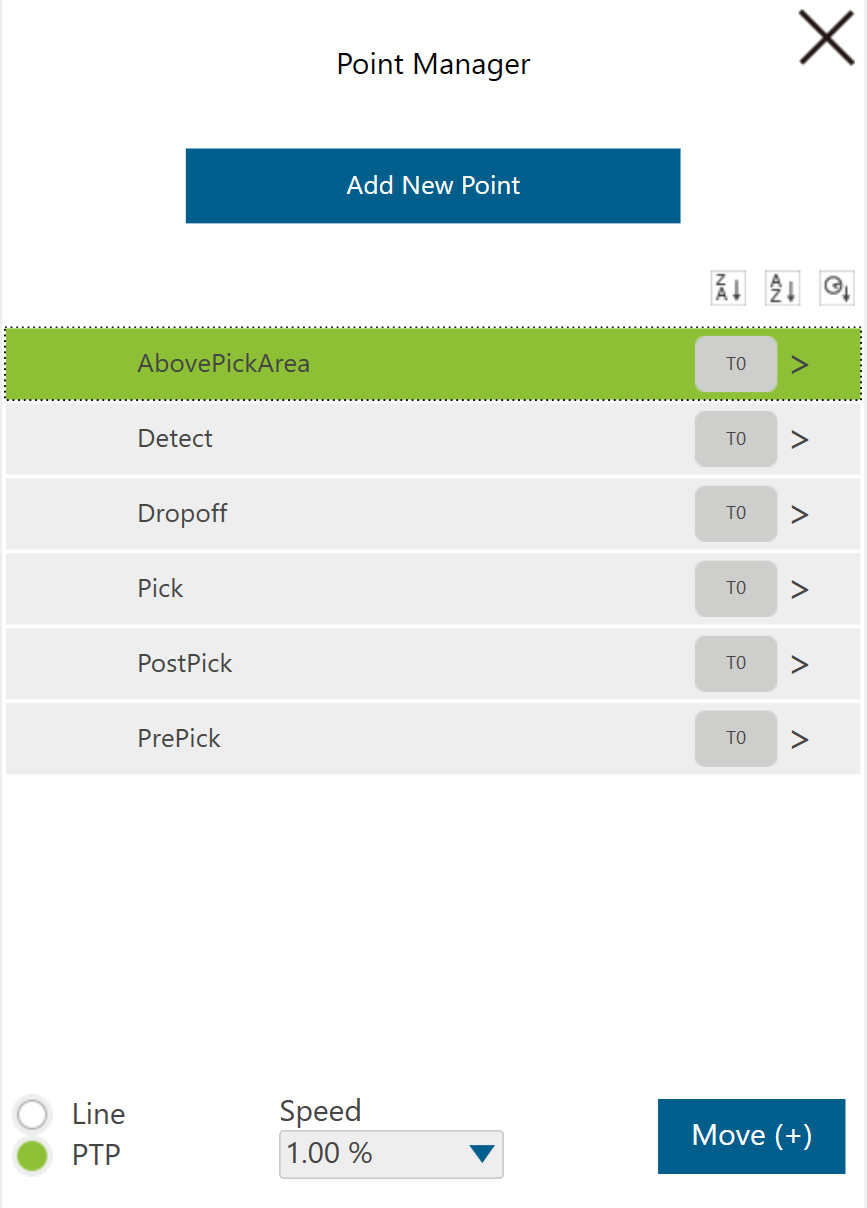
Fixed points
These points need to be taught by the user:
Detectfrom where to perform object detection.Dropoffwhere to place objects.AbovePickAreaa point roughly above the pick area from which the above two can be reached without collision. In simple scenarios, it can be the same asDetect.It is recommended that they are taught using the tool that will be used for the pick and place operation. The active tool can be changed in the top-right bar (right-most drop-down below).

Automatically computed points
These points are computed from Pickit’s results:
PickThe actual picking pose.PrePickUsed for the linear approach motion before the pick takes place. It consists of thePickpoint offset along its z-axis, i.e. it tilts with the object.PostPickUsed for the linear retreat motion after the pick takes place. It consists of thePickpoint offset along the robot base z-axis, which typically means straight up.
Note
These points are initially specified with respect to tool T0 (no tool).

When using a tool other than T0, you should re-teach these points with the tool of interest.
For instance, if the pick is to be performed with tool T1, you should:
Select
T1as active tool.Open the Point Manager and re-teach
Pick,PrePick, andPostPickto a dummy robot pose. Note that its value is irrelevant, as it will be overwritten by Pickit, the important thing is to correctly set the tool used for reaching the point.Close and re-open the Point Manager, confirm that points are now shown relative to
T1.

Gripper command
The pick and place sequences require enabling and disabling the gripper.
They contain by default a Set node that performs no action.
You should either set the correct variable (e.g. toggle a digital output) or replace the node with an instance of a custom gripper component.
[Optional] Variables
These variables have reasonable default values, but can be overridden if desired:
var_target_picks How many objects to pick before successfully terminating the program. The default value of zero indicates “pick all”.
var_max_detection_retries How many times to retry object detection when no objects are found before bailing out. Defaults to five.
var_pre_pick_offset and var_post_pick_offset Offsets applied to the
Pickpoint to computePrePickandPostPick, respectively.
Program breakdown
The pick and place program is structured as follows:
Motion sequence subflows: There are three different motion sequences for the detection, pick and place actions. There are more application-dependent and it’s typical that a user modifies them by adding additional points and custom gripper actions.
Main program: Contains generic pick and place logic. It should be fairly application agnostic, and the user should rarely have to modify it.
The above are described in the following subsections.
Motion sequence subflows
Pick sequence
This sequence computes pickit_pre_pose and pickit_post_pose relative to the pickit_pose returned by getResult.
It also enables the gripper.

Some grippers allow to check pick success (e.g. vacuum check, finger position or force).
The set_pick_ok node sets the var_pick_ok to true by default, but this behavior can be overridden to skip placing an object if it was not successfully picked.
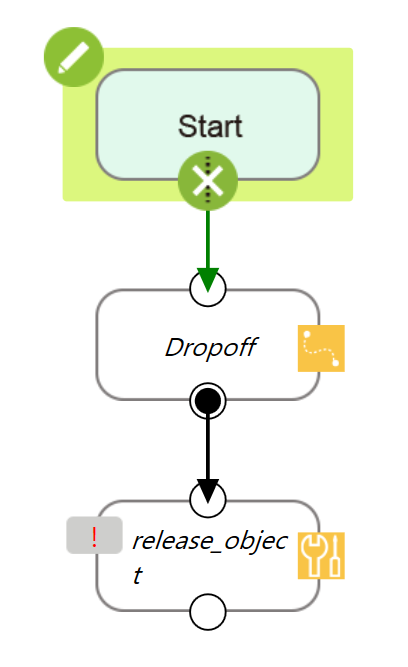
Place sequence
Uses fixed points and the gripper command to place the picked object.
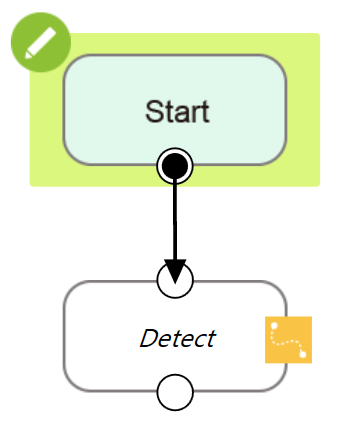
Object detection
This is a trivial sequence that consists of a single point. It rarely needs to be modified.
Main program
A pattern that is used throughout the program is that whenever a non-recoverable error is found, the flow is directed via a Goto node to a sequence (display_msg) that displays the contents of the g_perception_pickit_user_msg global variable and stops the program execution.
Initialize Pickit using the init component. The program requires robot mode to be enabled in the Pickit web interface to continue.
Note
If your Pickit system is not using the default 169.254.5.180 IP address, you should set it in the configuration of the init component.
Configure the object detection scenario using the configure component. Here the user needs to manually set the setup and product parameters.
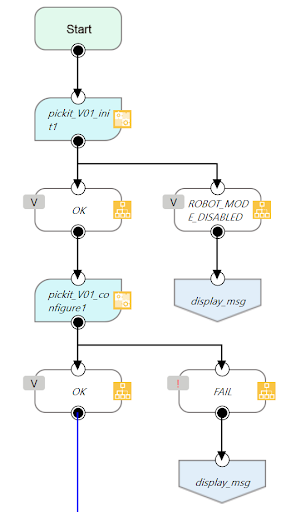
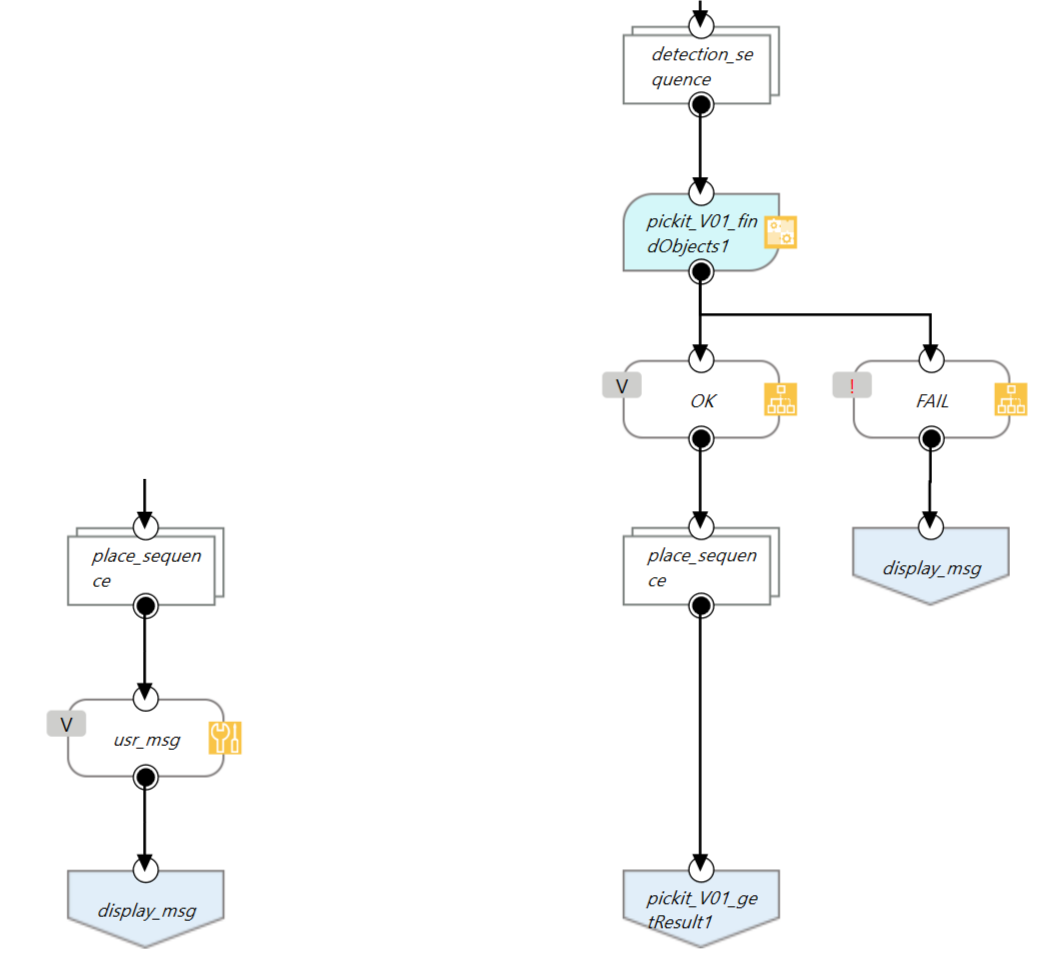
Execute the detection_sequence subflow and trigger object detection using the findObjects component.
Collect detection results using the getResult component.
If there are no more pickable objects, the program terminates. Reasons for termination are:
No object found after n consecutive retries.
Empty Region of Interest (ROI).
No camera image.
General failure.

If there are pickable objects, the pick_sequence subflow is executed.
If the pick was not successful (c.f. the pick sequence for how to check this), a new detection is triggered (back to step 3).

Check if enough objects have been picked:
If yes, perform the place_sequence subflow and stop the program (below left).
If no, re-trigger object detection using the findObjects component and execute the place sequence in parallel. Then go back to step 4 (below right).
Running the program
Attention
Before running the robot program for the first time, make sure that:
There exists a valid robot-camera calibration.
The Tool Center Point (TCP) has been correctly specified.
The robot speed is set to a low value, so unexpected behavior can be identified early enough to prevent the robot from colliding with people or the environment.
Pickit is in robot mode, which is enabled in the Pickit web interface.