Warning
You are reading the documentation for an older Pickit release (3.1). Documentation for the latest release (4.1) can be found here.
Qualitative calibration validation
Attention
This validation method relies on a human operator visually confirming the correctness of a calibration, hence is a coarse check.
Pickit also allows to perform a quantitative calibration, which is more accurate, and recommended for applications that need to keep an eye on sources of picking errors.
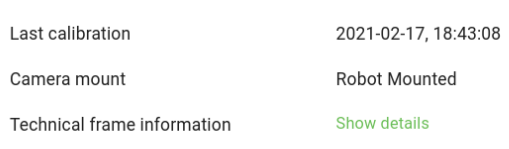
To inspect the details of the existing calibration, click the Calibration button on the top bar of the Pickit web interface. You will be presented with a summary of the last calibration associated to the active camera. If no calibration has been ever performed, it will also be indicated.
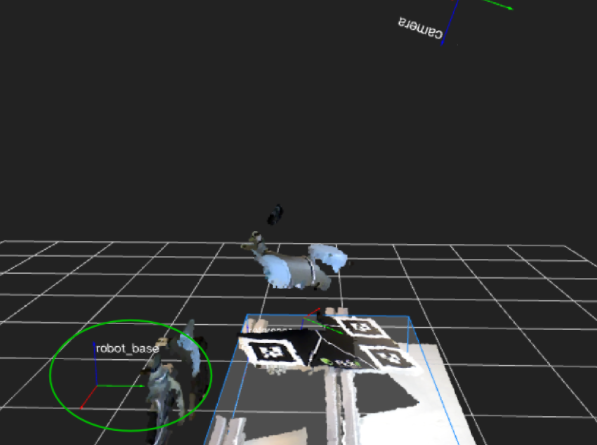
Once Pickit thinks it knows where the robot is, it places two new frames in the 3D environment: the robot base and the robot flange frames. Their pose relatively to the camera frame should correspond to the actual transformations between robot base, flange and camera in the real world. It is recommended to have a look from different viewpoints to verify that the position and orientation of the robot base and flange frames look correct.
Checking robot-camera calibration with a UR robot
If you have a Universal Robots robot, you can additionally visualize a virtual 3D robot, which should make it easier to verify the correctness of calibration. To do so, follow these steps:
Make sure there is communication between Pickit and the robot:

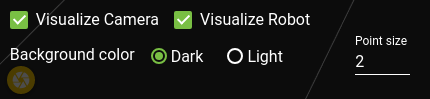
Navigate to the 3D view and click on the settings button on the lower right of the viewer.

Toggle the Visualize Robot check box.
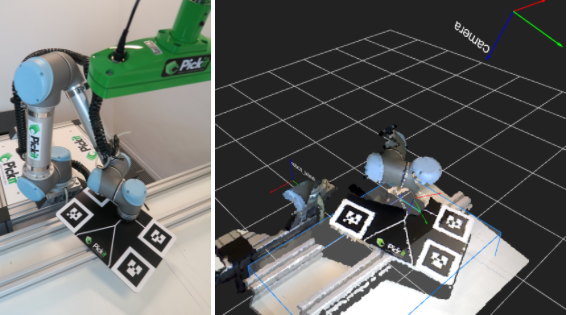
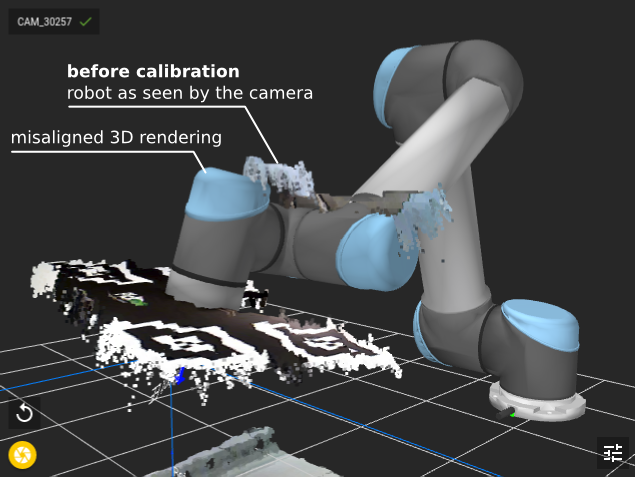
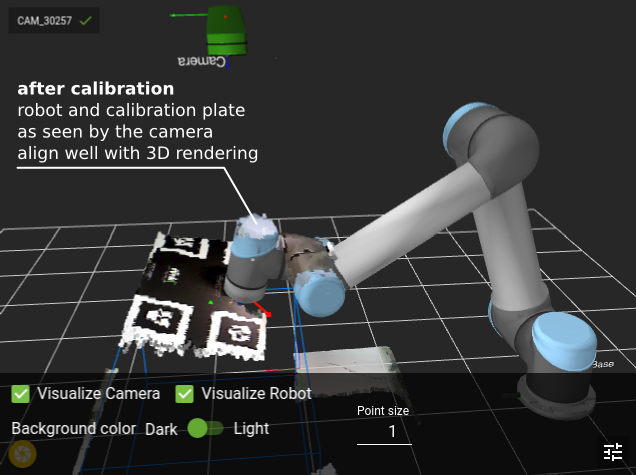
This allows you to intuitively check whether the virtual 3D robot aligns well with the displayed coordinate frames and captured point cloud. For example, the following images show a fixed-camera scenario where the robot is inside the camera view volume. It can be seen how, before calibration, the robot as seen by the camera does not align with the virtual 3D robot. After calibration they nicely align. Similarly, the attached calibration plate (only visible to the camera, not part of the virtual 3D robot) is correctly aligned with respect to the robot flange after calibration.
Invalid robot-camera calibration?
If the outcome of calibration validation is that the current calibration is invalid, the most likely cause is that the camera moved with respect to the robot base (fixed camera) or robot flange (camera on robot). When this is the case, robot-camera calibration needs to be performed again.
If the camera has not moved with respect to the robot, it could be that something went unexpectedly wrong during calibration. The following pointers can help you identify the cause:
The calibration plate moved during the calibration process.
The camera mount (fixed or robot-mounted) was incorrectly selected in the calibration wizard.
For multi poses calibration, the calibration poses don’t comply with the recommendations.
For single pose calibration, the helper transformation is incorrect.
If you are integrating a new robot brand with Pickit, there might be an incompatability in the way poses are communicated between Pickit and the robot.
Note
If you are having trouble with robot-camera calibration, contact our support team by sending an email to support@pickit3d.com.