Warning
You are reading the documentation for an older Pickit release (3.3). Documentation for the latest release (4.1) can be found here.
Pickit Example case: depalletizing buckets
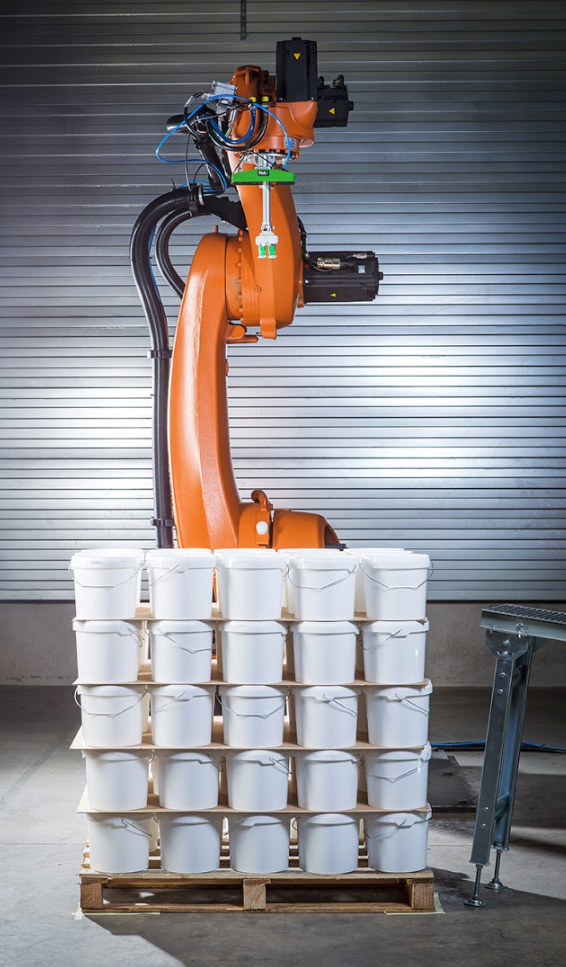
In this article, we explain step by step how to set up an application for unloading buckets from a euro pallet using Pickit with a Pickit L camera. If you’re already curious to see the end result, here’s a video.
The goal of this application is to automate depalletizing five layers of buckets. Each layer contains 15 buckets, and there is a rectangular cardboard separating the layers. The robot should pick all buckets in each layer, one by one, and place them on a conveyor belt. Once the layer is empty, the robot should pick the cardboard and place it on the side.
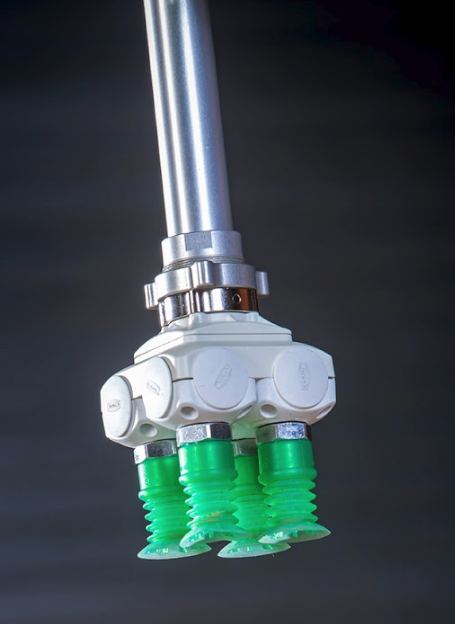
In this example, a large 4 degrees of freedom (DOF) depalletizing robotic arm, equipped with a vacuum gripper, is used for the picking. The gripper is composed of four suction cups.
This tutorial consists of 6 easy to follow steps.
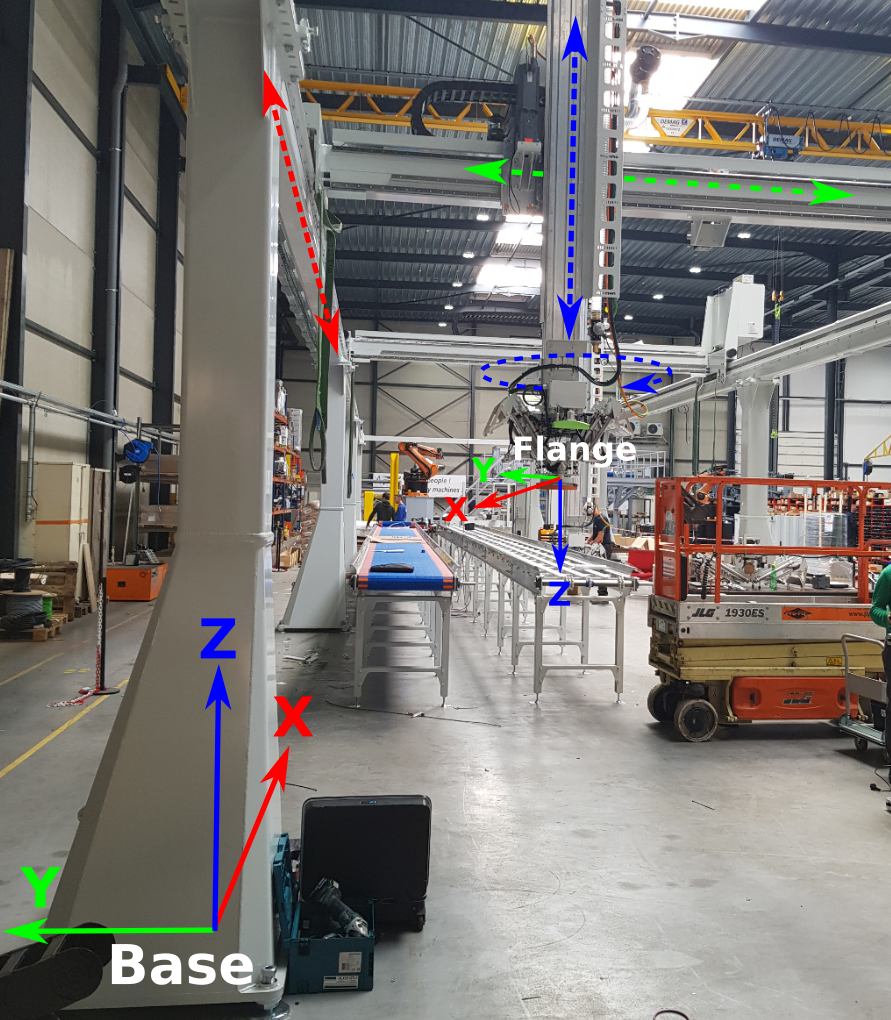
Mount the camera on the robot flange
In this application, the camera is mounted to the robot flange. This way, the robot can bring the camera lower to make sure that the buckets are always in the field of view of the camera, as the layers of buckets are emptied.
In this stage, it is useful to have the Pickit web interface opened, showing the 2D view. This provides immediate visual feedback of the effectiveness of the camera mounting.
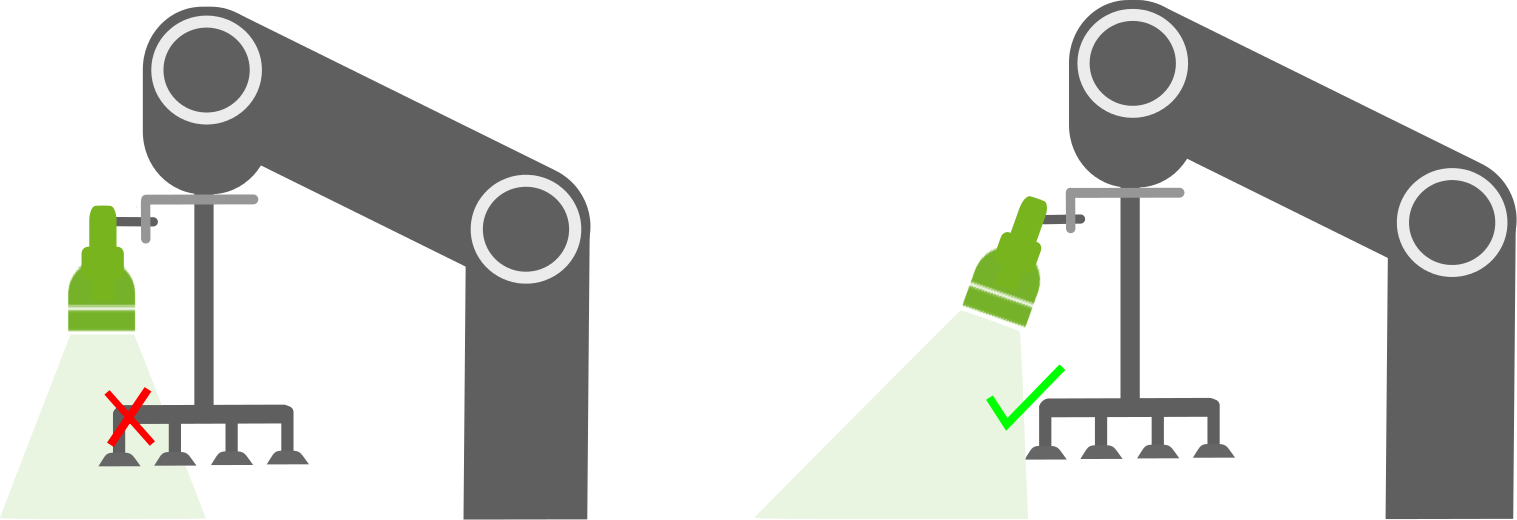
For this application, we choose to have a tilted camera mount to make sure that the gripper does not occlude the field of view.
You should make sure that the highest layer of the pallet is at least 1300 mm away from the camera. In case the robot cannot bring the camera sufficiently high to achieve this, the following solutions are possible:
Fix the camera such that it lies at a higher position than the flange.
Put the robot base at a higher position than the pallet.
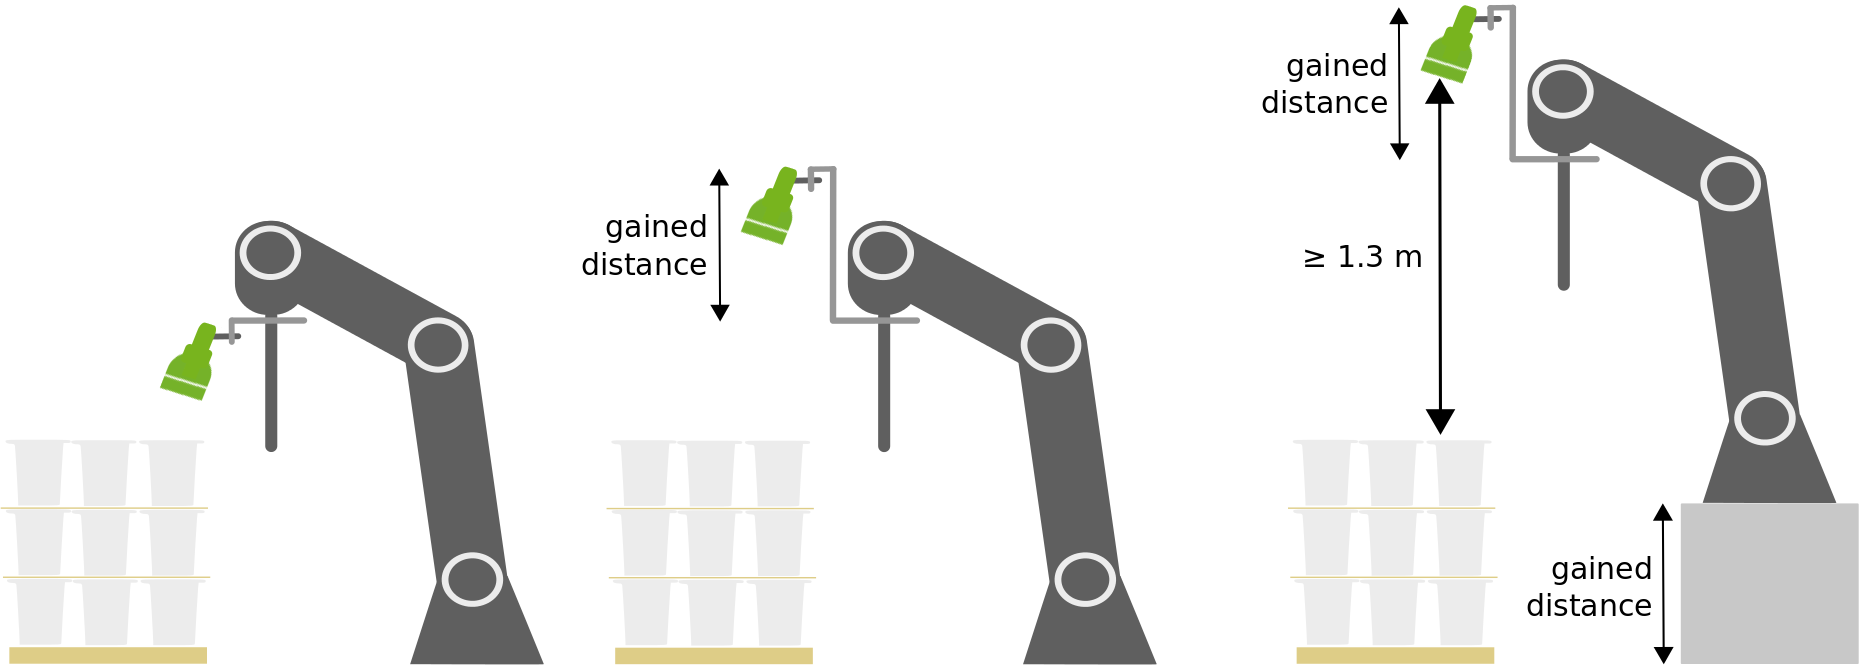
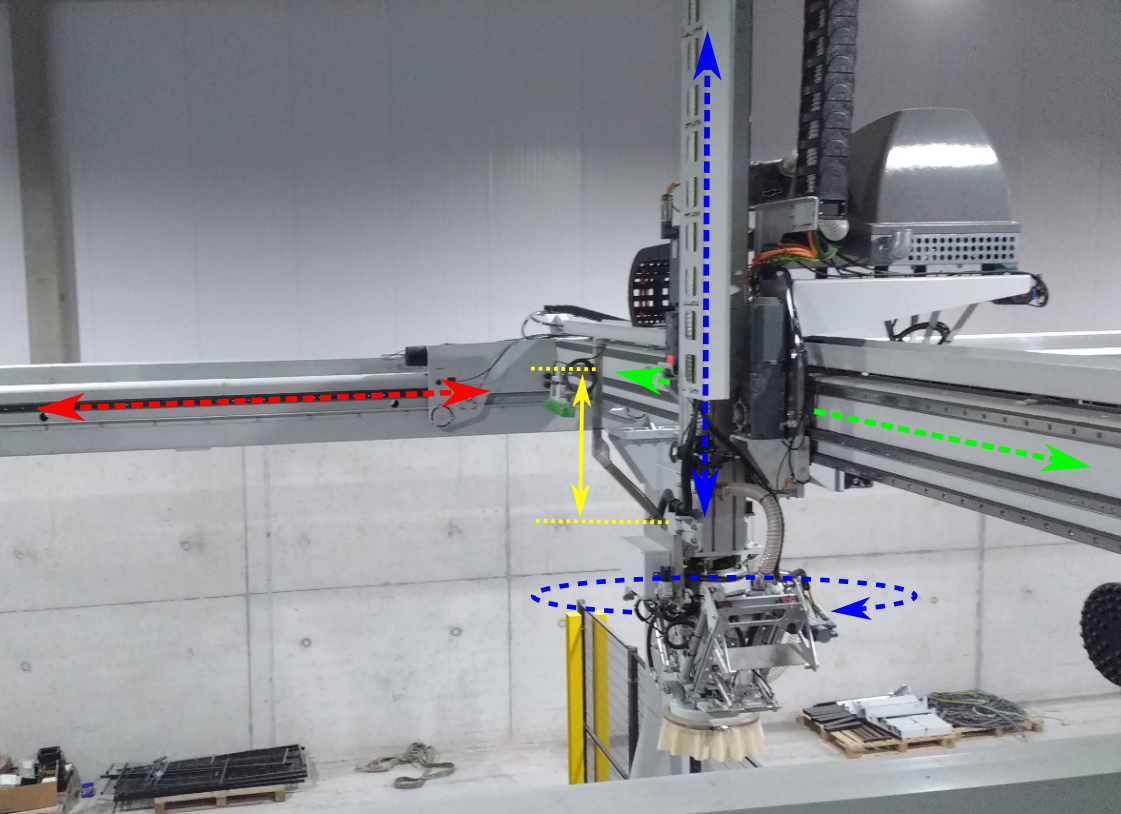
A special class of 4 DOF robots, commonly used in depalletizing applications, are gantry robots. These robots consist in three movable axes, allowing the flange to translate in the X, Y and Z directions, and a rotating joint at the bottom of the vertical axis, allowing the flange to rotate around its Z-axis.
In the example below, the camera is mounted on an extension, to make sure that the highest layer of the pallet is captured. The gained distance is highlighted in yellow.
Warning
To prevent the camera and/or its extension from hitting the Y-axis (dashed green) of the gantry robot, the allowed angular range of the rotating joint at the flange must be limited. It may also be necessary to limit the motion of the translation axes, to prevent collisions against the X-axis (dashed red).
Robot-camera calibration
Once the camera is mounted to the robot flange, robot-camera calibration should be carried out. Refer to Calibration for further guidance.
Teach the Region of Interest
We recommend teaching the Region of Interest fixed to the robot base, and not to the camera.

Before continuing, make sure there is a connection between Pickit and the robot.

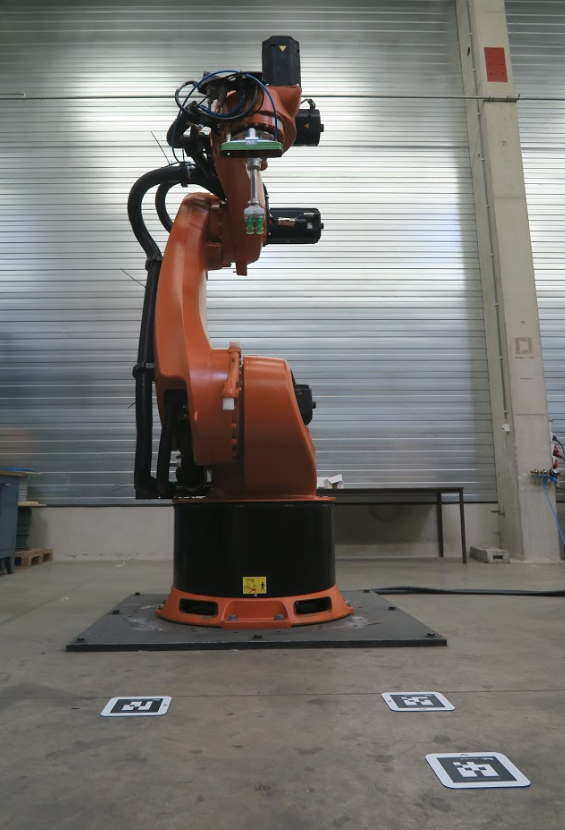
For teaching the Region of Interest, use the L markers. Place the markers at three corners of the empty pallet or on the floor, and define a Region of Interest.
Using the arrows in the 3D view of the web interface, adjust the Region of Interest, such that its height fits the whole loaded pallet. The Region of Interest should be wide enough to fit the pallet and tolerate uncertainties in the pallet positioning. It should not include external elements standing close by, which are not supposed to be detected (walls, fences, other machines, …).
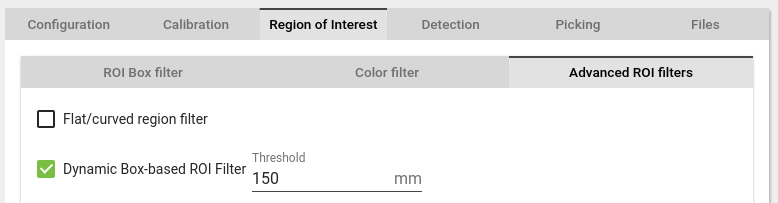
For depalletizing applications like this, we recommend using the Dynamic Box-based ROI filter, which can be activated in the Region of interest page, in the Advanced ROI filters section. This filter makes sure that all objects in the top layer will be detected and picked before any objects in the next layer. For this application we set a threshold of 150 mm, i.e. we keep the top 150 mm of the point cloud and filter out everything below.
Configure the products
In this application, we will detect the buckets and intermediate cardboard layers as two separate products. Refer to the general detection tutorials.
Buckets product
This product should allow detecting aligned touching circles. Pickit Pattern is recommended for this type of applications. Since the circles are touching, the circle contours cannot be seen completely. Tune the contour score threshold parameter to a lower value to detect more buckets, but don’t set it too low to make sure that no circles are detected on the empty cardboard. The picking strategy can be such that buckets are picked in order, for instance, from left to right.
Cardboard product
This product should be configured in a way that the cardboard is always detected. This can be achieved using Pickit Flex rectangles, with a flexible range of dimensions and low contour and surface scores.
Make a robot program
The robot should pick the buckets and place them on a conveyor belt, while the current highest layer is not empty. Once the layer is empty, the robot should pick the piece of cardboard and drop it on the side.
In order to keep cycle time short, the robot can trigger a detection and pick all detected buckets, one after the other. After the last detected bucket is picked, the robot should trigger a new detection for buckets, until no buckets are detected anymore.
Hint
Run a number of consecutive detections in the robot program to be sure that no buckets are left on a certain layer.
At this point, the robot program should trigger a detection for the cardboard, pick it and drop it by the side. This finishes the top layer, leaving the buckets of the next layer ready for detection.
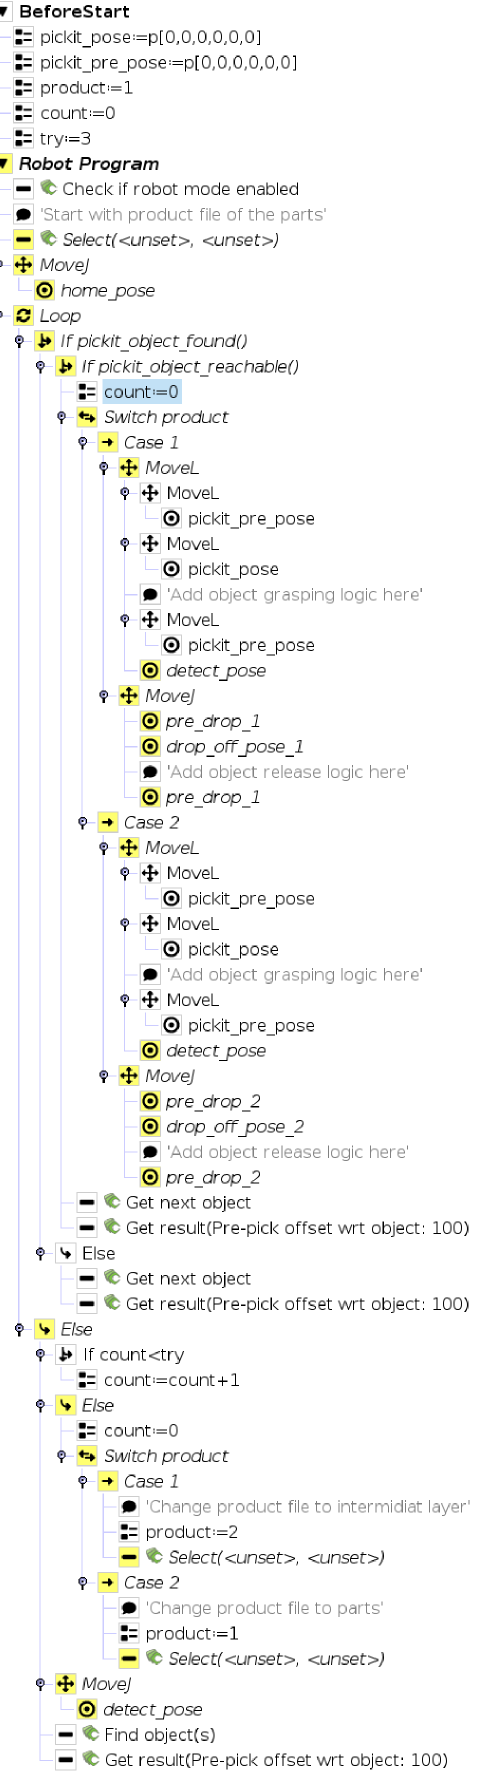
Below you can see the template that has been used to make the robot program. This template can be downloaded here.
Start picking!
Once the robot program is finished, you are ready to pick! In the first attempt, ensure a safe experience: let the robot move slowly and in manual mode. Here’s a video of the tutorial that you just completed.