Warning
You are reading the documentation for an older Pickit release (1.10). Documentation for the latest release (4.1) can be found here.
Pickit example case: Picking of randomly stacked boxes
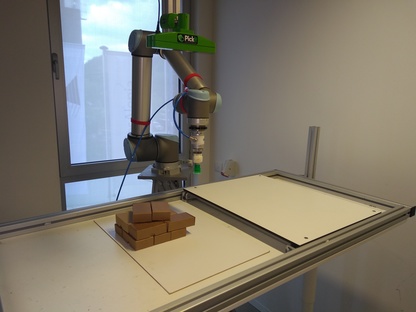
In this article you will learn how to pick the cardboard boxes in the picture above with Pick-it. We cover the basics of the application as well as the robot program used in this application. The result will be a working robot application to pick the boxes with a vacuum gripper and drop them off with exact orientation.
For this article we assume knowledge about the basics of Pick-it Flex and Pattern. If you are not yet confident with these detection engines you can get up to speed by reading the following articles: Flex & Pattern
Motivation
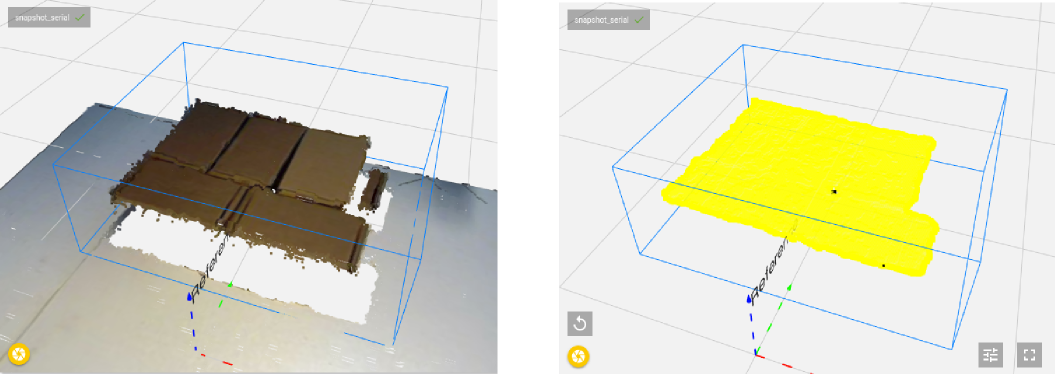
In this application boxes are picked that are stacked in a random way. From the way they are presented it is hard to see the orientation of the boxes. As you can see in the image below: The 3D information shows one big surface. From the yellow plane it is a challenge to determine the exact location of all 5 boxes. Here we will discuss a method that is able to solve these kind of cases.
The idea to solve this case is to do this in two steps. In the first step the focus lies on isolating a part by picking it and dropping it on a new location. In the second step the system looks again to determine the orientation of the isolated box. After the orientation is determined the box is picked again and stacked in an organized way.
See video below for the result of this approach. Further below everything is explained in detail.
Advanced ROI filter: Dynamic Box-based ROI filter
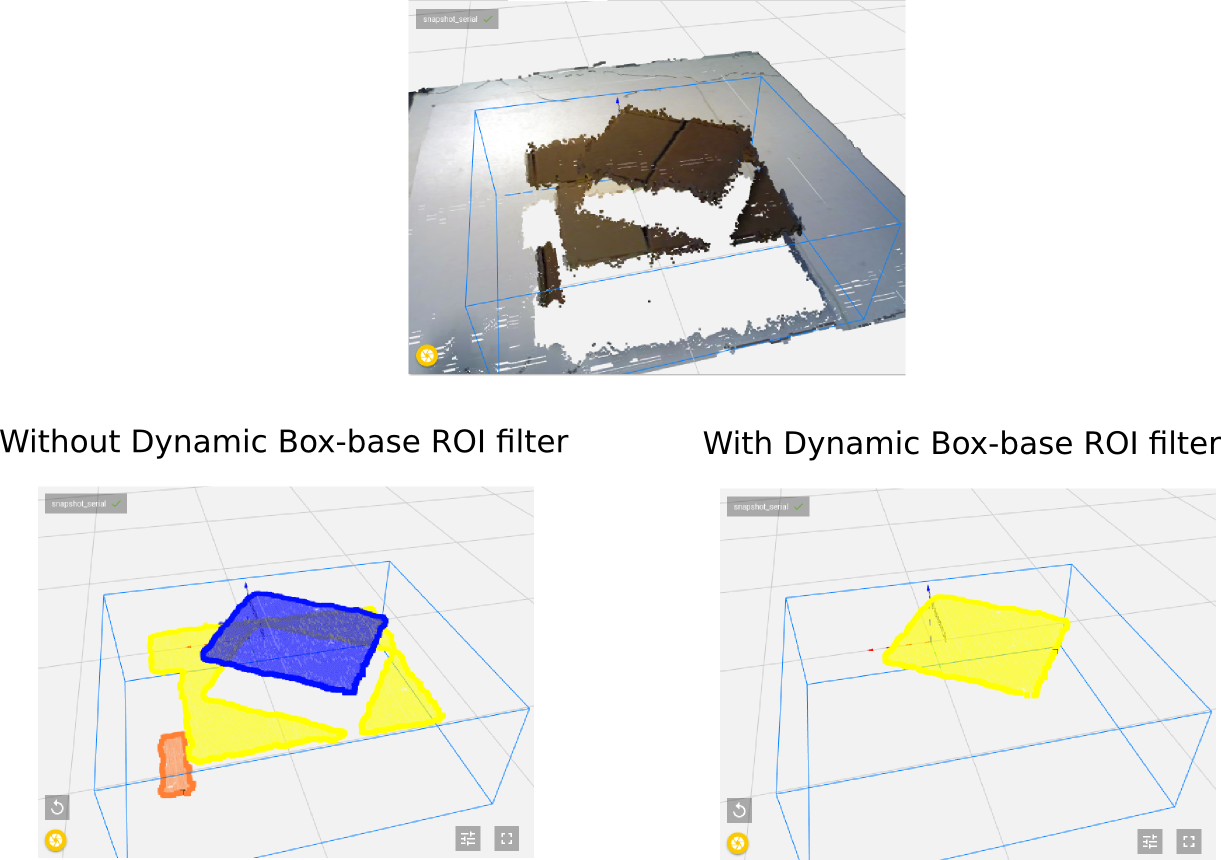
The boxes are stacked on a table in different layers. It seems logical that the robot should always focus on the top most layer first and afterwards proceed to the next layer. This is something that can be forced in the Pick-it system by using one of our advanced ROI-filters: Dynamic Box-based ROI filter.
With this filter additional filtering on the points in the region of interest is done. Now the system is forced to only focus on the highest point and the points that lie slightly lower than this highest point. Below the effect of this filter is shown.
After all boxes are picked from the top layer. The next layer will be the highest point in region of interest and will now be visible for the system. For this application the system only keeps the points that are maximum 20 mm lower than the highest point.
If you are interested in more information about our advanced ROI filters you can have a look a this article: Advanced ROI filters.
Small plane strategy
In some applications it is hard to determine the correct orientation of parts when they are presented in a random way. To solve this kind of applications a two step method is applied. In the first step the only aim is to isolate a part. This is done by attaching our gripper to a part and to drop it somewhere isolated. For this first step it is not important where the gripper is attached to the part it should just be a good place where the gripper can attach himself.
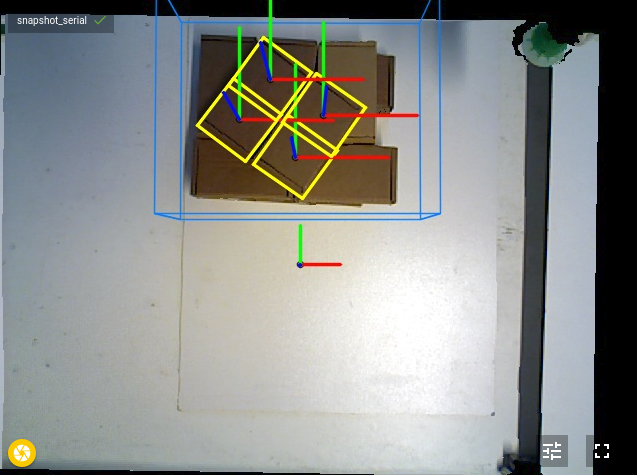
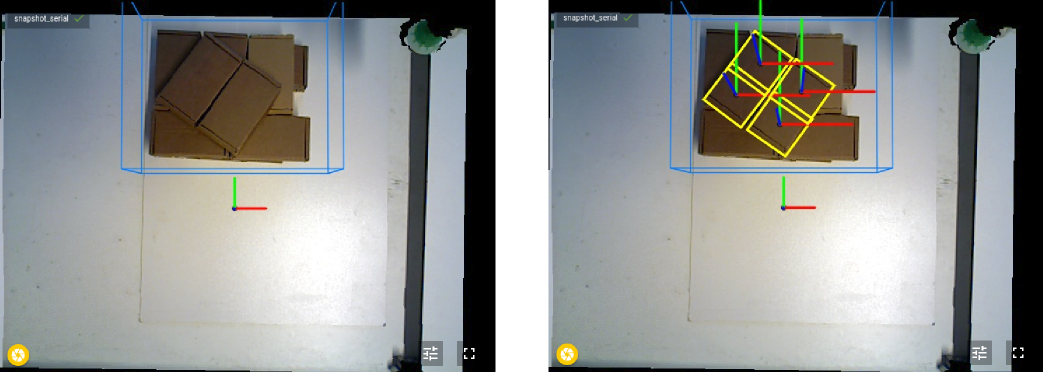
Here the application is solved by looking for squares with Pick-it Pattern. The dimension of the squares that is looked for is the same as the width of the objects. By looking for these squares we know that each attachment point is found is always somewhere on the part. See image below to see how 4 different attachment points are calculated for the first layer(2 for each box). The system does not look for the object as a whole but will look for small planes on the object good enough to attach himself to. This is what we call the small plane strategy.
Enforce alignment
In this first step the orientation of the part is from no importance. This means that the pick frames can be forced to be orientated in exactly the same way. By using the option XYZ||XYZ all pick frames will be orientated exactly as the reference frame. This allows further optimization of the movement speed of the robot, because the last wrist movement of the robot is not used. By applying this strategy it means that in the first step all parts will be picked and dropped with the same orientation.
Interested in enforce alignment? See this article about Enforce alignment of Pick frame orientation.
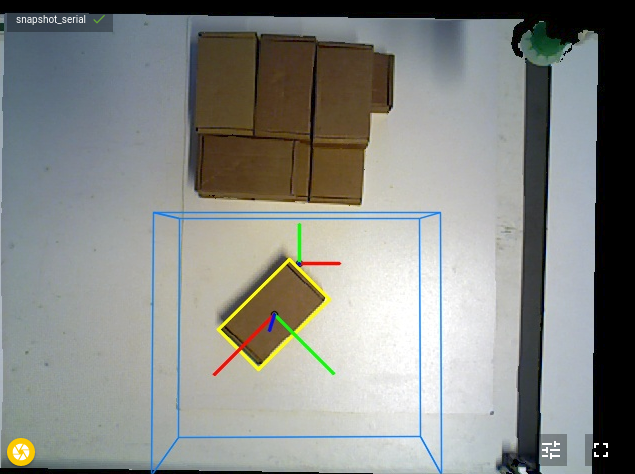
Multiple step program
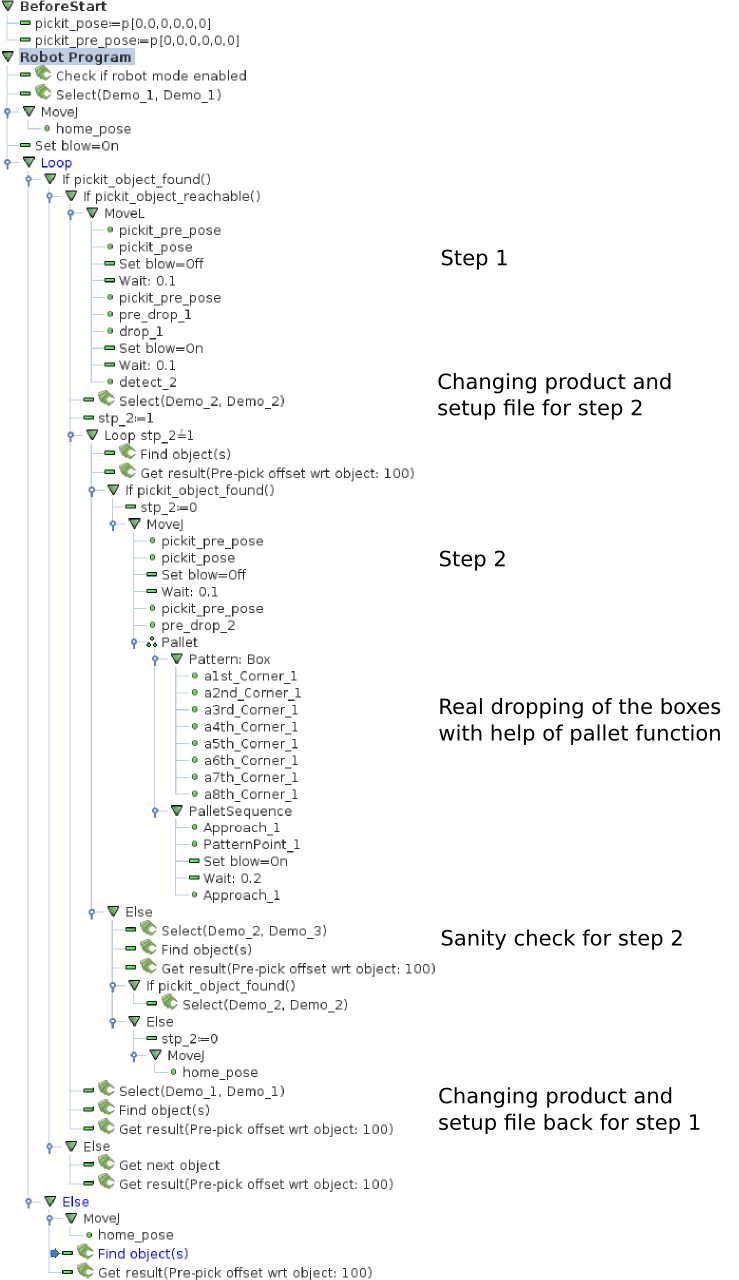
After the first step the part is dropped on an isolated location. Then a new detection is triggered to determine the complete orientation of the part. For the second step a second setup and product file are created. The region of interest now focus on the isolated part. The part itself is detected using Pick-it Flex by looking for rectangles.
The image below shows the complete robot program that has been used for this application. The second step is done in a second loop in the program. Right before the loop the setup and product file are changed. Afterwards the setup and product files are changed back for doing step 1.
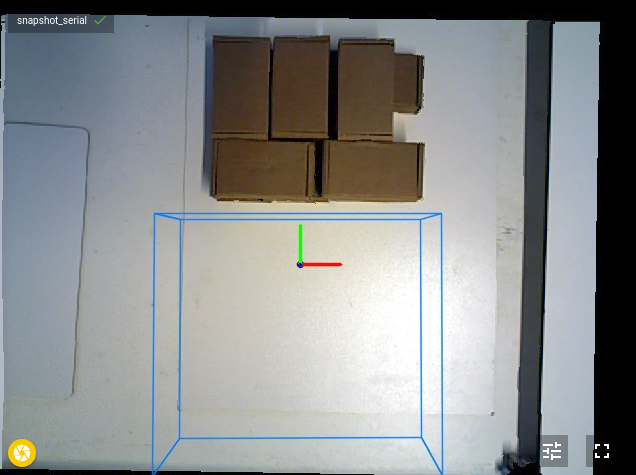
Detect empty ROI-box
In the program above a sanity check is implemented. If in the second step for any reason the detection would not return a result. It is first checked if there is still something before the system looks again to find the box. If really nothing is found in the region of interest the program automatically goes back to the first step.
To check if there is something beneath the camera a Flex detection is triggered. No clustering is applied, no rejecting of clusters, no fitting(Blob) and only filtering out on the number of points. If less than 300 points in total are seen in the region of interest we assume that nothing of importance is beneath the camera, so no new detection for finding the box is triggered. More extensive information about this method is explained in the How to detect an empty ROI.
Snapshots
Below you can download 3 snapshots files to see the settings of all parameters that were used for this program.