Warning
You are reading the documentation for an older Pickit release (1.10). Documentation for the latest release (4.0) can be found here.
Getting ready for remote service
We will cover 3 possible scenarios in this how-to guide.
Connect your Pickit processor to the internet
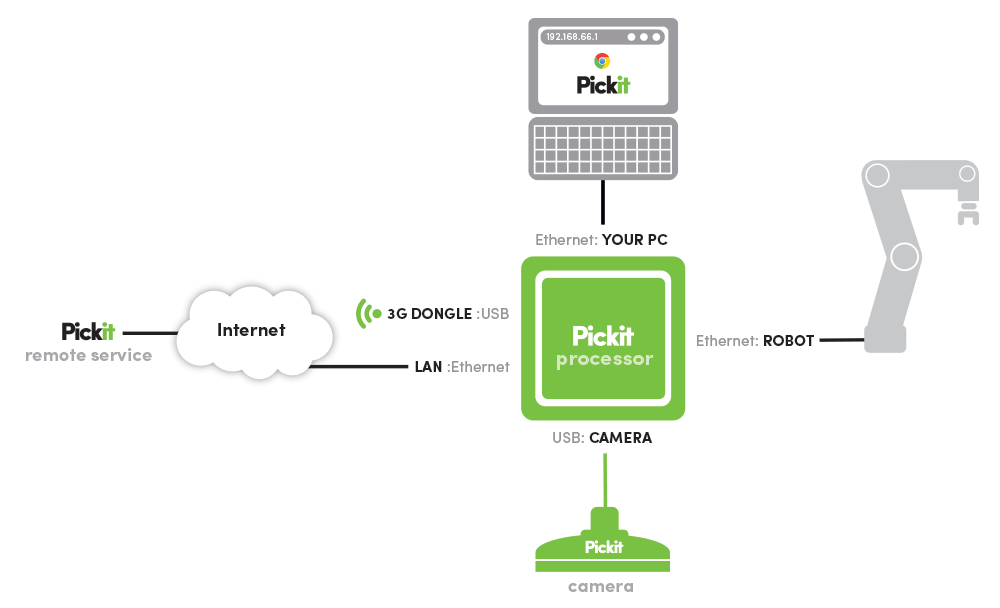
The preferred method is to connect your Pickit processor via an Ethernet cable. If this is not possible you can connect your Pickit processor via the 3G USB dongle.

Connecting via Ethernet cable
Plug in an Ethernet cable (with internet access) into the LAN port of the Pickit processor.
Navigate to the Network settings, by clicking on the Settings button at the top-right of the web interface.

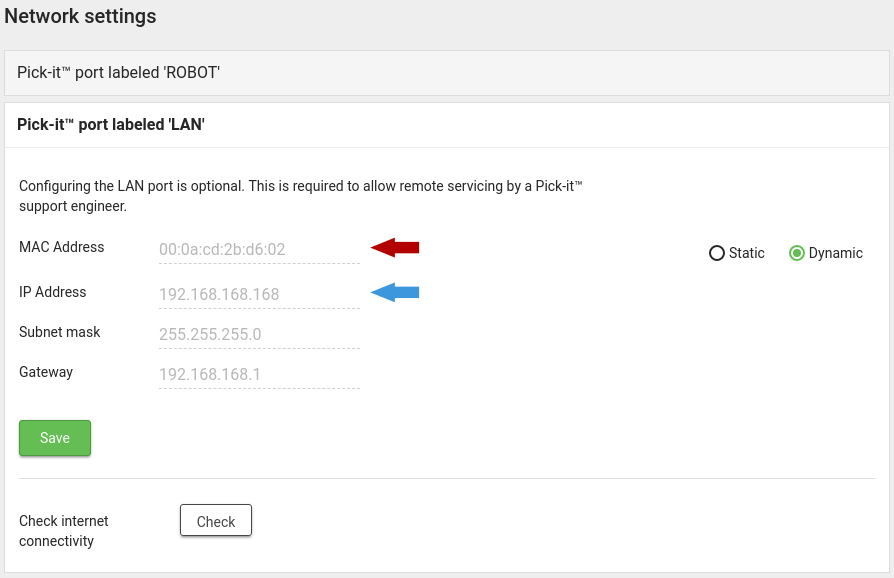
In the Pickit port labeled ‘LAN’ section, make sure that the IP address field has a valid value (blue arrow in image below).

If an IP address shows up, you are good to go. A Pickit engineer can now connect to your system.
If no IP address shows up:
Double check if the Ethernet cable is attached in the right way to the Pickit processor and your network;
Check with your system administrator if there is a firewall on your network. If so:
Ask your system administrator to whitelist the ‘LAN’ port’s MAC address shown in the Network page. (red arrow in the image above)
Ask your system administrator to open TCP 443 port.
Note
Pickit uses VPN/TLS over TCP port 443 to establish connection. The Pickit Support Server is known as vpn.intermodalics.eu
Connecting via USB dongle
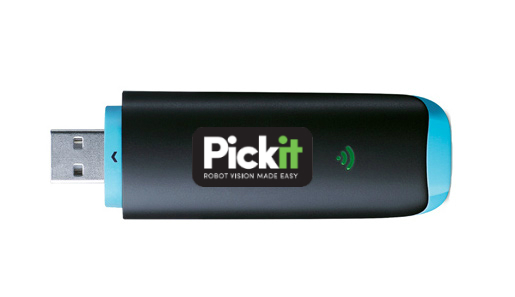
Your Pickit system was delivered with a USB 3G dongle to connect the Pickit system to the internet when connecting via Ethernet is not an option. A Pickit SIM card is already inside so this works out of the box.
Note
Since this is a wireless device, it’s important that it is positioned outside a metal enclosure (cage of Faraday). In case your Pickit system is in such an enclosure, you may use an extension cable up to 2m to install the remote service modem outside this enclosure.
Note
Depending on 3G reception on site, a Pickit support engineer could view and manipulate the Pickit web interface, install product and or setup files and perform updates. If the mobile reception is bad viewing and manipulating the interface could be impossible. On slow connections, software updates can take up to several hours.
Pickit systems were shipped with 2 different types of USB 3G dongles, use the images below as a reference to check which type of dongle came with your Pickit system.
Type 1

The USB dongle can be plugged into any available USB port of your Pickit system. No configuration is required.
Status LED |
Indication |
|---|---|
Solid red |
The modem is initializing. |
Blinking red |
Check if a SIM/USIM card is inserted. If it is, try to unplug and replug the modem. |
Blinking green |
The card has registered to the network but no internet connection could be made. Try reinserting the USB modem and restarting the Pickit processor. If that doesn’t help, contact a Pickit support engineer. |
Solid Green |
The network is available with a successful internet connection. A Pickit support engineer can now access the system. |
Type 2

The USB dongle can be plugged into any available USB port of your Pickit system. No configuration is required.
Status LED |
Indication |
|---|---|
Blinking green twice (every 3s) |
The USB dongle is powered on. |
Blinking green once (every 3s) |
The USB dongle is registering with a 2G network. |
Blinking blue (every 3s) |
The USB dongle is registering with a 3G/3G+ network. |
Solid Green |
The network is available with a successful internet connection to a 2G network. A Pickit support engineer can now access the system but the connection might be too slow to perform a software update. |
Solid Blue |
The network is available with a successful internet connection to a 3G network. A Pickit support engineer can now access the system but the software update might take up to several hours. |
Solid Cyan |
The network is available with a successful internet connection to a 3G+ network. A Pickit support engineer can now access the system to perform a software update. |
Connect your PC (with internet connection) to your Pickit processor
In case connecting your Pickit processor to the internet is not an option or does not work we can provide some remote service through one of the following options:
TeamViewer
Video conferencing
To receive remote service through one of these option you should always connect your PC/laptop to the Pickit processor:
Connect your PC/laptop to the Pickit processor with an Ethernet cable to the network port labelled ‘Interface’ on your Pickit processor and surf to the Pickit web interface.(http://192.168.66.1/)
Make sure your PC/laptop has connection to the internet, while being able to see the Pickit web interface.
TeamViewer
When using TeamViewer installed on your PC, while your PC is connected to the Pickit system, a Pickit support engineer can view and manipulate your Pickit web interface.
Make sure TeamViewer is installed on your PC/laptop. (download it here)
Open TeamViewer and send your partner id and password to the Pickit support engineer.
Video conferencing
When using a video conferencing tool that allows screen sharing, while your PC is connected to the Pickit system, a Pickit support engineer can view your Pickit web interface.
Choose a video conferencing tool such as Google Hangouts or Skype.
Contact a Pickit support engineer to ask him/her to join the video conference.
Share your screen with the Pickit support engineer.
There is no internet connection
The only available option when the is no internet connection on site is getting service by Saving a snapshot in Pickit and sending them to a Pickit support engineer.