Warning
You are reading the documentation for an older Pickit release (3.2). Documentation for the latest release (4.1) can be found here.
How to edit an existing Pickit Teach model
After teaching a model, it is possible to change it, without the need to add or delete models. This article explains how you can edit an existing model.
Re-teaching the model cloud
If you wish to change the model cloud from scratch, click on the Re-teach button of the concerned model. This replaces the model cloud by the content of your current Region of Interest (ROI).
A common example is when you realize that the model cloud quality could be improved. For instance, a model taught with the camera at a far distance might be missing important details. In that case, you may want to Re-teach it from a closer distance.
See also the recommendations on how to teach a good model.
Cropping and expanding a model cloud
The different teaching methods produce models with:
The contents of a CAD file.
The ROI contents of a camera capture.
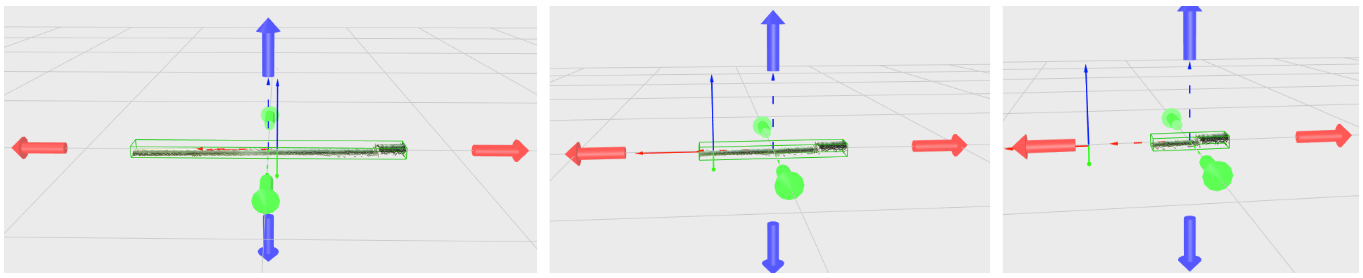
Models can be cropped to only include a subset of the full model by means of the Enable cropping button in Define models. You can use the interactive arrows in the model viewer, or set exact numeric values to restrict the model to the contents of the crop box.
Note
Cropping and expanding operations do not replace the model with the content of the current ROI. Instead, they work on the point cloud that was captured at the moment of teaching. When expanding the model box (making it larger), it is possible to include points that were initially outside the ROI at the time of teaching.
There are several situations where cropping an existing model is extremely convenient, as opposed to re-teaching it from scratch:
Suppose that, upon teaching the model, undesired small amounts of points, that are difficult to spot, are accidentally included in the model cloud. You can quickly get rid of these points by cropping them out of the model, without the need to re-teach the model with a cleaner workspace.
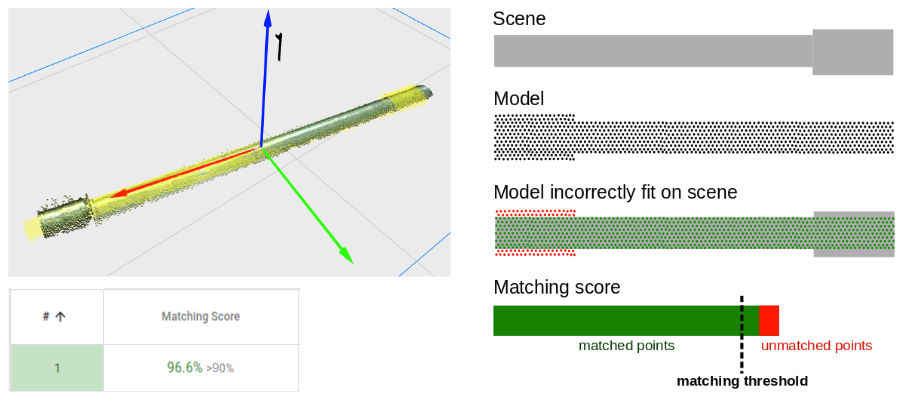
When using Pickit Teach, it is intuitive to teach the whole object to be detected. However, depending on the part geometry, this might not lead to the best results. In particular, parts which are almost symmetrical except for a small detail tend to be fit 180 degrees flipped around the symmetry axis. Such wrong fits have a high matching score, since only a small percentage of model points are unmatched. Consequently, both good and bad fits have a high score, making it difficult to filter out bad fits. The image below illustrates this behavior for an almost symmetrical tube, which has one of the tips slightly wider than the other.
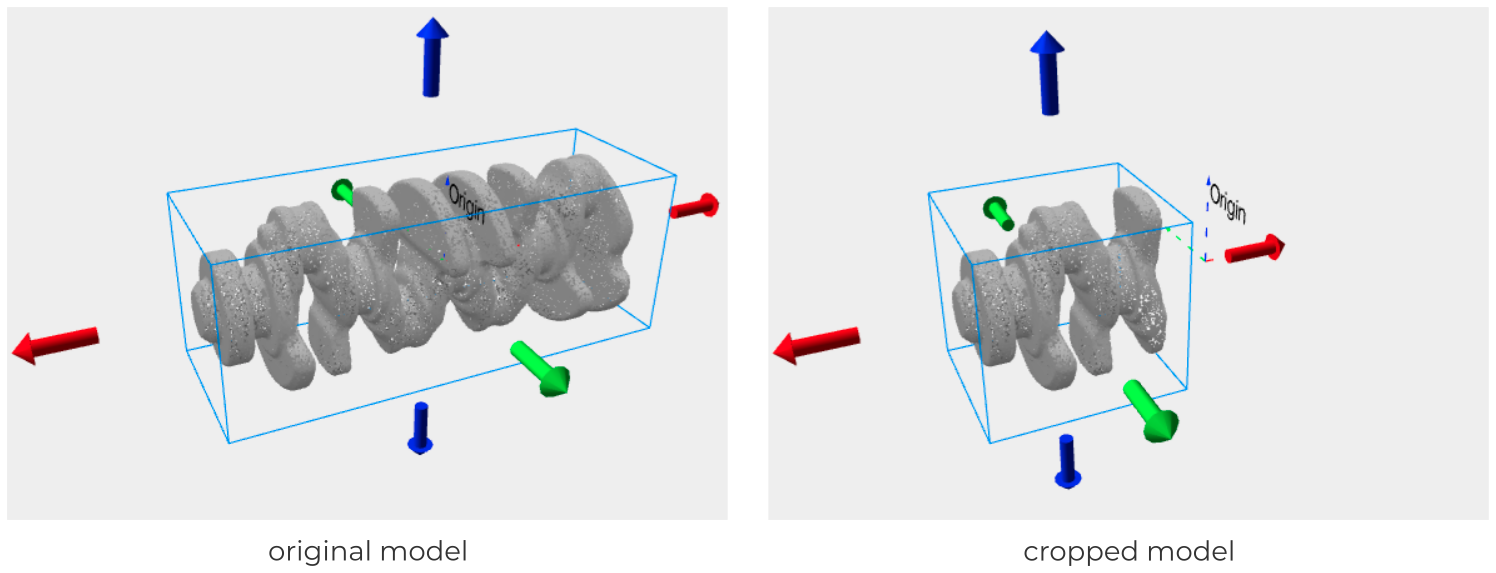
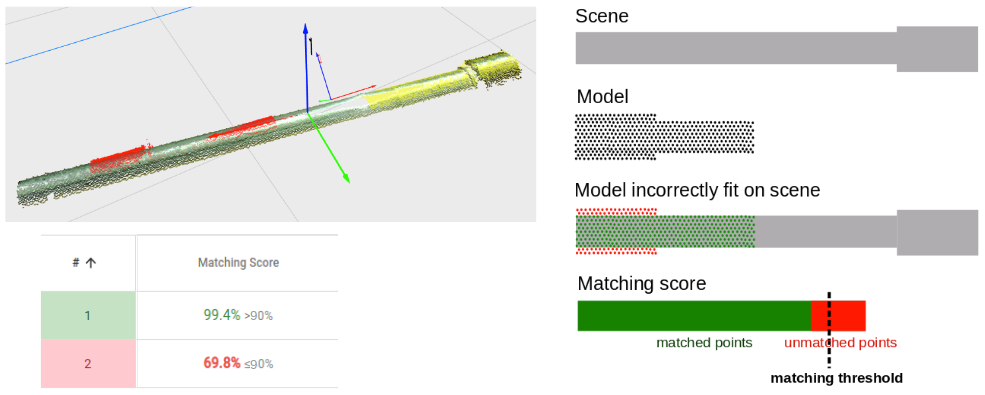
A way to increase the score gap between good and bad fits is to crop out some of the redundant side of the part, keeping mainly the small detail in the model. Using the cropped model, a 180 degree flipped fit will have a much worse matching score than a good fit, since now the percentage of unmatched points is larger relatively to the total amount of model points.
As one can guess by the example given above, finding a good Teach model can sometimes be a trial-and-error process. Compared to re-teaching a model, cropping an existing one is much faster, since this does not require the part to be placed under the camera and the Region of Interest to be adjusted. This ease of use allows you to quickly try out different cropped versions of the model and compare results.