Warning
You are reading the documentation for an older Pickit release (3.2). Documentation for the latest release (4.1) can be found here.
Pick points
Once a part to detect has been defined, pick points need to be associated to it. A pick point represents where an object can be picked by the robot. It is specified as a position and orientation relative to the object, where the robot Tool Center Point (TCP) should move to perform a pick. What constitutes a good pick point depends on both the gripping device and the object to be picked.
This article focuses on how pick points are created and managed in the generic Pickit Teach workflow. Pickit also provides convenient wizards for creating pick points for the following particular cases:
Pick points for cylinders of known size with Pickit Teach.
Pick points for 2D or 3D shapes with Flex or Pattern.
Multiple pick points per model
A single object can often be picked from more than one point. Having multiple pick points associated to a single Teach model has a two-fold advantage:
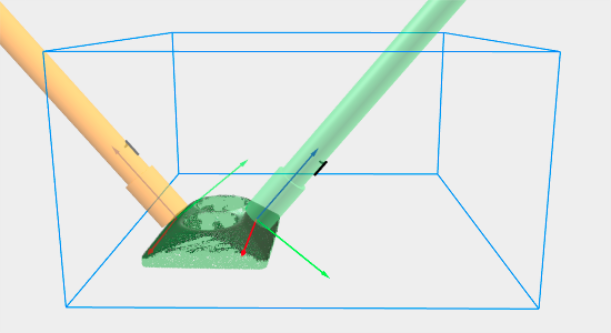
Increase the likelihood that objects are pickable even if they overlap or are close to bin walls. Below, two possible pick points for picking a socket with a suction gripper are shown: the left one (in orange) is unpickabe due to collisions with the bin, while the right one (in green) is pickable.
Specify pick points for models where only one part is visible at a time. This is the case for full object models taught from CAD. Below, pick points for the top (left) and bottom (right) sides of a socket are shown.

Tip
Refer to the How to get more pickable parts article to learn about the different strategies supported by Pickit to increase the number of pickable parts produced in a single detection.
Pick point creation and management
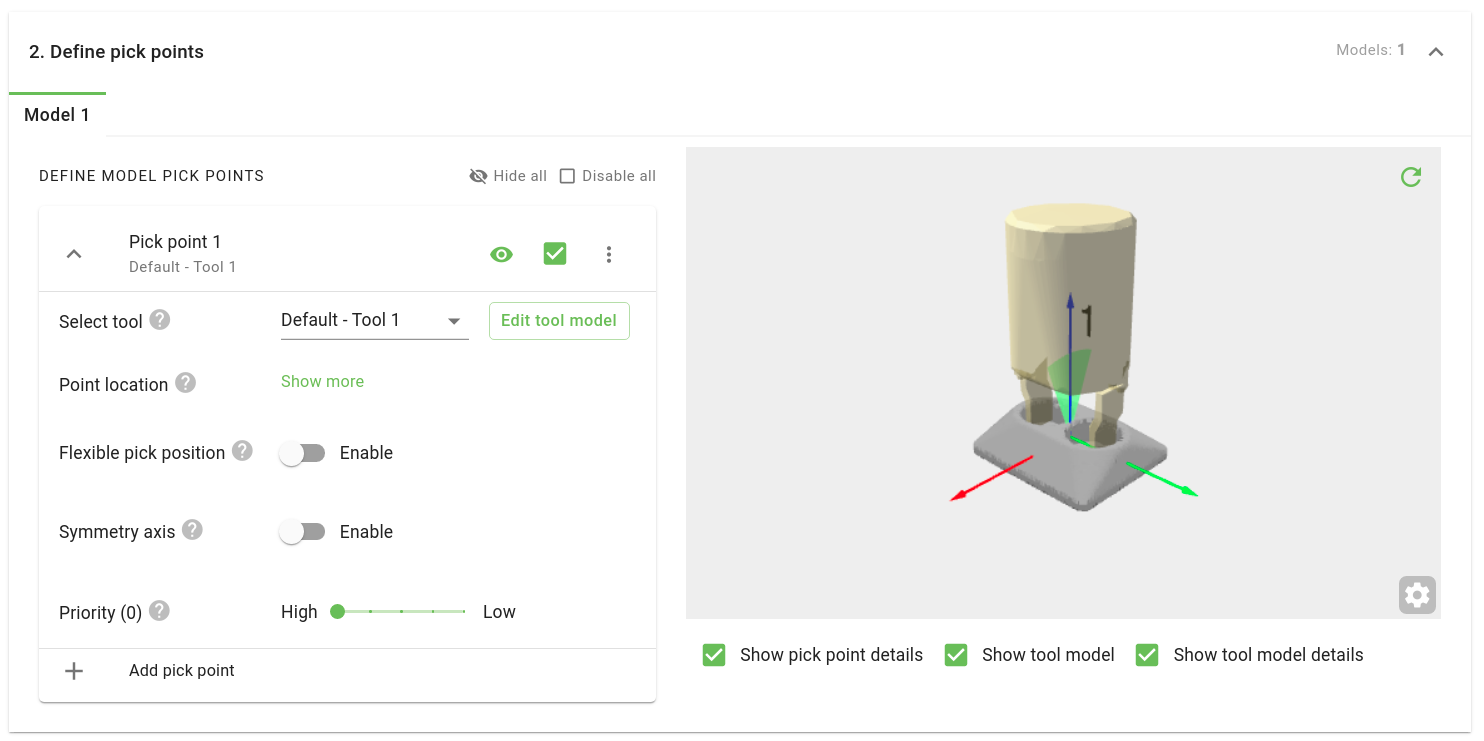
The Define pick points section of the picking page allows to create and manage the pick points of Teach models:
Add pick point creates a new pick point. Once created, a pick point can be enabled/disabled and its visibility can be toggled.
⋮ button, provides access to pick point management functions:
Duplicate a pick point.
Renumber a pick point. This is useful to group similar pick points together and enforce a convention in Pickit and the robot program. For example, pick points on the top of a part are 1-5, while pick points on the bottom are 10-15.
Copy properties from a pick point to other pick points, preventing tedious manual work.
Delete an existing pick point.
Select tool, sets the tool model to use for this pick point.
Point location, sets the pick point position and orientation with respect to the object origin, or optionally with respect to an existing point by changing the Reference point.
Flexible pick position, sets the optional position variation that can be tolerated in a given direction without compromising pick success.
Symmetry axis, can be optionally associated to the pick point. This is especially relevant for parts with axial symmetry.
Priority, can be optionally set such that pick points with lower priority are considered only if higher priority ones are unpickable.
Tip
The way in which an object is picked can also determine how to correctly place it at a drop-off location. To learn more about how to make the best use of pick points in real application scenarios, take a look at the smart picking and smart placing examples companion articles.
Pick point selection
When an object has multiple ways of being picked, Pickit smartly selects the best one to use. It does so by following these steps:
Sort the pick points
If a pick point tolerates variations, because it either has a symmetry axis or the robot tool has a flexible pick orientation, prefer orientations that are closer to the preferred pick point orientation.
b. If multiple pick points exist, prefer pick points that are higher. For pick points at the same height, prefer pick points that are closer to the preferred pick point orientation.
Find a pickable point
Select a pick point from the sorted list.
If the initial configuration is unpickable (e.g. it’s too tilted or in collision) but the pick point tolerates variation, search for a pickable configuration that deviates as little as possible from the preferred orientation.
If a pickable configuration is found, use it to pick the object, else continue with the next pick point.
No pickable points? If no pickable point is found, the object is labeled as unpickable.
Tip
If you click on a particular detection in the objects table, you can learn which pick point was selected for picking. Also, if an object is unpickable, you can learn the reason why its pick points were not considered pickable.