Warning
You are reading the documentation for an older Pickit release (3.3). Documentation for the latest release (4.0) can be found here.
KUKA installation and setup (KR C2)
A Pickit interface for KR-C2 controllers is available and can be set up as follows.
Check controller and software compatibility
Warning
The Pickit integration files for KUKA KR-C2 only work for all KRC2 robots that are build on Windows XP systems and later (e.g. not Windows 98). The robot software version has at least to be V5.x.x.
Module installation
Pickit interface is based on the KUKA Connect KRC module.
Download the Pickit KUKA files here.
Plug in the USB drive containing the KUKA Connect KRC module files in the USB port of the KR-C2 controller.

To install the module, run the Setup.exe file. Then reboot your controller.
KUKA KRC settings
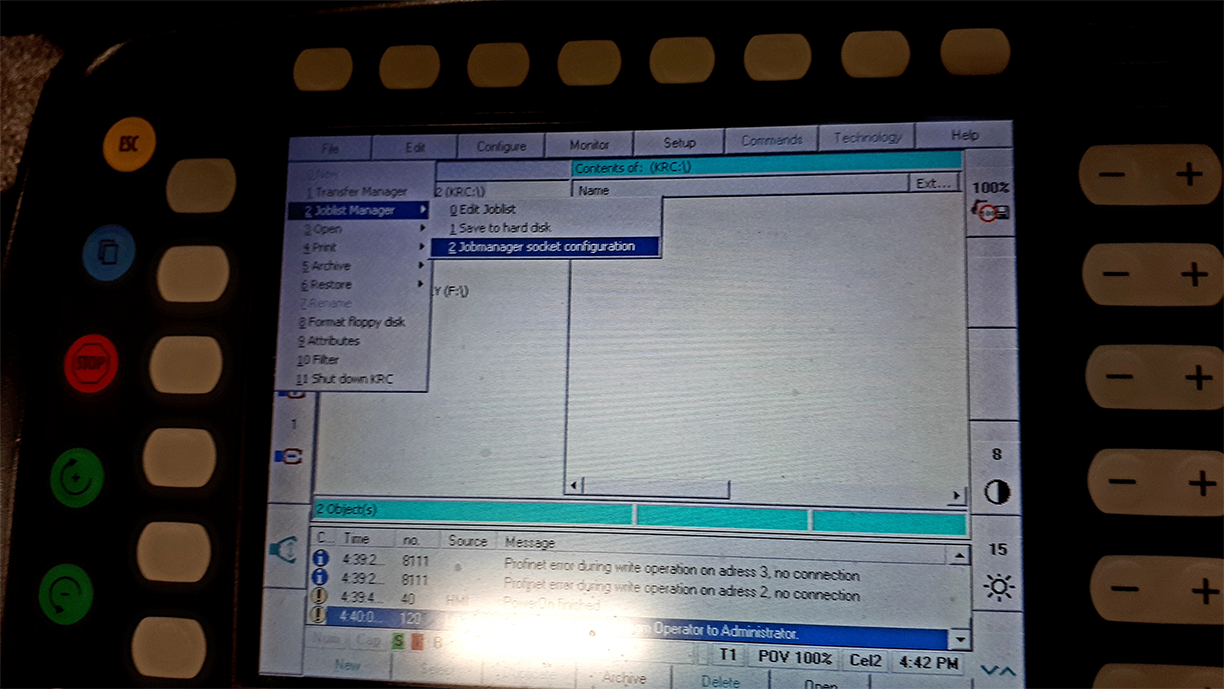
Now that the KUKA Connect KRC module is installed, we need to configure it to communicate correctly with the Pickit system. To do this, go to Joblist Manager, then Jobmanager socket configuration.

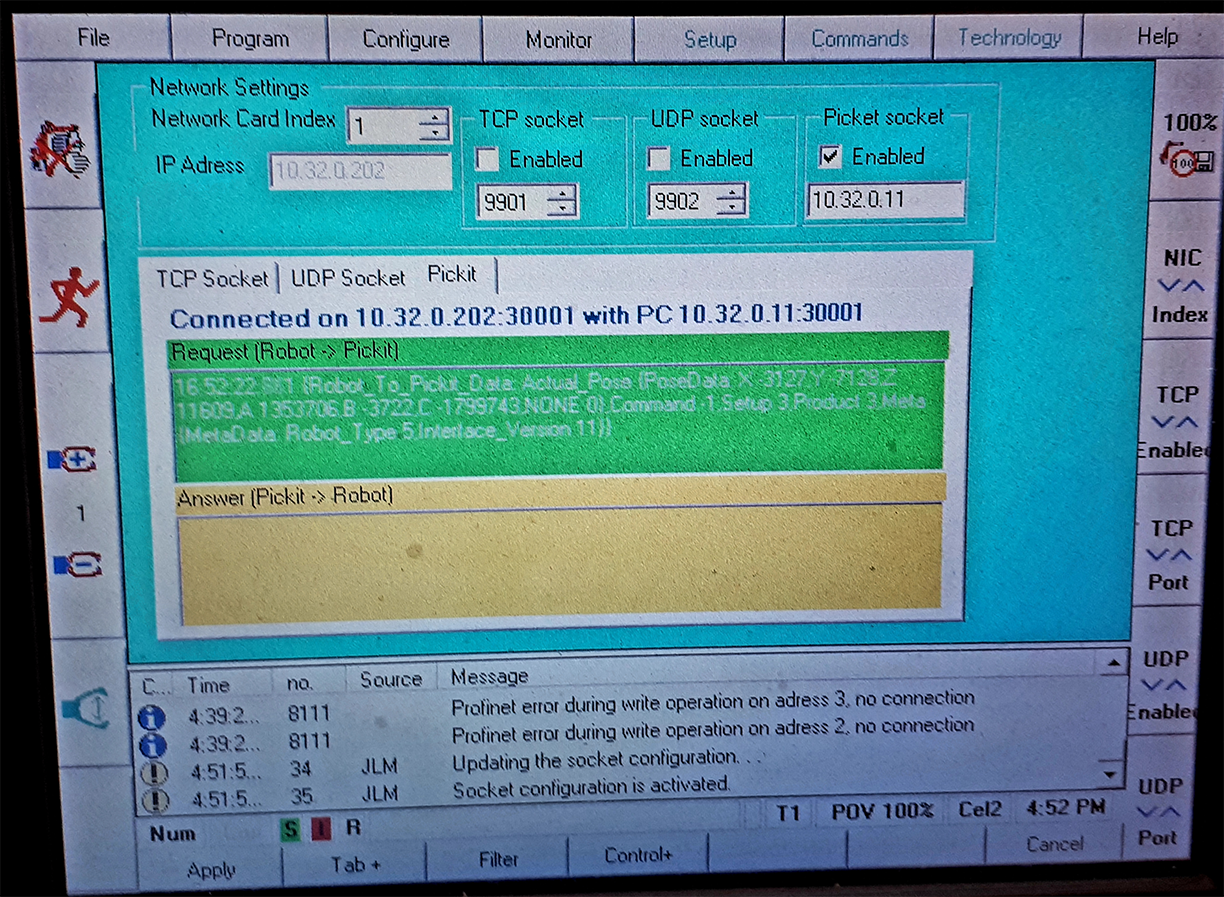
In the Connect settings screen select the Pickit tab and inspect/modify the configuration, as follows, and as shown in the figure below:

Check correctness the robot IP address. This is a read-only value shown for sanity-checking the robot configuration. If you wish to change the robot IP address, please refer to the KUKA KR-C2 user manual.
Disable the local UDP port.
Disable the local TCP port.
Enable Pickit socket.
Specify the Pickit server IP address.
Attention
When communicating with KUKA robots, the Pickit server IP address cannot belong to the following IP ranges:
169.254.0.0 to 169.254.255.255
192.168.0.0 to 192.168.0.255
172.16.0.0 to 172.16.255.255
172.17.0.0 to 172.17.255.255
The default Pickit server IP is 169.254.5.180, which belongs to the first range, so it must be modified.
Click on the Apply button to store the settings.
Setting up the network connection
The Pickit processor has to be connected to the KUKA KR-C2 controller using an Ethernet cable. This Ethernet cable should connect:
The network port labeled ROBOT of the Pickit processor
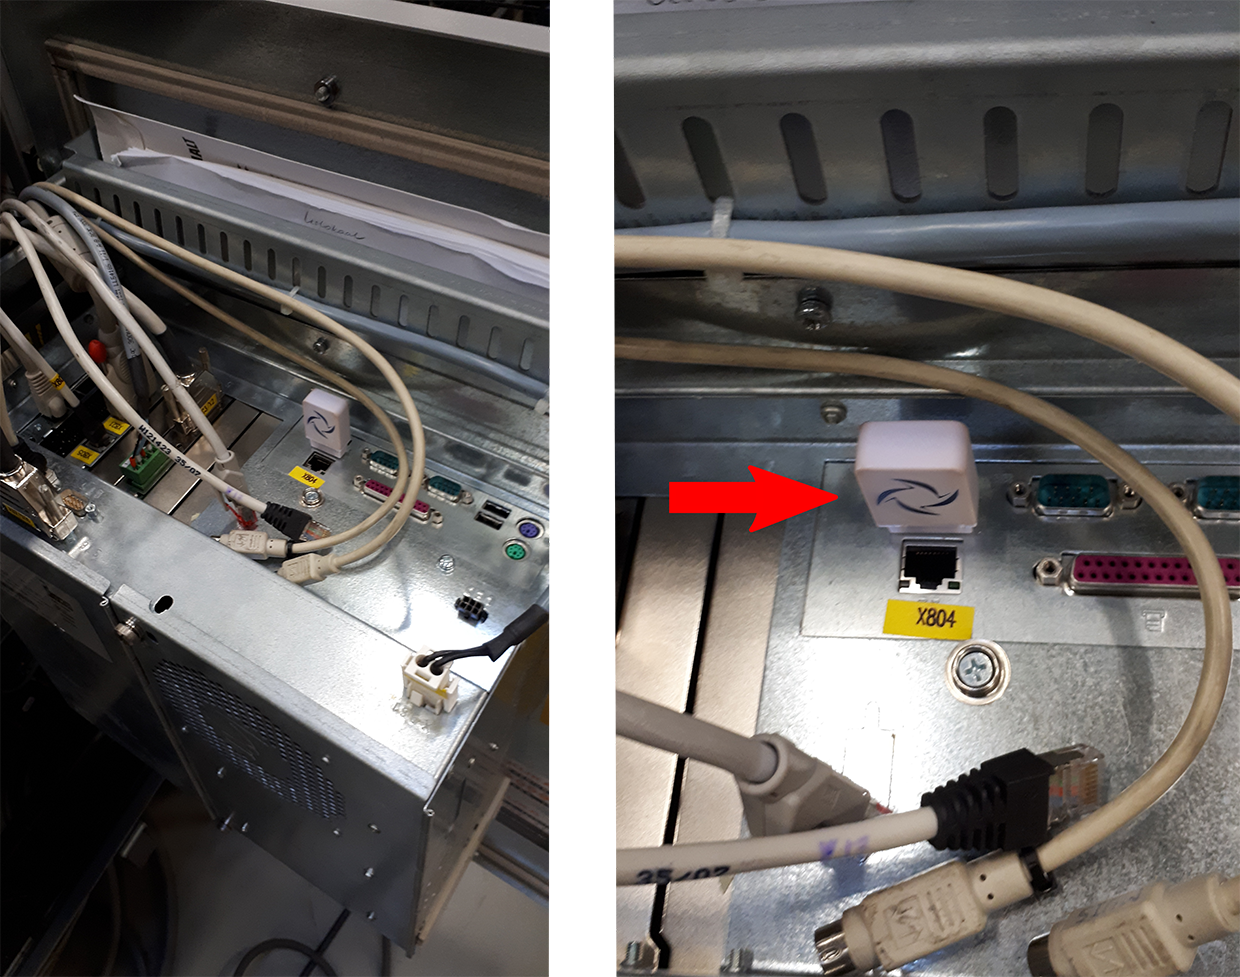
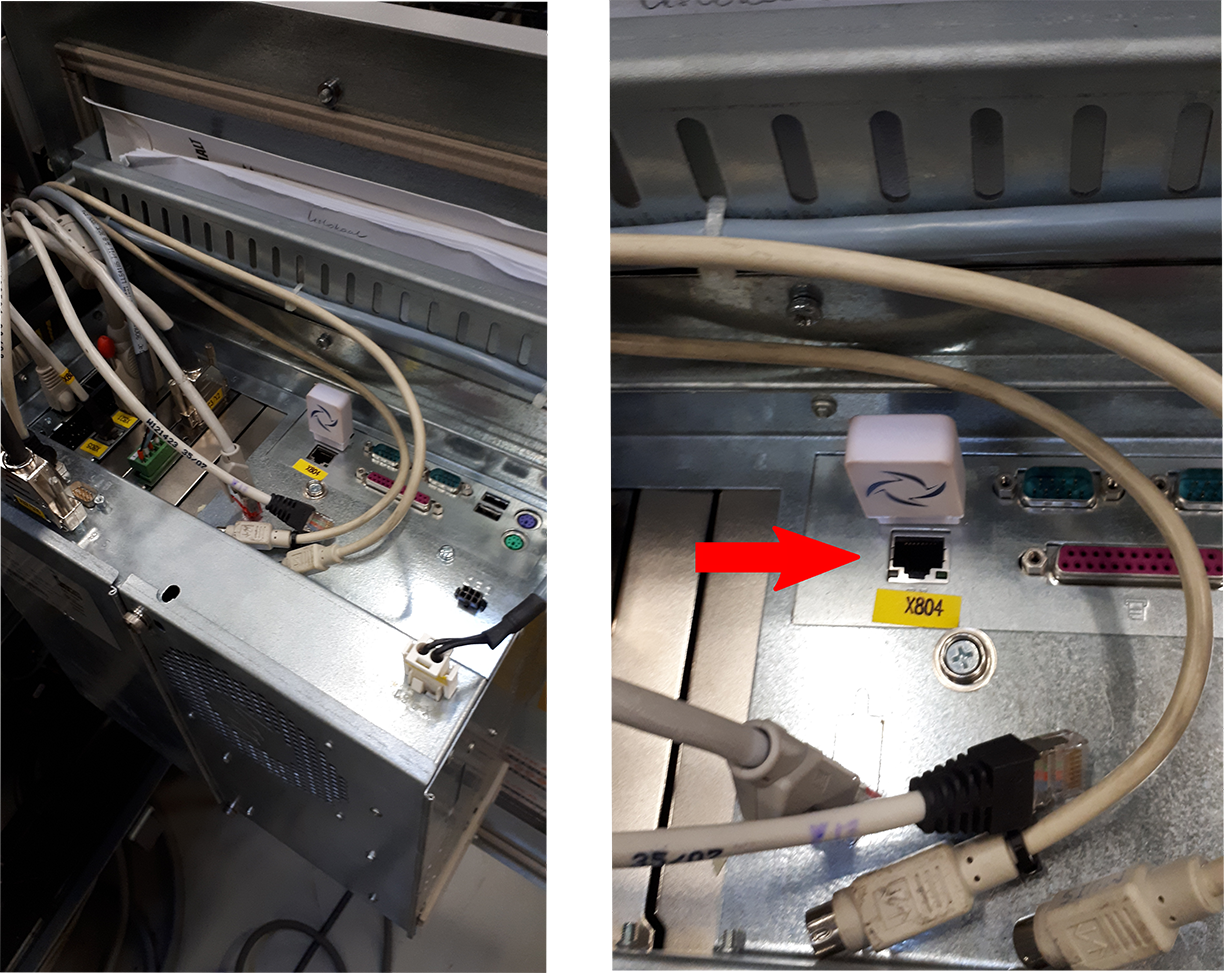
The KR-C2 controller ethernet port. The location of this port may vary depending on the controller model. The images below show example location.

Starting and verifying the communication
In the Connect settings screen, data being exchanged between the robot and Pickit are displayed in the text boxes labeled (Answer) Pickit -> Robot and (Request) Robot -> Pickit. You should see data and timestamps be updated multiple times per second.

Details on testing this connection on the Pickit side can be found on: Testing the Robot to Pickit connection.