Warning
You are reading the documentation for an older Pickit release (2.0). Documentation for the latest release (4.1) can be found here.
Robot-camera calibration
In this step we do a robot-camera calibration. In the previous chapter we saw that the Pickit system is able to detect parts in its field of view. Now Pickit needs to know where the robot is based so that it can tell the robot where it needs to move to when an object is detected. If you skip this step, the robot will move to a wrong location.
Follow the steps below to do a robot-camera calibration:
Mount the robot-to-camera calibration plate to the flange of the robot. Make sure it is well fixed.
On the Pickit interface open the 2D view and the camera(s) tab. In this tab select Stationary and Multi poses calibration.
On your robot open the example multi pose calibration file supplied by Pickit
In this robot program define 5 different waypoints where the robot shows the robot-to-camera calibration plate to the camera.
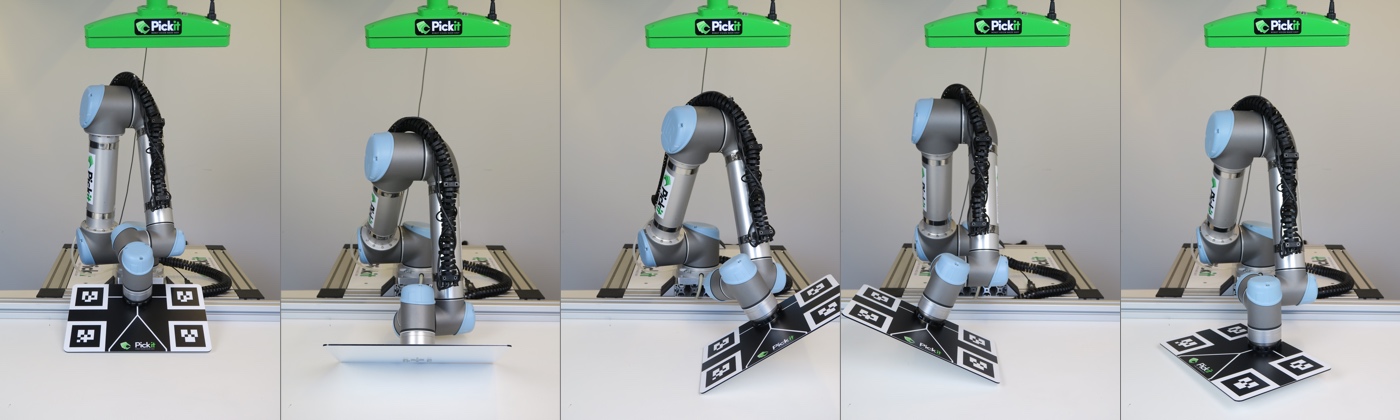
Run the program on the robot.
In the Pickit user interface go to the 3D view and if the updated position of the robot base matches the actual position of the robot base.
Press Save in the Pickit user interface.
Robot-to-camera calibration plate can be dismounted from the robot.
Tip
More details about robot-camera calibration can be found in the How to execute robot camera calibration article.