Warning
You are reading the documentation for an older Pickit release (2.4). Documentation for the latest release (4.1) can be found here.
Example pick and place program
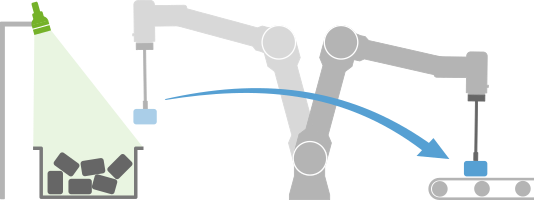
The program implements a pick and place task where Pickit is used to continuously pick objects from a detection region and place them in a specified dropoff location. No assumptions are made on how objects are laid out in the detection region, so the program is a good starting point to build a wide range of applications. Objects can be for instance stacked randomly in a bin, or in a pattern on top of a pallet.
Creating the program
Note
This example program uses the Pickit pick and place template, which is available for URCap 2.0 or later and Pickit 2.2 or later. Installation instructions can be found here.
Create an empty robot program, and in the top Robot Program section, set the program to not loop forever (by default it does).

In the the left panel click URCaps → Pickit: pick and place to add an instance of the pick and place template, a program node for executing vision-guided pick and place tasks with minimal programming effort.
On insertion, two basic questions about the application need to be answered. Clicking Done initializes the template.

The program explained
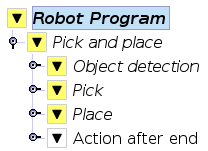
Below the top-level pick and place node, the three main sequences responsible for object detection, pick and place can be seen. Additonally, the optional Action after end sequence is enabled, which by default provides useful information when setting up and debugging the application.
Lines marked in yellow by Polyscope indicate that they (or their nested commands) have uninitialized input parameters that must be set before running the program. The minimum inputs required to run the pick and place program are:
Pickit configuration (setup, product) used for object detection.
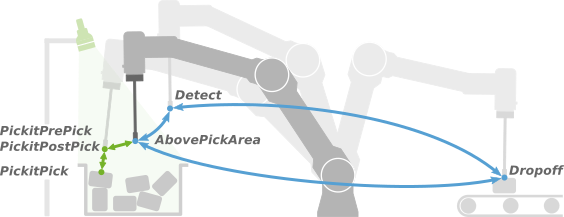
Three waypoints:
Detect,AbovePickAreaandDropoff(learn more).
Note
Before teaching the above waypoints, make sure the Tool Center Point (TCP) is correctly specified for your robot tool.
Once the required inputs have been specified, the program should no longer contain commands in yellow.
That’s it! We are now ready to run the program and pick some parts.
Running the program
Attention
Before running the robot program for the first time, make sure that:
There exists a valid robot-camera calibration.
The Tool Center Point (TCP) has been correctly specified.
The robot speed is set to a low value, so unexpected behavior can be identified early enough to prevent the robot from colliding with people or the environment.
Pickit is in robot mode, which is enabled in the Pickit web interface.
Also, make sure the robot is in normal mode and not in simulation.

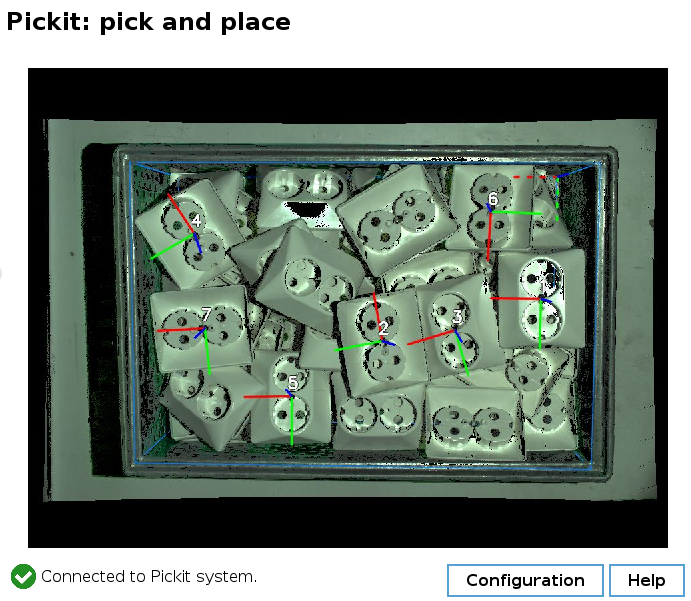
While the program runs, the state of Pickit object detections can be interactively monitored from Polyscope by clicking the top-level pick and place node, where a live camera stream is shown.
The pick and place template will by default continue until no more pickable objects are found, and will then exit. When this happens, the Action after end sequence will raise an informative popup mentioning the reason for no more pickable objects.
Once pick and place is up and running, you can fine-tune its behavior by editing the advanced configuration (accessible from the top-level pick and place node), or optimizing the motion sequences in object detection, pick and place.
Happy picking!