Warning
You are reading the documentation for an older Pickit release (3.2). Documentation for the latest release (4.1) can be found here.
Fine-tune ROI box
Once an initial ROI box has been defined, you can manually adjust its location and dimensions from the Fine-tune ROI box section of the Setup page. Adjustments can be done by either clicking and dragging interactive arrows in the viewer, or by setting exact numeric values.
Note
Only the position and dimensions of ROI box can be adjusted, not its orientation. To change the orientation, a new ROI box needs to be defined, as described in the Build ROI box article.
Click and drag interactive arrows
In this modality, you can interactively click and drag the colored arrows attached to the ROI box faces. When the Fine-tune ROI box section is opened, these arrows are shown in all views, except the 2D view.
Arrows are colored according to the ROI frame axes: X→red, Y→green, Z→blue.
Exact numeric values
In this modality, you can specify the exact values that describe the ROI box.
For each direction, you can set the bounds (e.g. X min and X max), or the dimensions (e.g. Length).
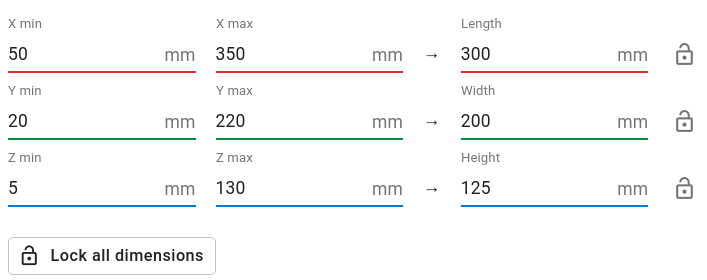
When some or all ROI box dimensions are set, and you’re only interested in changing location, you can click on the lock icon next to each direction, or the Lock all dimensions button.
When a dimension is locked, its size will remain constant when you modify one of the bounds, either by using the numeric inputs or the interactive arrows.
The image below shows the Length direction with its size unlocked and locked.

Removing the ground plane and bin walls
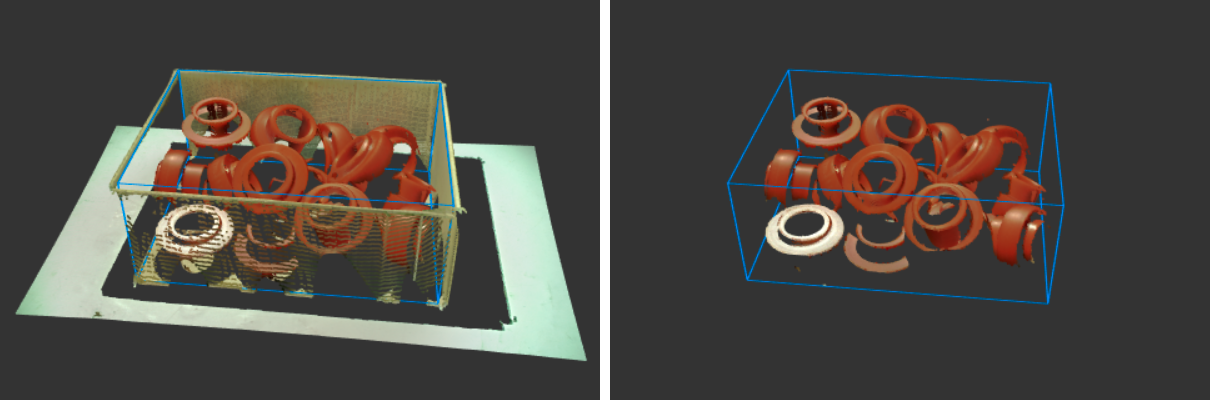
Removing the ground plane and the bin walls from the ROI box is one of the simplest ways to have faster detection times. We recommend to initially teach the ROI box using markers, aligning them with the bin corners. Then, adjust the box bounds such that it excludes most bin points, and includes relevant bin contents.
The image below left displays the full field of view of the camera, including ground plane, the bin and its contents, as shown by the 3D view. The image below right displays the ROI box contents, as shown by the Points view.