Warning
You are reading the documentation for an older Pickit release (2.3). Documentation for the latest release (4.1) can be found here.
Web interface
Interaction with Pickit is done through its web interface. Its simple and intuitive user experience lets you configure the system and monitor detections interactively. This article presents an overview of the Pickit web interface.
Connecting to the web interface
Follow these instructions on how to connect an external computer to your Pickit system. When successfully connected to the Pickit web interface, you should expect to see something similar to the image below:

If you cannot manage to successfully visualize the Pickit web interface, contact us at support@pickit3d.com.
Components
The interface consists of three main components:
Top bar
The top bar of the Pickit web interface contains relevant status information and buttons that remain visible at all times.
The left part of the bar displays the following contents:

The Pickit logo.
The Pickit version. By clicking on it, you can access the changelog of what’s new in each Pickit release.
The currently active Setup and Product files. By clicking on either file name, a separate window will pop up that allows you to change the active file or manage available files. See the Configuration article for more details.
The right part of the bar displays the following contents:

The layout for toggling visualization of the main interface elements (viewer, detection grid and configuration).
The status of the Pickit connection with the robot. An active robot communication is indicated by ✓, otherwise ∅.
The Settings button, which opens a page with user Settings.
The Snapshots button, which opens a page for snapshot management.
The Calibration button, which opens the page for performing robot-camera calibration.
The Enable Robot Mode button. When enabled, Pickit starts listening for incoming robot commands and prevents the user from modifying the Pickit configuration.
Right panel
This part of the web interface is where you specify your object detection configuration. There are different pages where you can define:
Setup: Where to look for objects.
Detection: What type of object to look for.
Picking: How to pick the detected objects.

Left panel
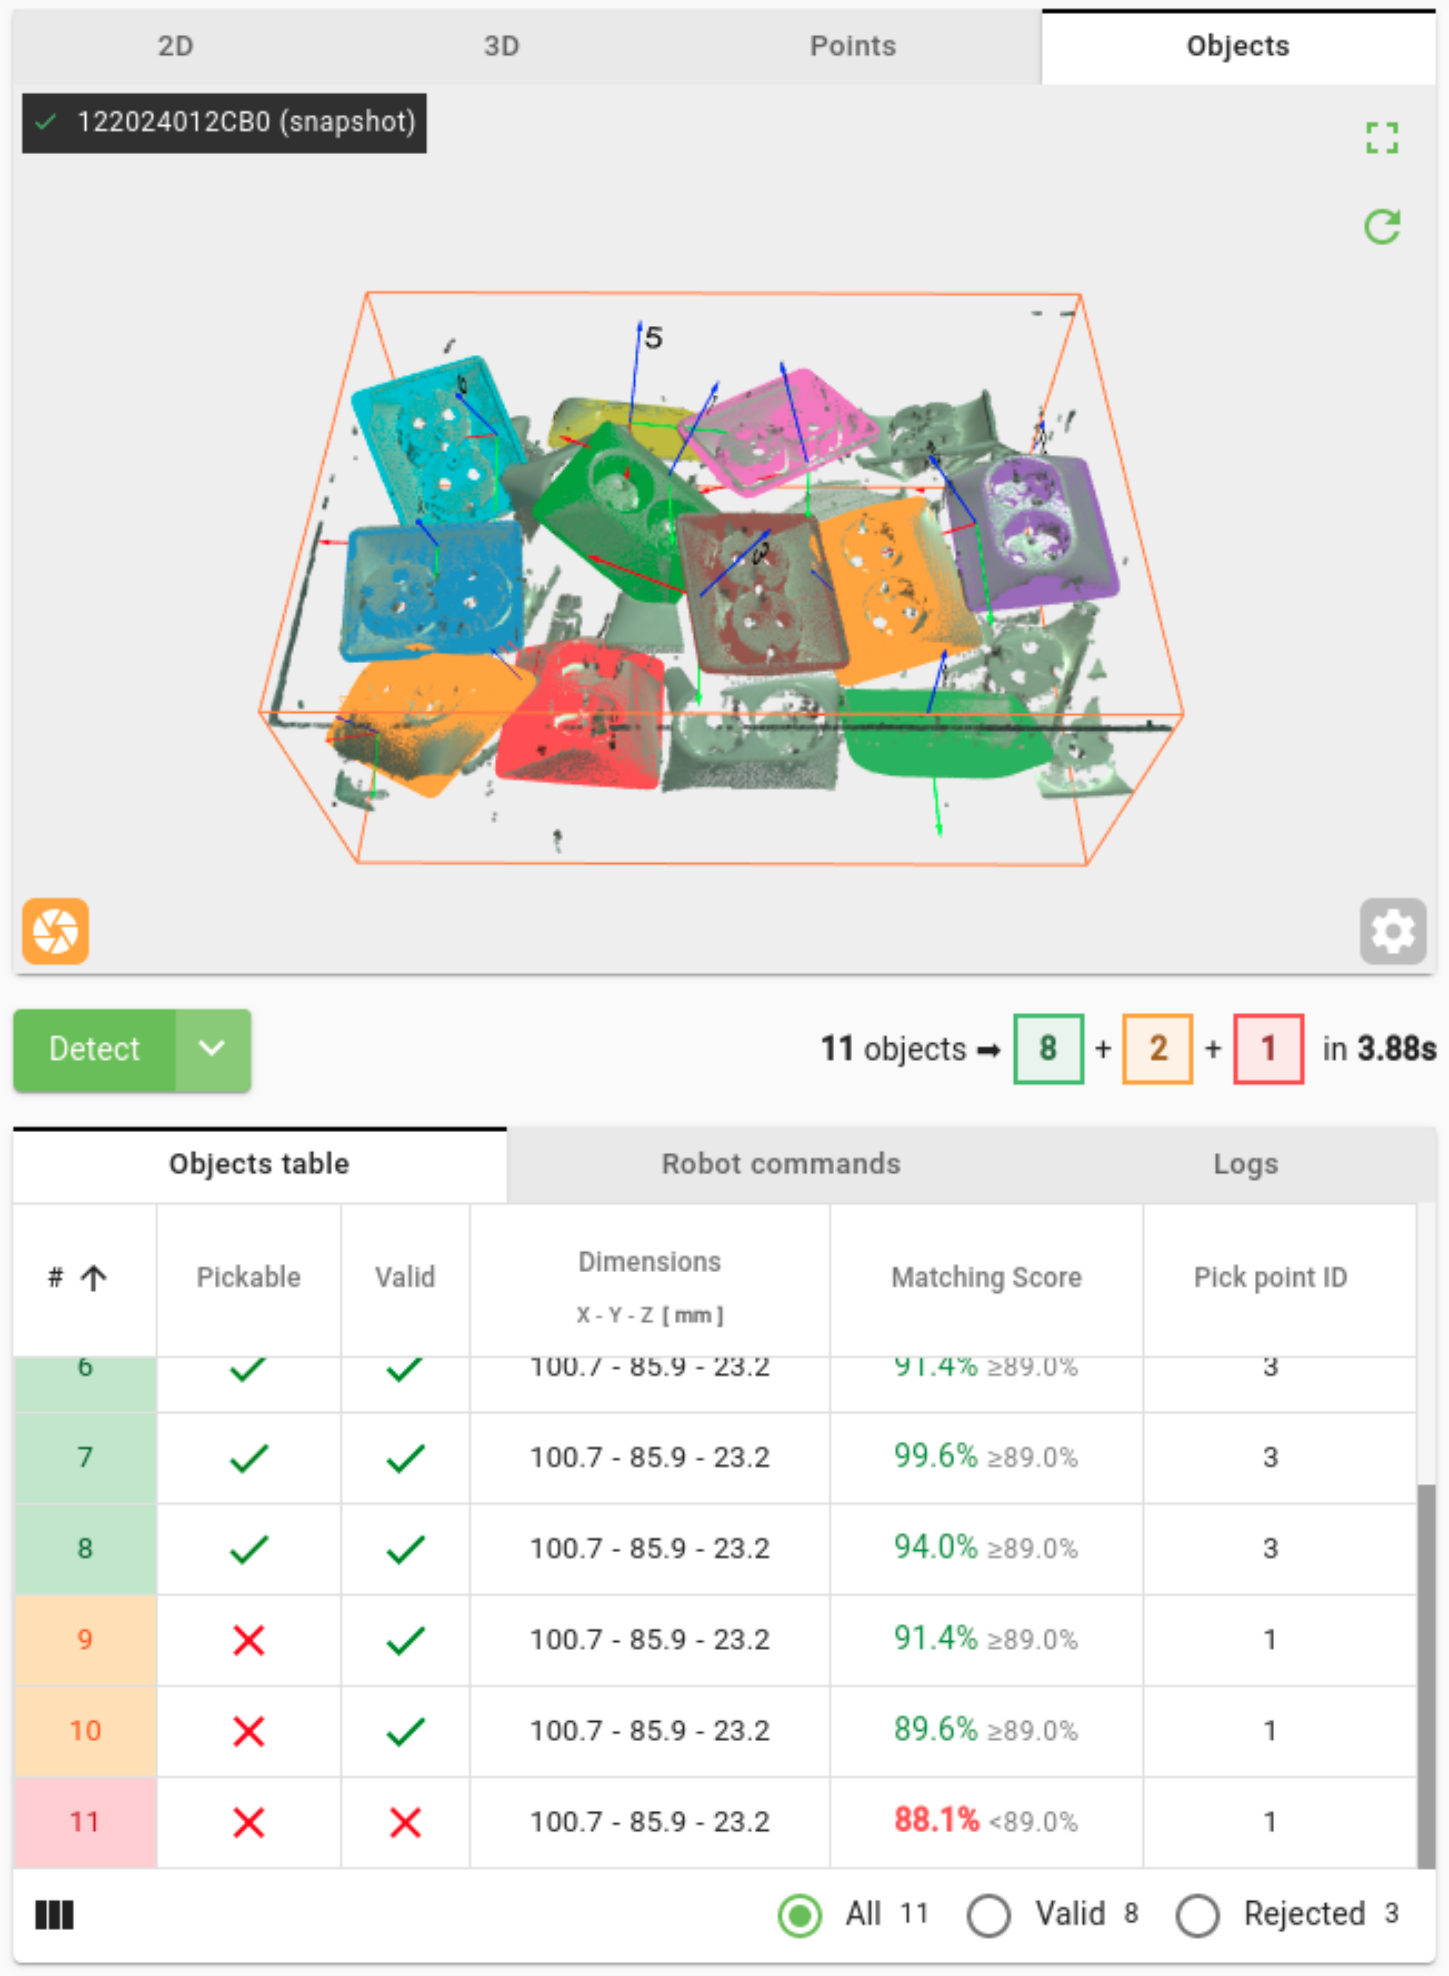
This part of the web interface displays the results of an object detection run both graphically (viewer, top) and numerically (detection grid, bottom). These allow you to have both qualitative and quantitative feedback on the performance of object detection, and are powerful tools for inspecting and optimizing your application.
The following color code is used to classify detections:
Green - Pickable object: These are the only objects sent to the robot for picking. Note that for Pickit Teach, different colors (other than red and orange) are used in the Objects view to discriminate multiple detections in a scene.
Orange - Unpickable object: Pickit successfully detected the object, but it’s not pickable for reasons such as robot tool collisions or too tilted pick points.
Red - Invalid object: The object failed to pass a detection quality check, such as the matching score being too low.