Warning
You are reading the documentation for an older Pickit release (2.3). Documentation for the latest release (4.1) can be found here.
Hanwha installation and setup
The setup of Pickit with a Hanwha HCR robot consists of 4 steps:
Check controller and software compatibility
Pickit is compatible with controllers as of version 2.001. Rodi 2.001 for socket communication is required.
Note
Socket communication is supported by Rodi 1.3 or higher versions, but this was verified in Rodi 2.001.
Setup the network connection
Hardware connection
The Pickit processor has to be connected to the robot controller using an Ethernet cable.
This Ethernet cable should be plugged in:
The ROBOT port of the Pickit processor;
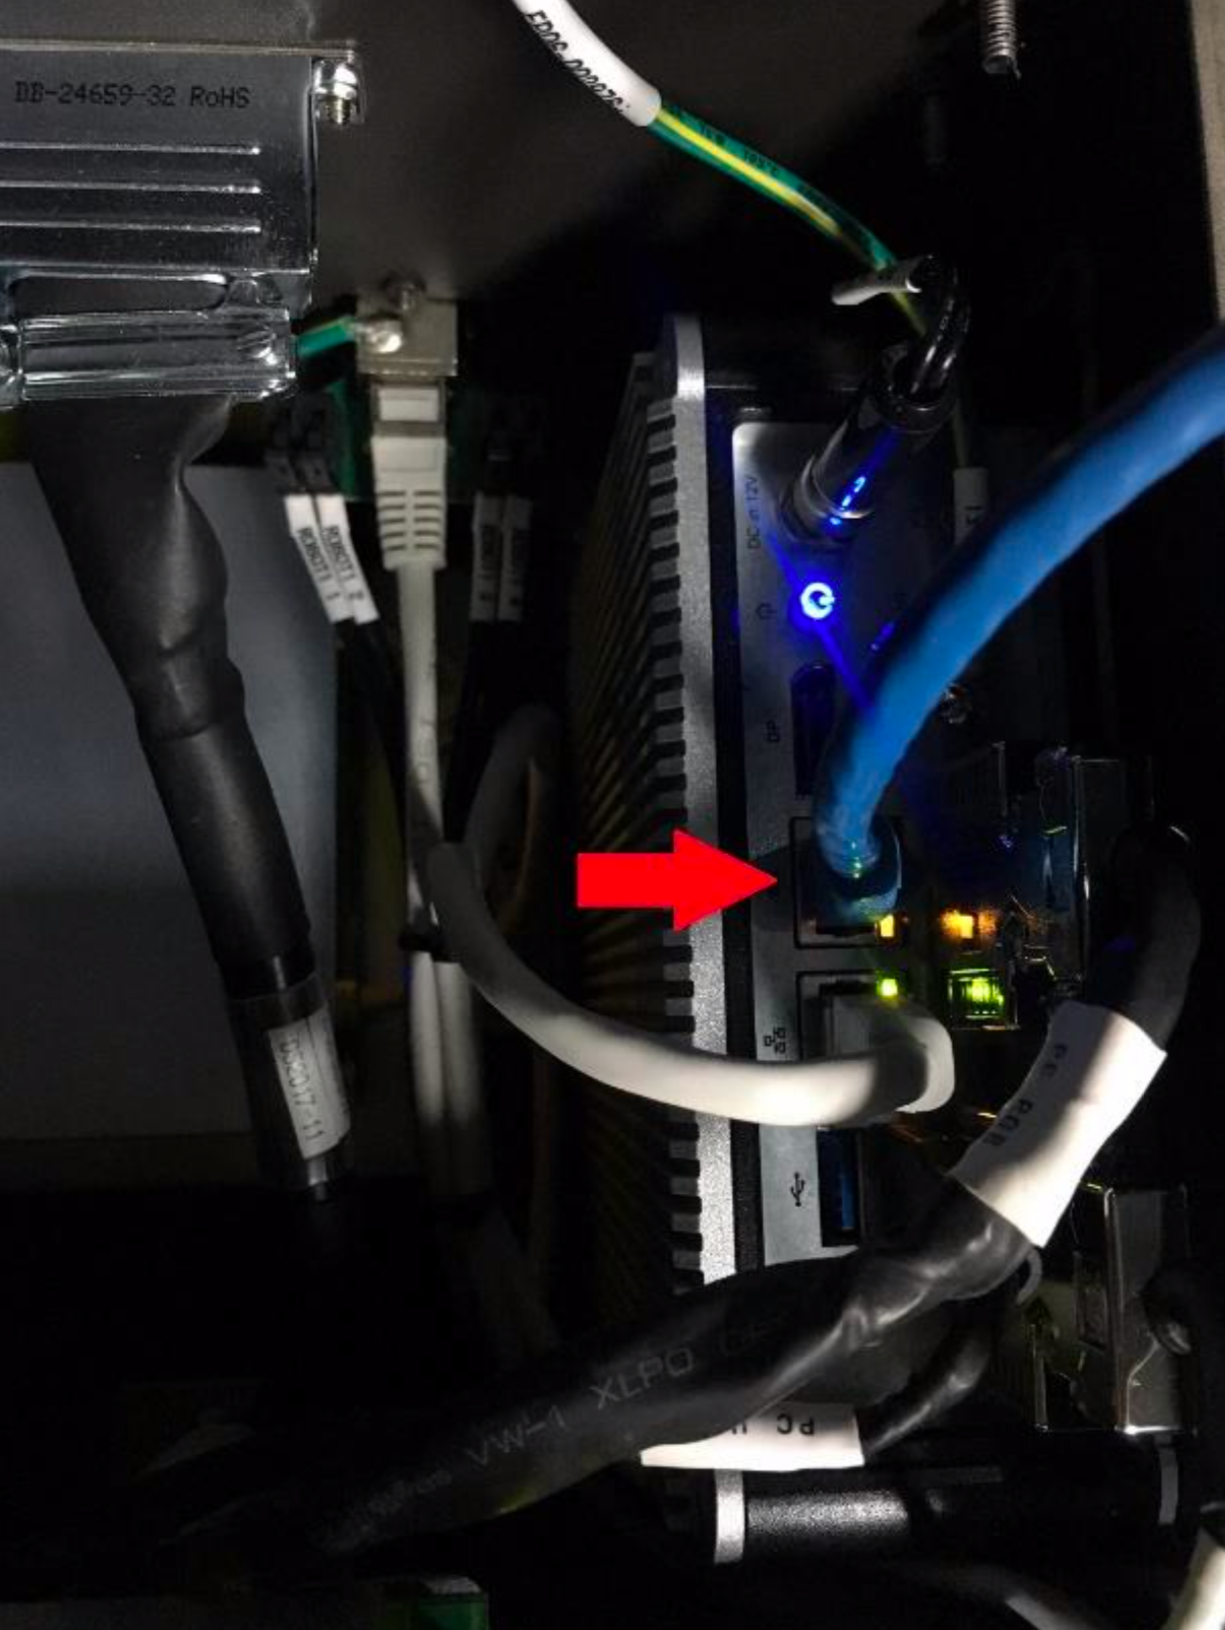
The EPC network port of the HCR robot controller. The location of this port is shown in the pictures below.
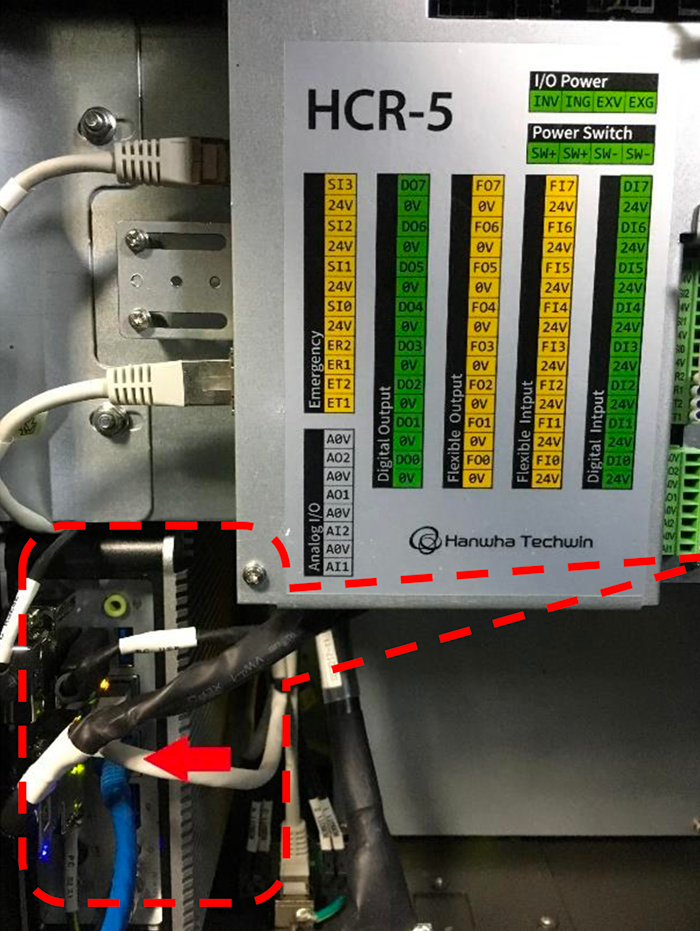
Warning
The Ethernet cable must be fastened by a cable clamp to prevent tension being applied to the RJ-45 connector, in case the Ethernet cable is pulled directly. This clamp is also used to ground the cable shield.
IP configuration
To allow communication between Pickit and the HCR controller, both must have an IP address in the same subnet.
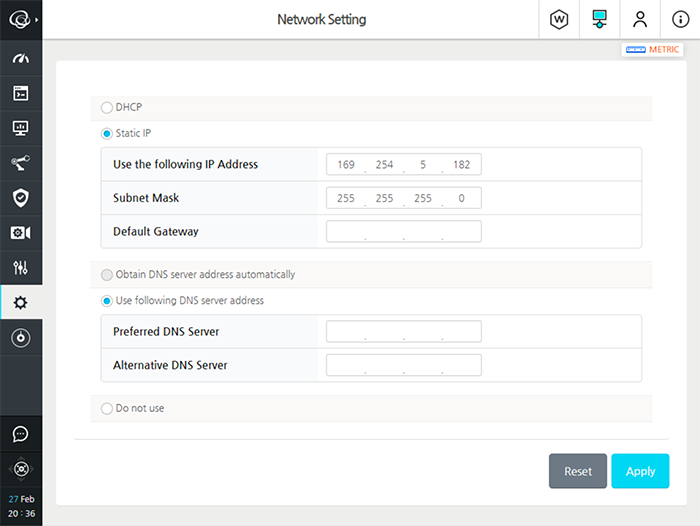
By default, the Pickit ROBOT connection (Ethernet port on the Pickit processor labeled ROBOT) is configured to have the static IP address 169.254.5.180 with a subnet mask of 255.255.0.0.
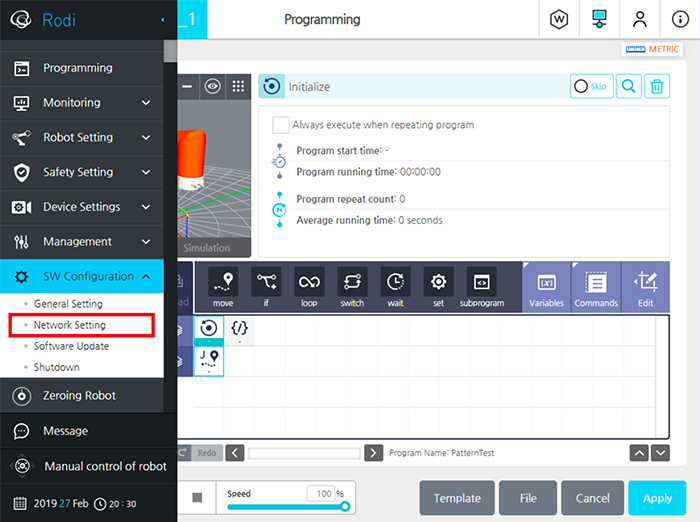
Set the IP address of the controller preferably to 169.254.5.182, which is an IP address in the same subnet as the Pickit IP, and set the subnet mask to 255.255.255.0 via SW Configuration → Network Setting:
Load example program
The provided example program file, called HCR_Pickit_Example.file, contains a calibration step and a detection test.
Download the Pickit Hanwha HCR files
Message structure
The structure of the command message that the robot sends to Pickit is shown below, through an example. Details on the low-level socket communication can be found on: Pickit socket interface.
robot_to_pickit_data |
HCR data |
actual_pose[7] |
x, y, z, rz, ry, rx, 0 |
command |
Pickit command (RC_PICKIT_XXXX) |
Setup file number |
15 (example) |
Product file number |
22 (example) |
Robot type |
5 |
Interface version |
11 |
Calibration step
The calibration step includes the following steps:
Set the calibration count: calCount is the number of calibration poses (5 for multi-poses calibration).
Define 5 positions for calibration. See : Multi poses calibration for guidance.
Send the current robot pose to Pickit. In this script, the socket communication is used. Define Pickit-related information in SERVER_INFO, and send the message using the ‘socketSendInteger’ function. See more details in HCR_Pickit_Calibration.script.
Detection step
For the detection step, the connection is established in the same was as for the calibration step, except that the command should be RC_PICKIT_LOOK_FOR_OBJECTS. See more details in HCR_Pickit_Detection.script.
Test robot connection on Pickit
Details on testing the robot connection can be found on: Testing the Robot to Pickit connection