Saving a snapshot in Pickit
A snapshot is a powerful support tool of Pickit. In a snapshot, both the camera images and detection parameters of the last detection are stored. This file can be downloaded and sent to anybody with a Pickit system. This tool allows anybody to give you remote support without a direct connection to your system.
By saving and sending a Pickit snapshot to Pickit support, a Pickit support engineer will analyze your scenario and will give you feedback on your detection settings.
Press the Detect button under the Pickit viewer to make sure you capture the current scene. You have to do this every time you are saving a new snapshot, otherwise the new data is not captured and old data is being saved.
Press the yellow Snapshot button in the lower left of the Pickit viewer.

Specify a name for the snapshot and click the Save button (the name is automatically prepended with the date and time).

In the snapshots page, check the snapshot(s) you want to share and click on Send to Pickit support. Fill in the short form with your contact details and a short message describing the issue.
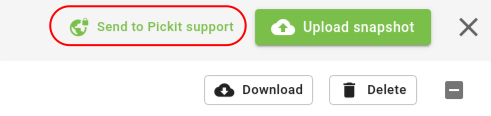
Alternatively you can also download the snapshot(s) with the Download button, and email them to support@pickit3d.com
When sending a snapshot to Pickit Support it’s always very helpful when you send multiple snapshots of different situations:
Scene almost empty
Scene with a few objects
Scene in a starting situation
The object you want to pick on its own (only when using the Teach engine)
Note
Apart from saving snapshots manually from the Pickit web interface, you can also save snapshots:
From the robot program, which are stored in the
snapshots/robotsubfolder.Automatically on each detection, which are stored in the
snapshots/autosavesubfolder.