Warning
You are reading the documentation for an older Pickit release (2.1). Documentation for the latest release (4.1) can be found here.
How to chose the correct M-HD preset
The Pickit M-HD camera is a high end camera with many different options on how to capture a point cloud of the scene. For instance, the camera can be optimized to better detect bright or dark parts. When set to detect bright parts typically the captured point cloud is darker, to compensate for the brightness of the parts. On the contrary when it is set to detect darker parts the point cloud becomes brighter.
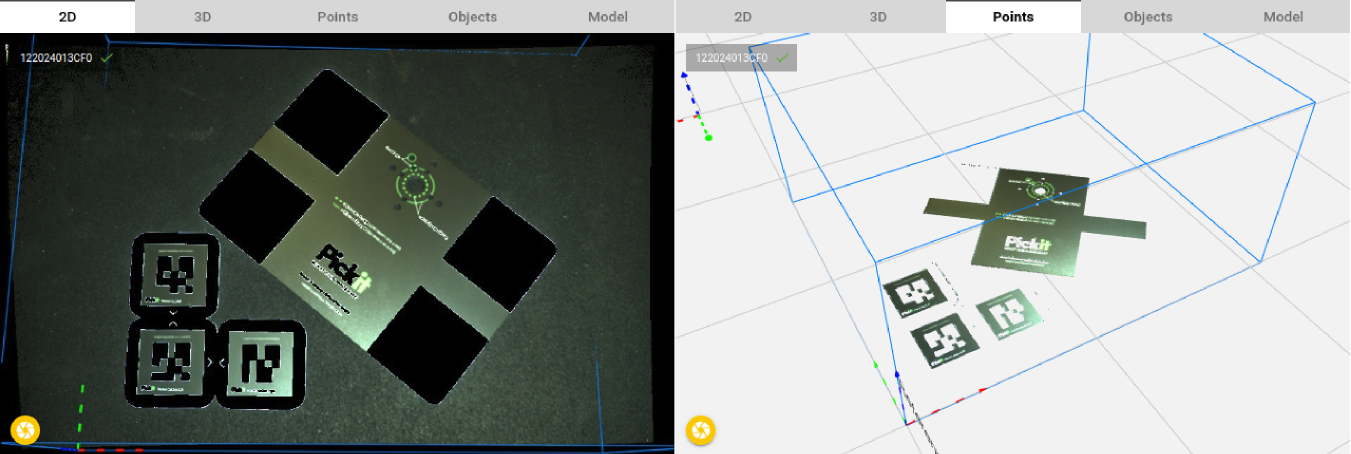
This capture was taken with the Light reflective plastic setting. Here you can clearly see that the bright parts of the plates are detected but the dark parts are not.
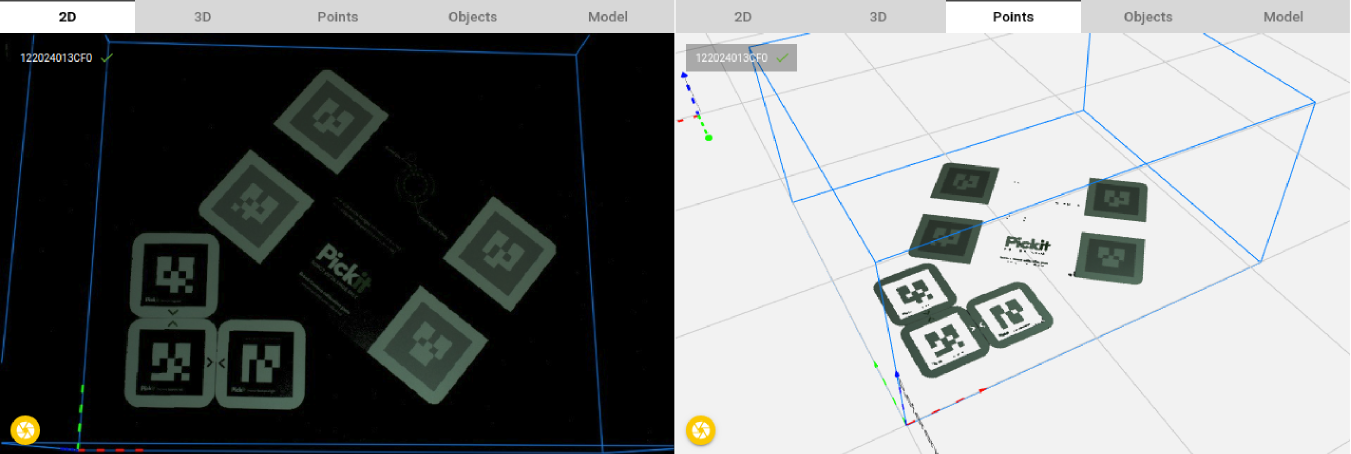
This capture was taken with the Dark non-reflective plastic setting. Here you can clearly see that the dark parts of the plates are detected but the bright parts are not.
Next to different settings to capture a point cloud the Pickit M-HD camera also has the possibility to trigger multiple captures in a row. Each capture uses a different setting and the combined image of multiple captures leads to a point cloud which can be better than a single capture. Taking multiple captures typically results in a better point cloud but also increases point cloud capture time.
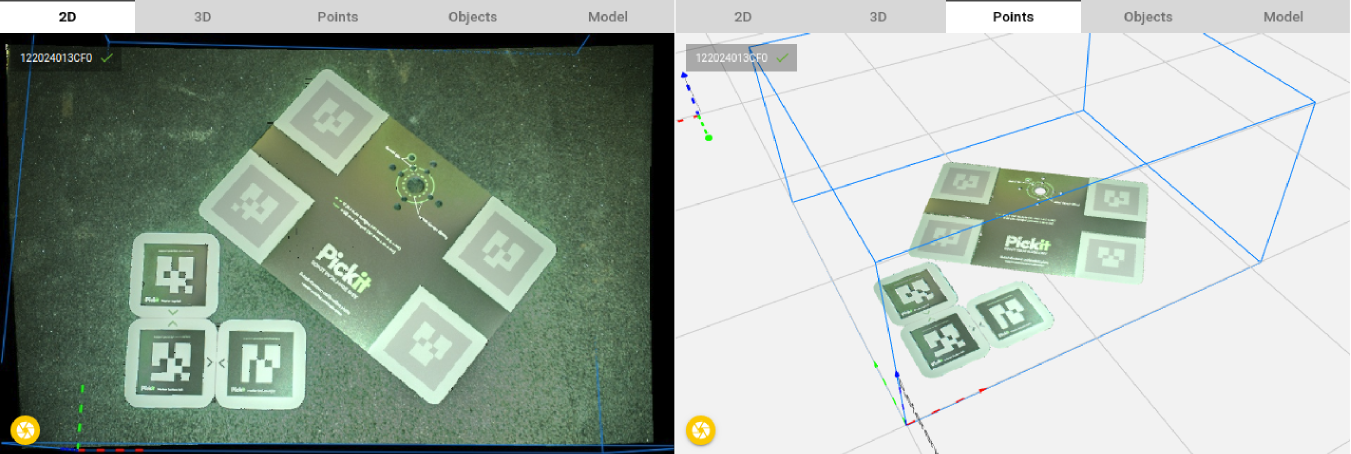
This capture was taken with the Mixed-color plastic setting. Here you can see that both the bright and dark parts are detected.
Pickit provides a few M-HD settings presets, which are suitable for capturing the following materials:
Light reflective plastic (1 capture).
Light non-reflective plastic (1 capture).
Dark non-reflective plastic (1 capture).
Dark reflective plastic (1 capture).
Mixed-color plastic (3 captures).
Sandblasted metal (2 captures).
Polished metal (3 captures).
To find the best setting for your application, it is recommended to try different presets and chose the one that gives the best results for your scene. The result of a certain preset is best visualized in the Points view.
Hint
Teaching the same model with different settings can help you choose the best setting, typically the preset that leads to the highest number of points in the model is the best preset for this part.