Warning
You are reading the documentation for an older Pickit release (2.3). Documentation for the latest release (4.1) can be found here.
Build ROI box
There are three methods in Pickit for defining the ROI box:
When a ROI box is built, it sets the location of the Pickit reference frame. The axes of this frame are aligned with the box, and box bounds are reported with respect to this frame, as mentioned in the Fine-tune ROI box. Furthermore, the position of the detected objects displayed in the Detection grid is with respect to the Pickit reference frame.
Note
The object positions are reported with respect to the Pickit reference frame in the web interface for convenience; but they are sent to the robot with respect to the robot base frame.
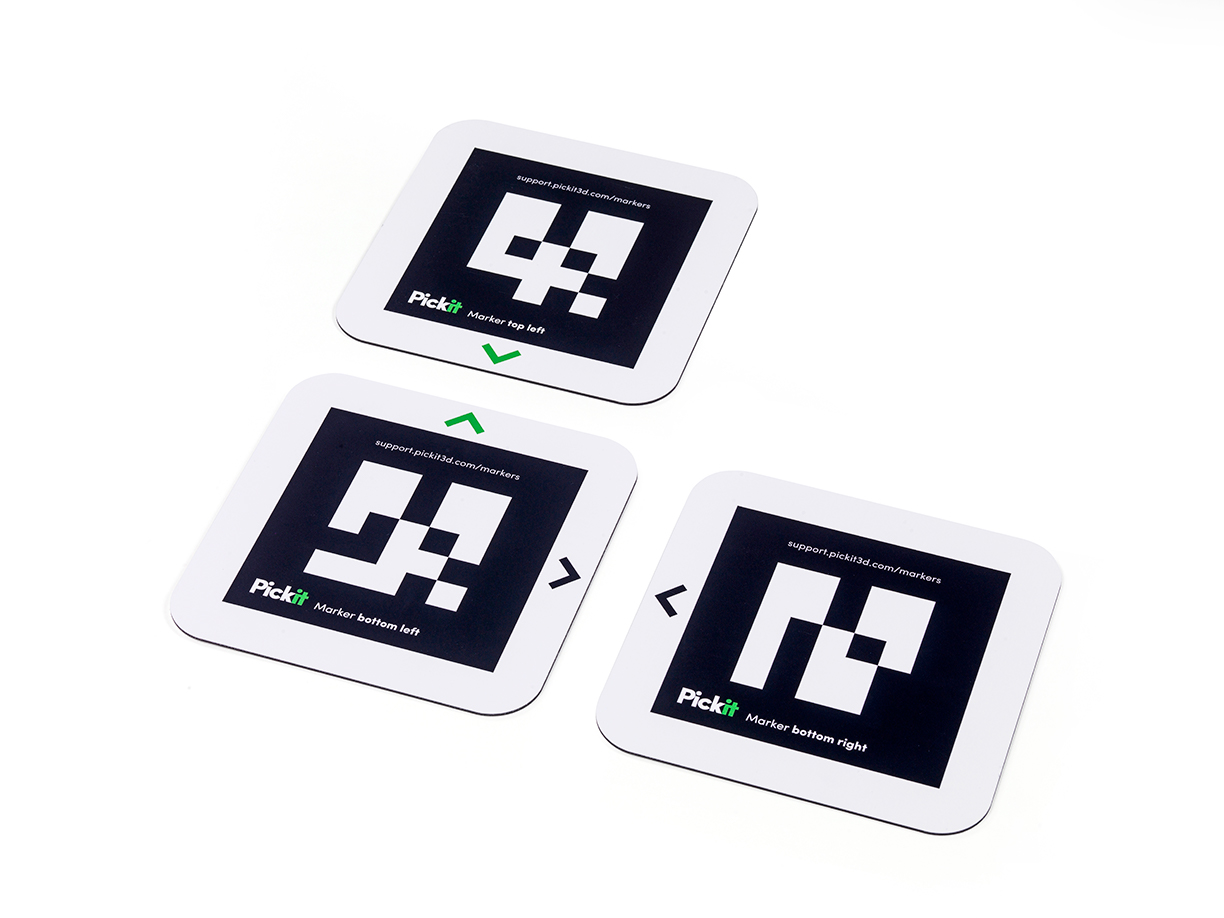
Around QR markers
This is the most common way of defining the ROI box. The ROI box is defined based on three markers laid out in the field of view of the camera. The Pickit text of all markers should be oriented in the same direction and the arrows of the same color should be pointing towards each other. The markers are not interchangeable.
Open the 2D view view in the Pickit viewer.
Place the three markers as shown in the image above in the field of view of the camera.
Press Around QR markers (this button is on clickable when all three markers are in the field of view of the camera).
If required, manually adjust the ROI box size as described in the Fine-tune ROI box section.
Note
When building the ROI box, the Pickit reference frame location is set to the left bottom corner of the ROI box.
Automatically
With this strategy, the ROI box is located on top of the most dominant plane in the field of view of the camera.
Press Automatically.
Input length and width of the desired ROI box.
If required, manually adjust the ROI box size as described in the Fine-tune ROI box section.
Note
When building the ROI box, the Pickit reference frame location is set to the middle of the ROI box bottom.
From camera
In this way the ROI box is defined based of the camera frame.
Press From camera.
Input length and width of the desired ROI box.
If required, manually adjust the ROI box size as described in the Fine-tune ROI box section.
Note
When building the ROI box, the Pickit reference frame location is set to coincide with the camera frame.